Super Saturday Crafts 2016

Super Saturday 2016

It’s almost Super Saturday again!

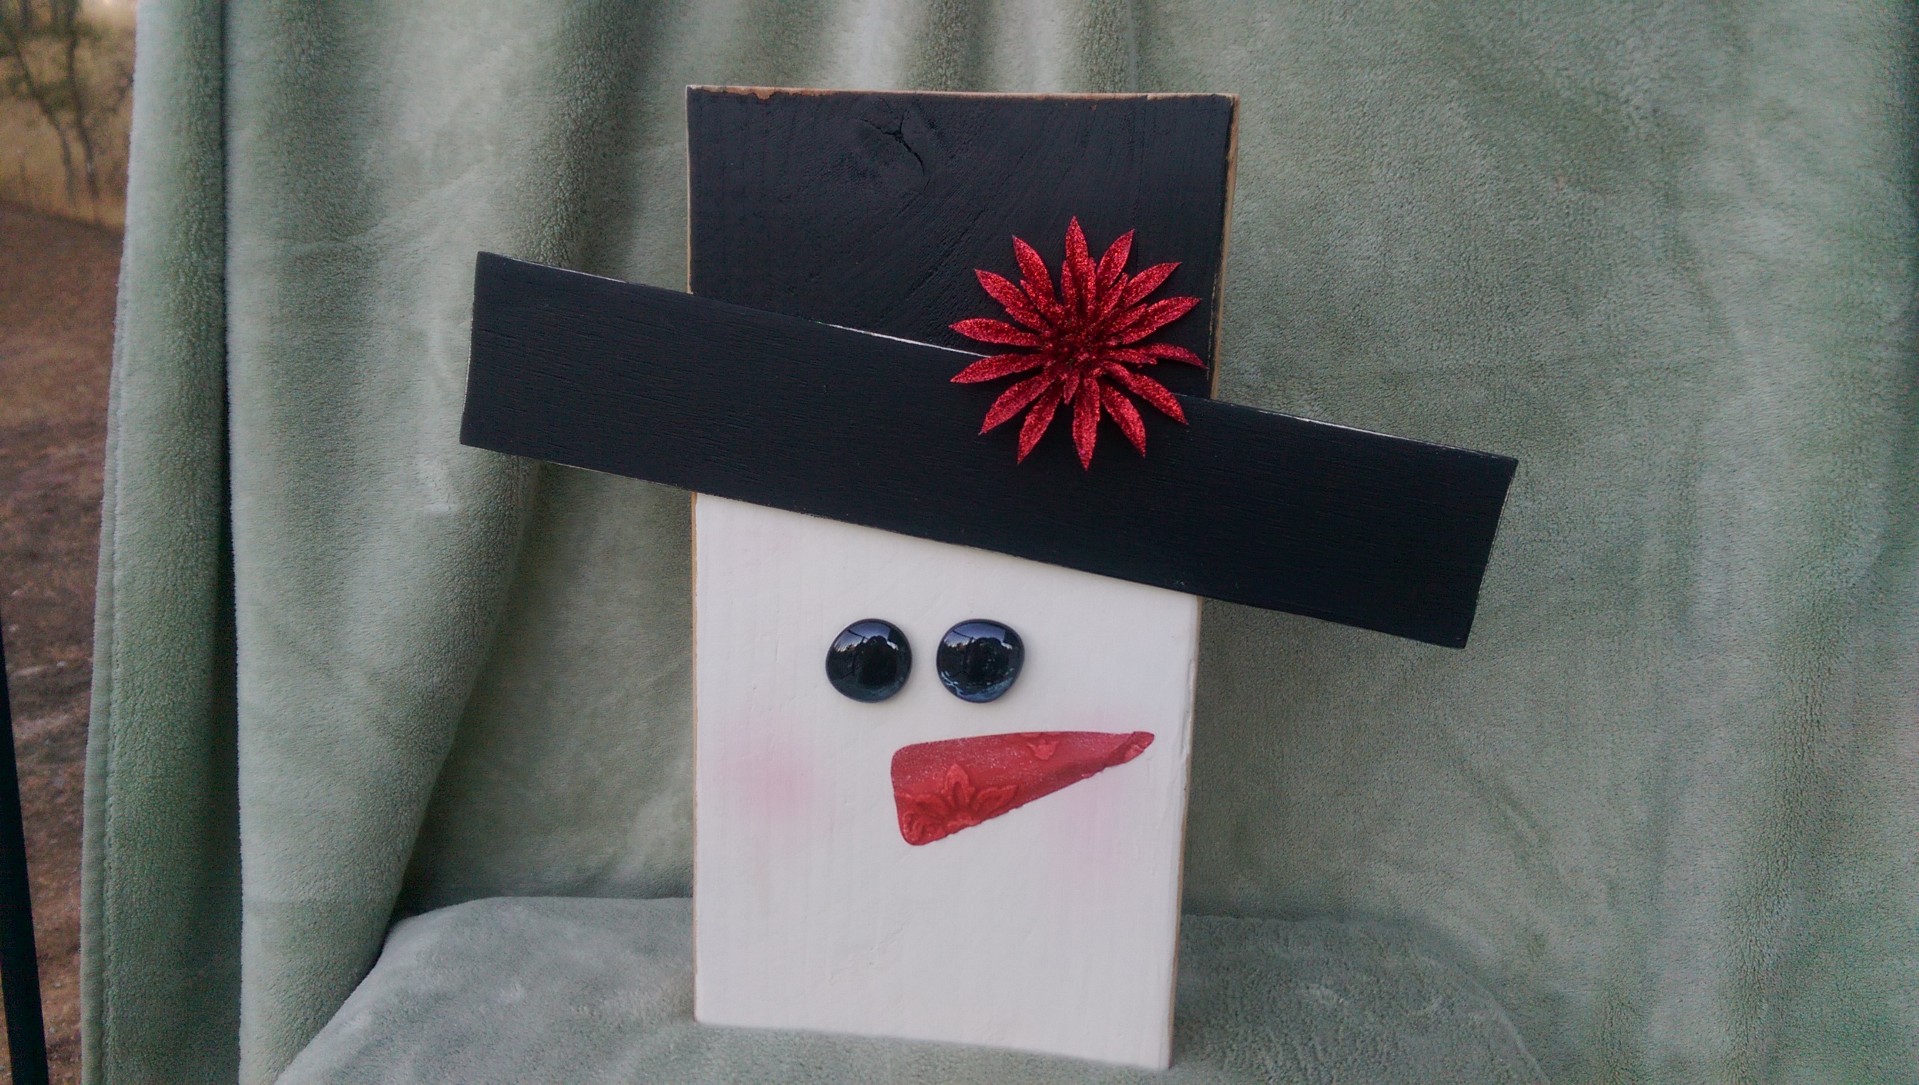
Super Saturday is my favorite crafting event and it is coming up in just 2 short weeks.  Last year I posted what crafts we did for our local Super Saturday and I figured that I would do the same this year.  Uggh.  I just realized that in that post I had promised a tutorial for the Scarecrow/Snowman craft that I made and I totally did not do that!  Shame on me! I will do that very soon.  This time I really mean it!  Promise!

***UPDATE: Here is the tutorial***

To decide on which crafts to make, I consulted my two Pinterest Super Saturday boards: Super Saturday Craft Day Ideas and my group board, Super SUPER SATURDAY Craft Ideas.  You should check these boards (my other boards too!) out for some awesome, awesome crafting ideas.  (I will link below to show the original crafts that I copied for this Super Saturday activity)

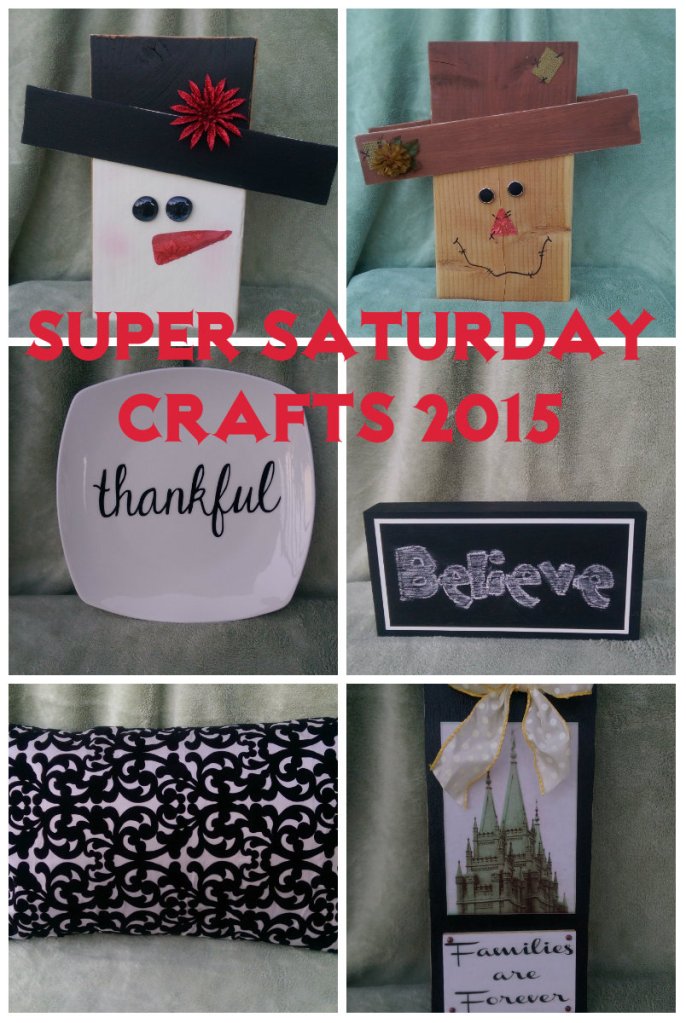
Now, on to this year’s Super Saturday crafts:

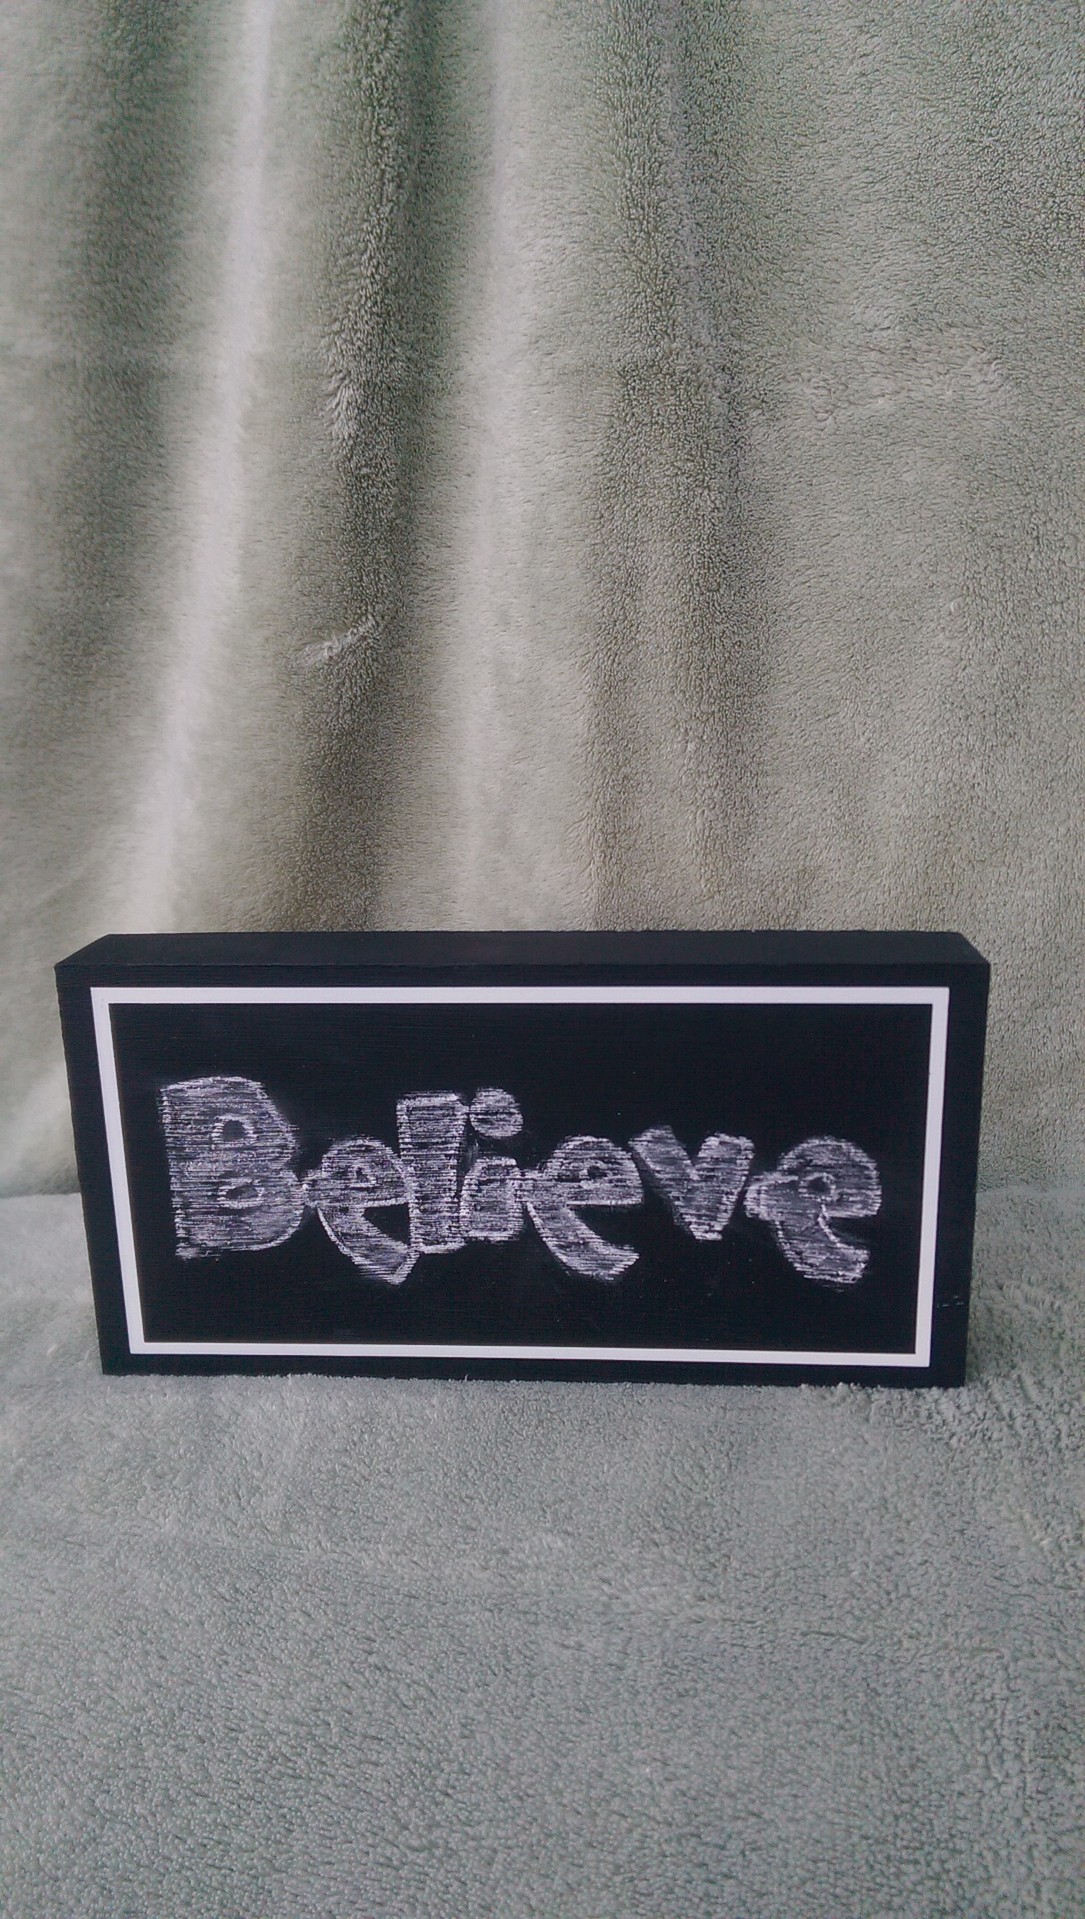
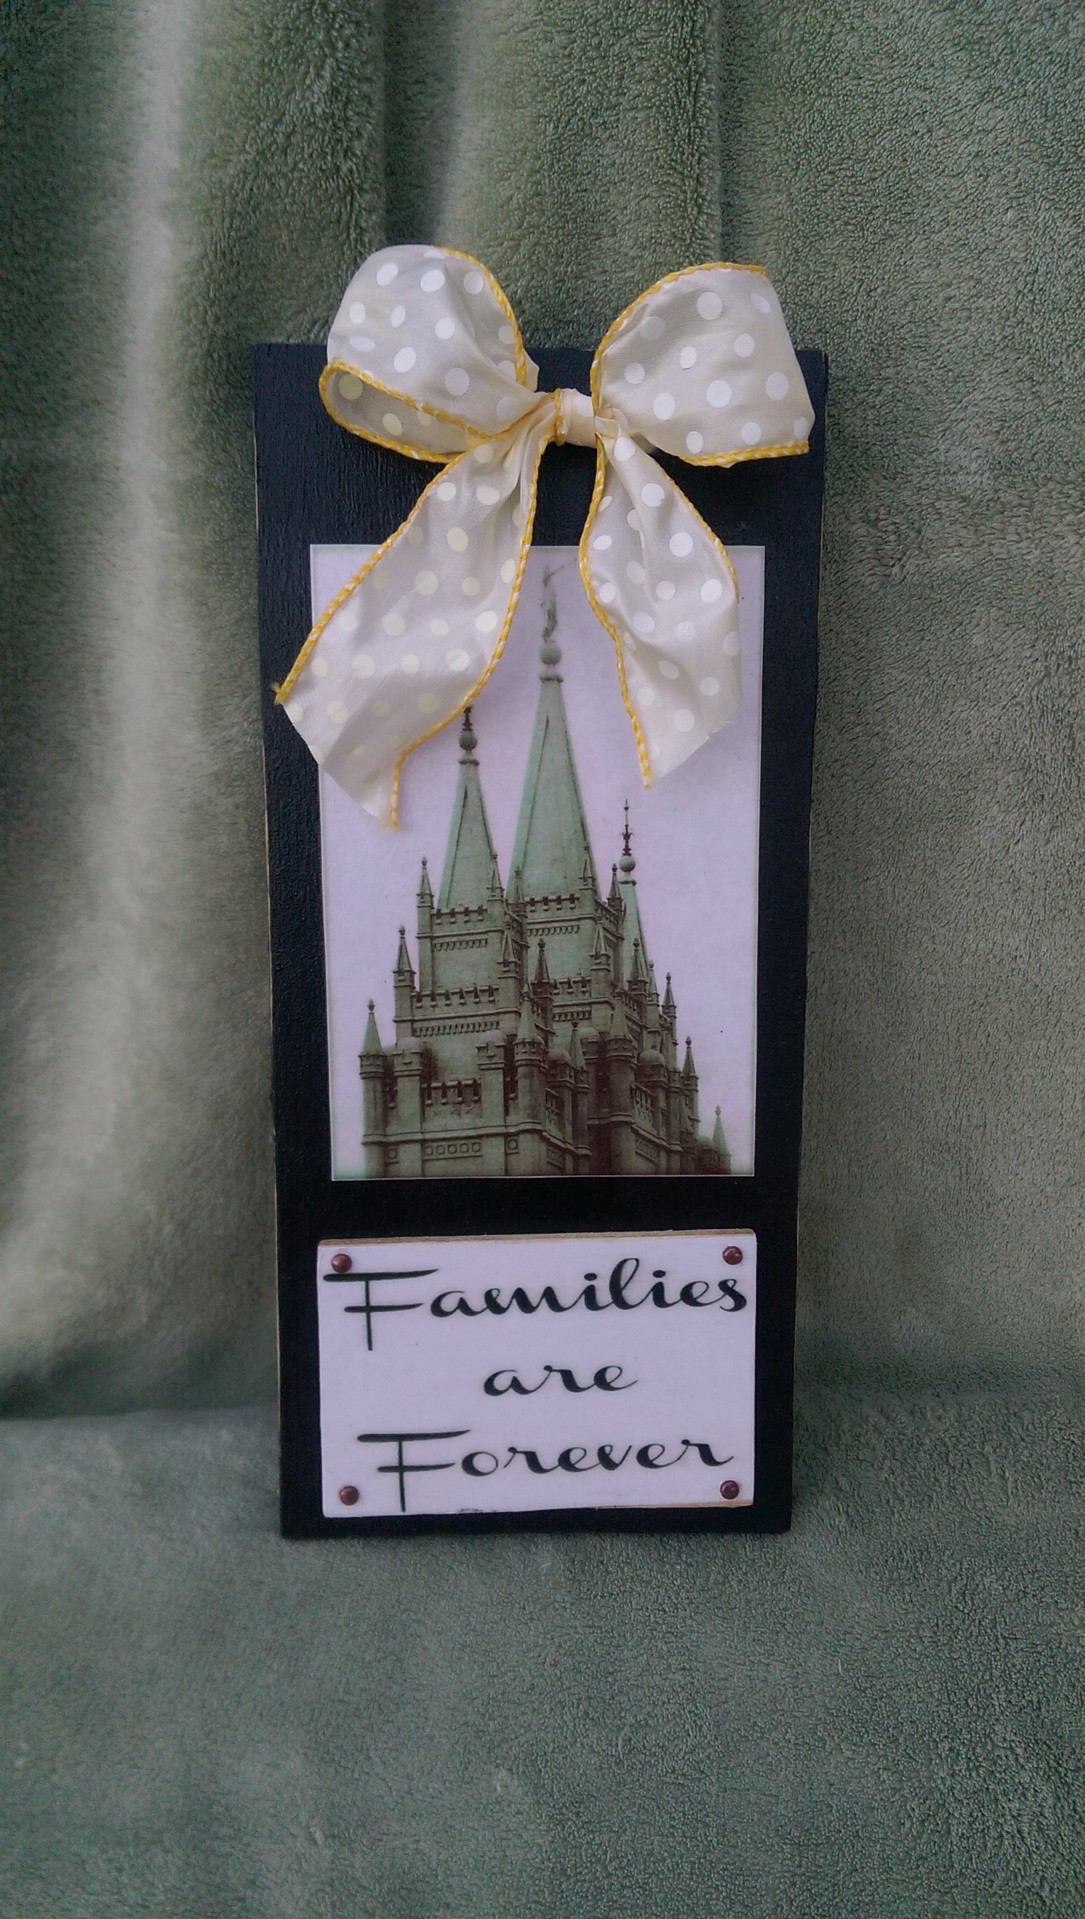
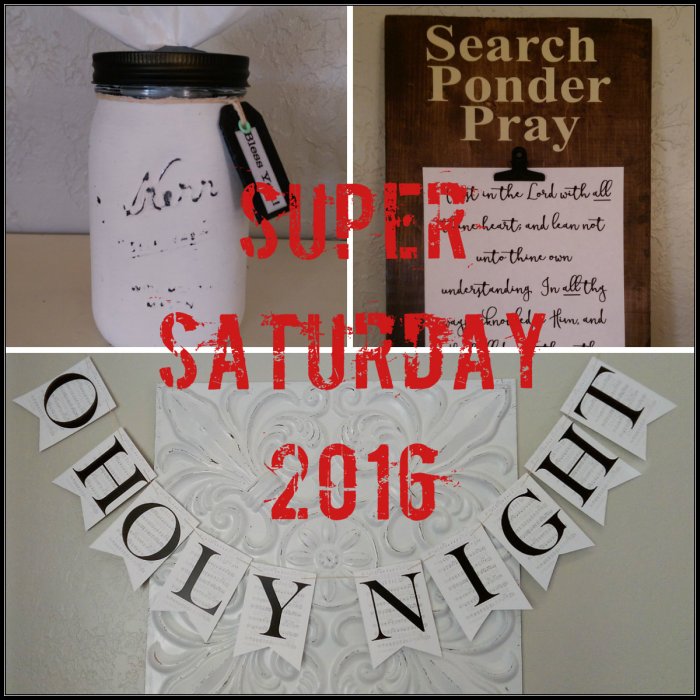
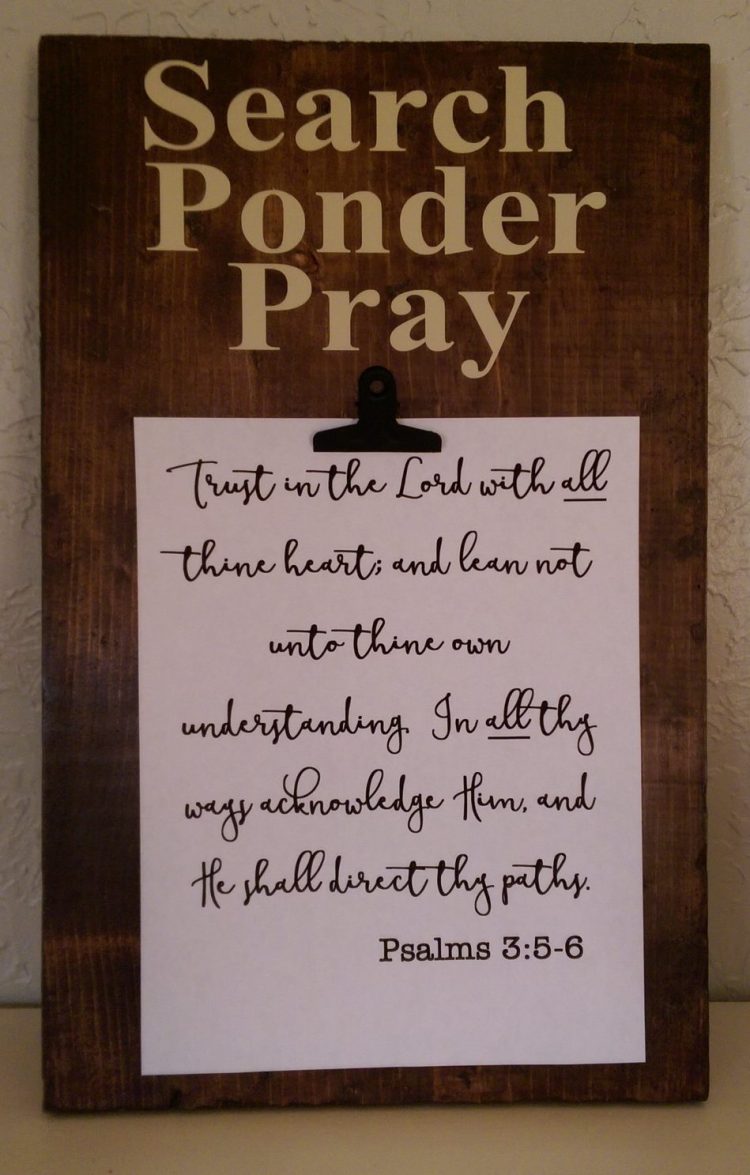
This first craft is what I will call a Ponderize Board.  The thought is that you take scripture verses or other quotes that you want to incorporate into your life and you print it up in cool fonts and post it on this board where everyone can see it often.  It can just be a nice thought to ponder or you can try to memorize, hence the name, Ponderize.  The great part is that you can easily change your chosen verse or quote, maybe change it out every week or month.  Or, keep it up forever.

wp_20161023_001

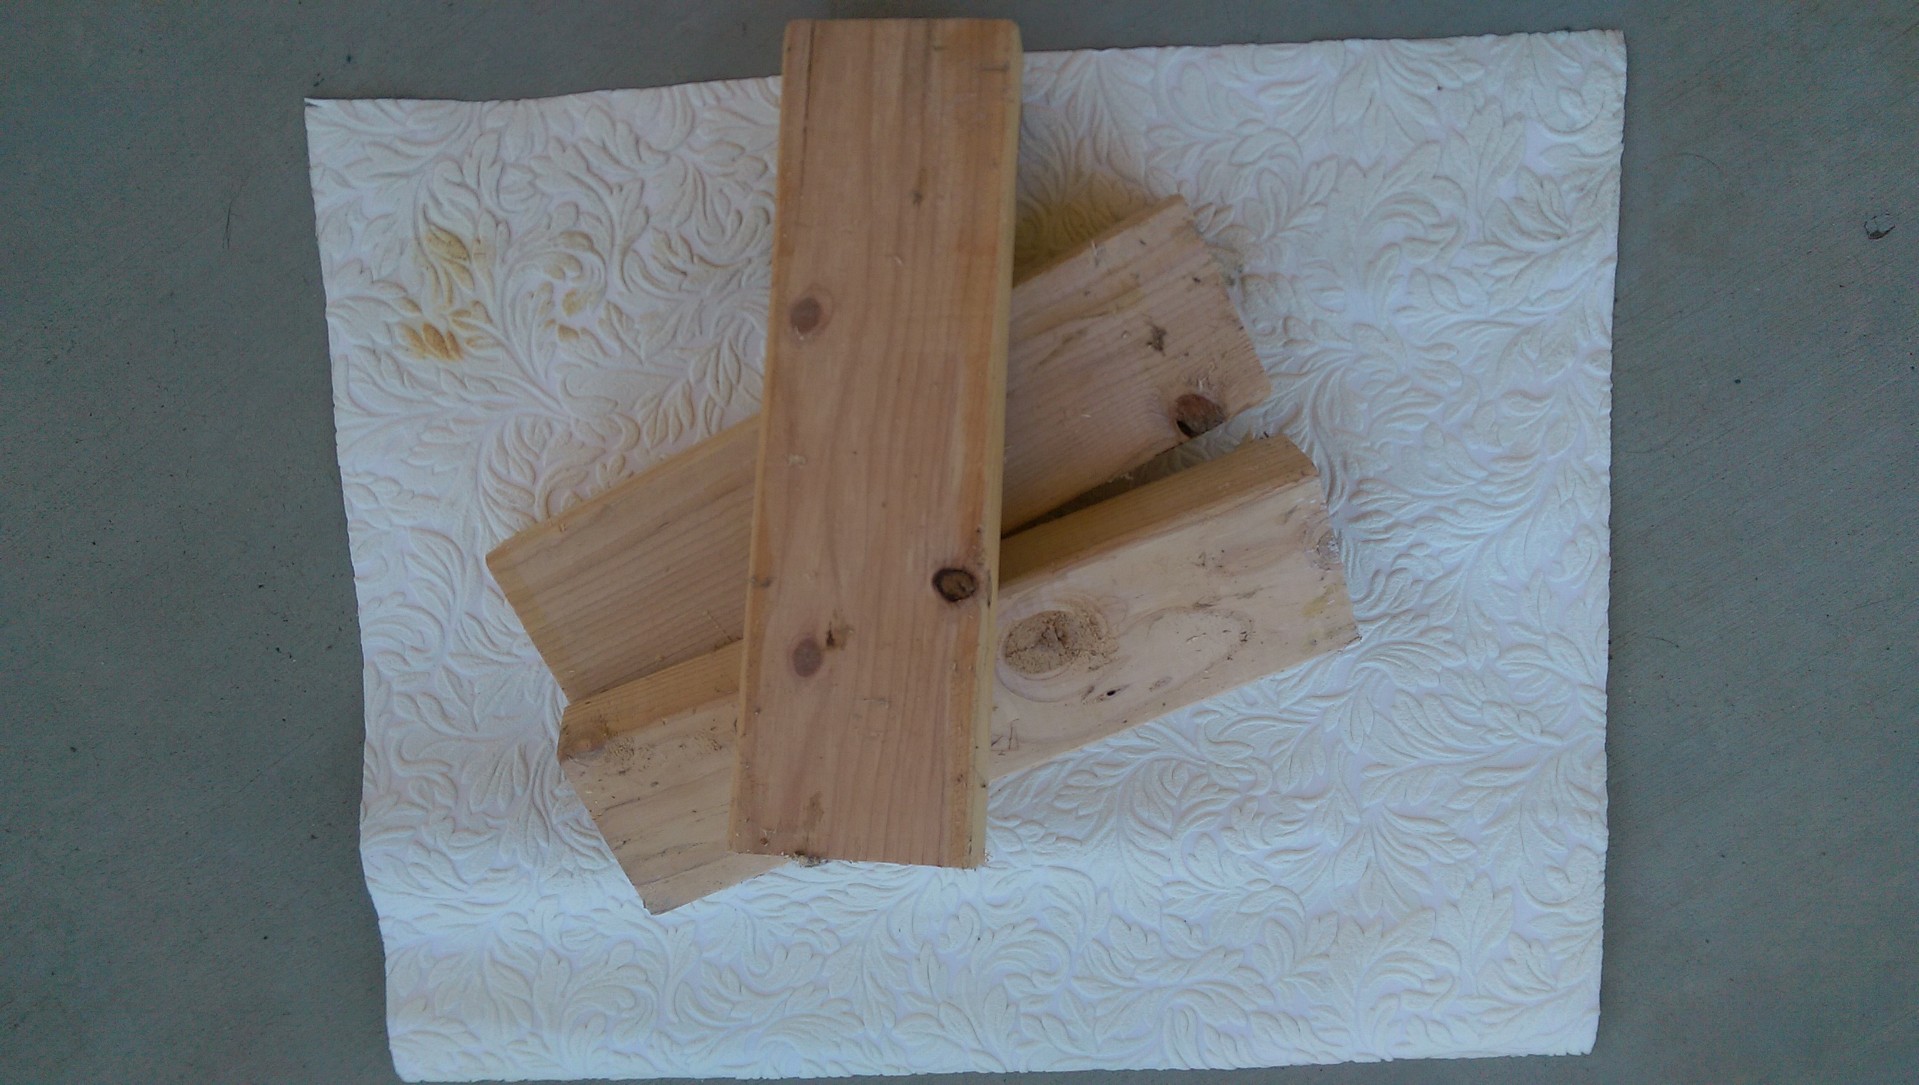
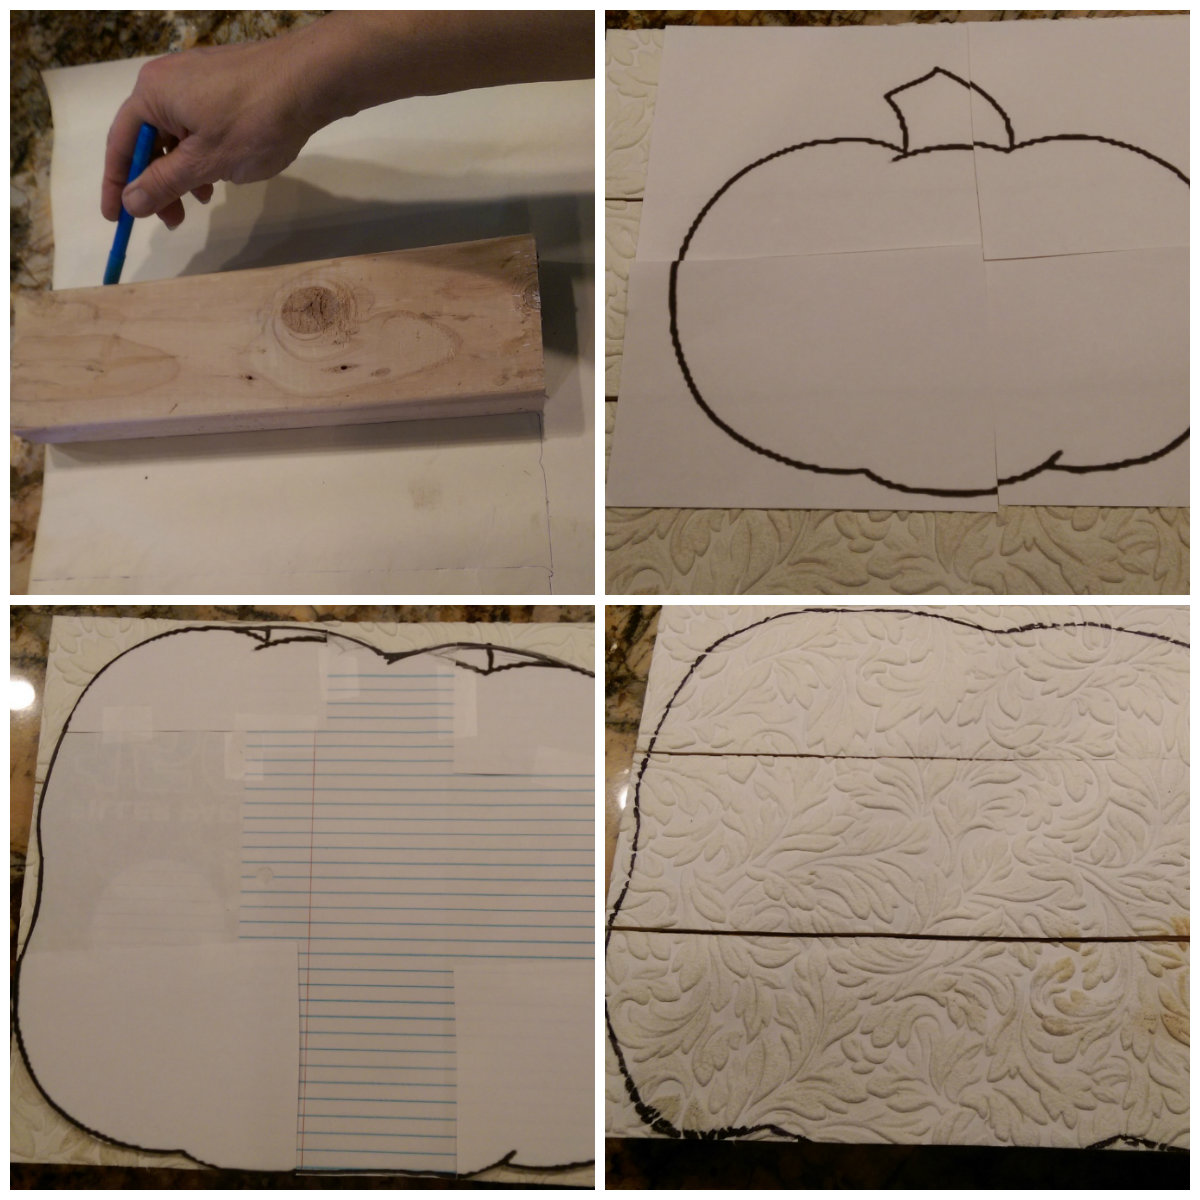
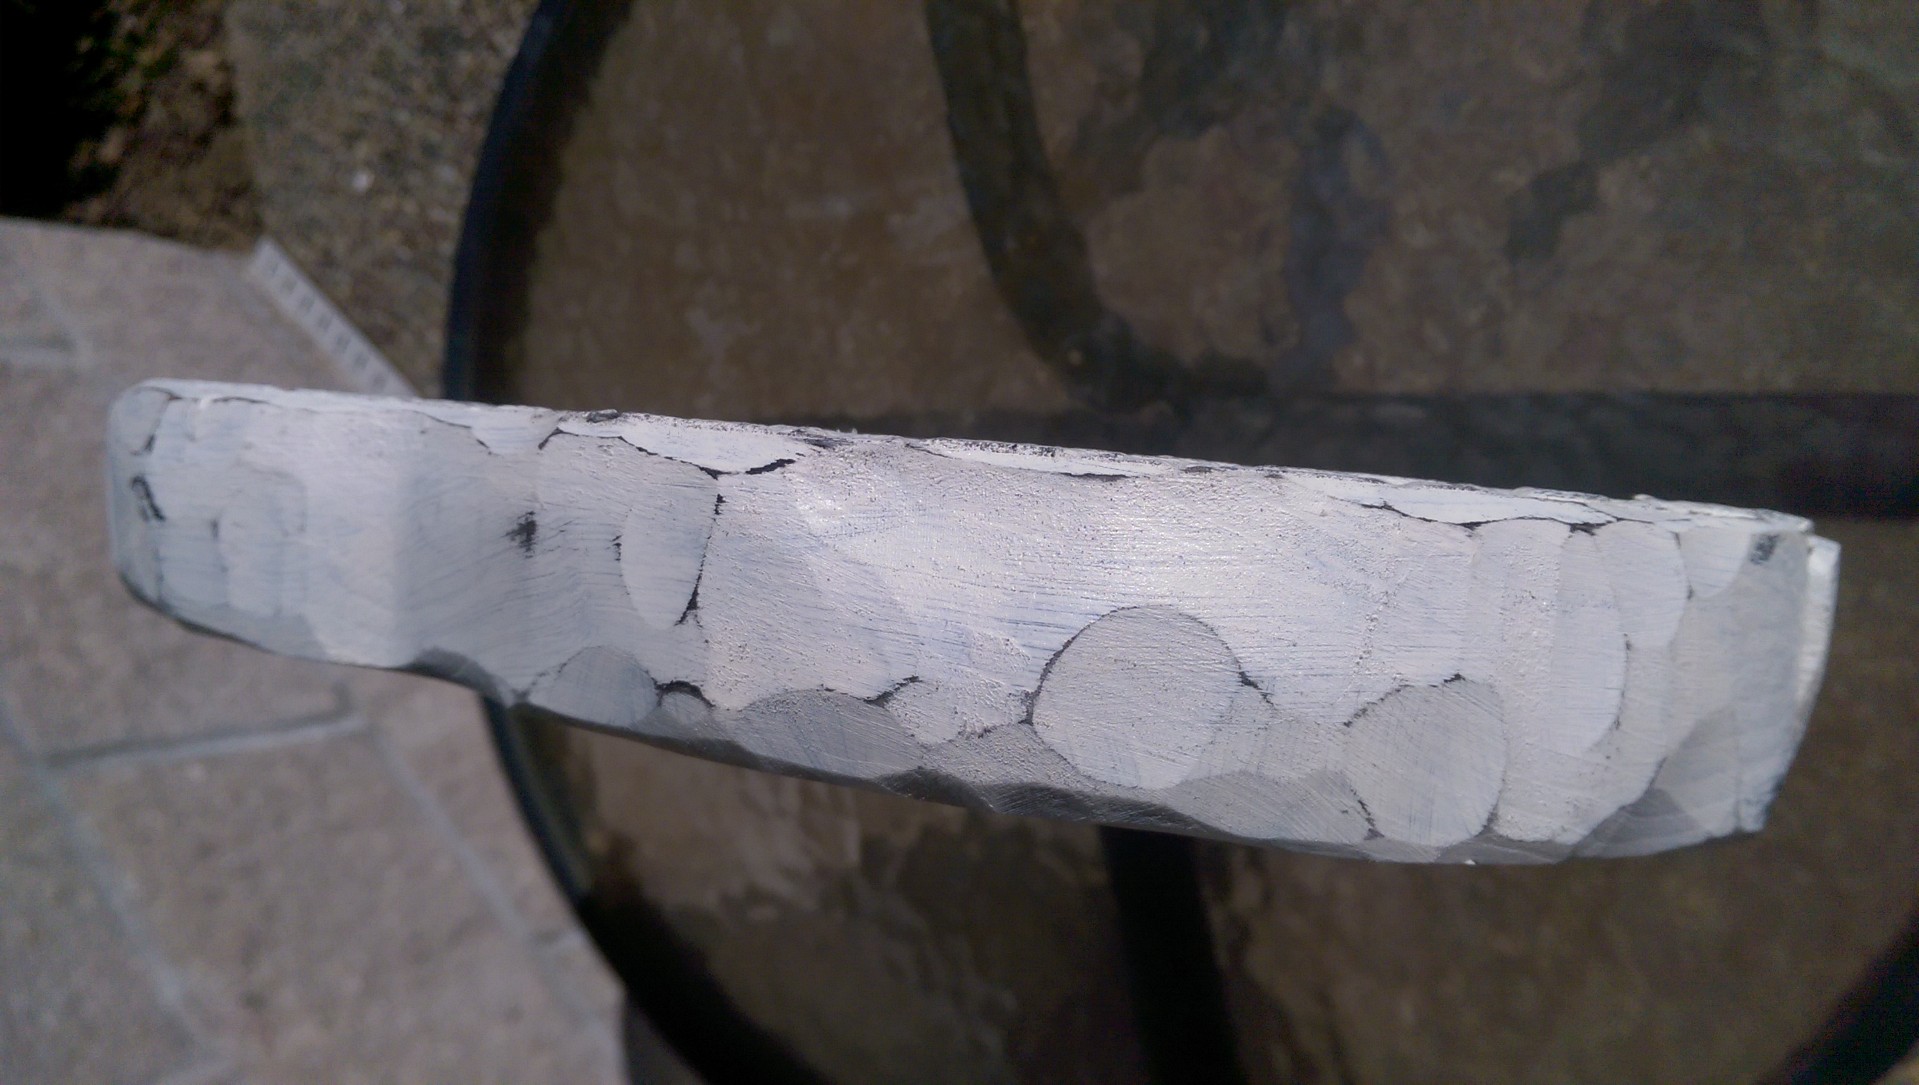
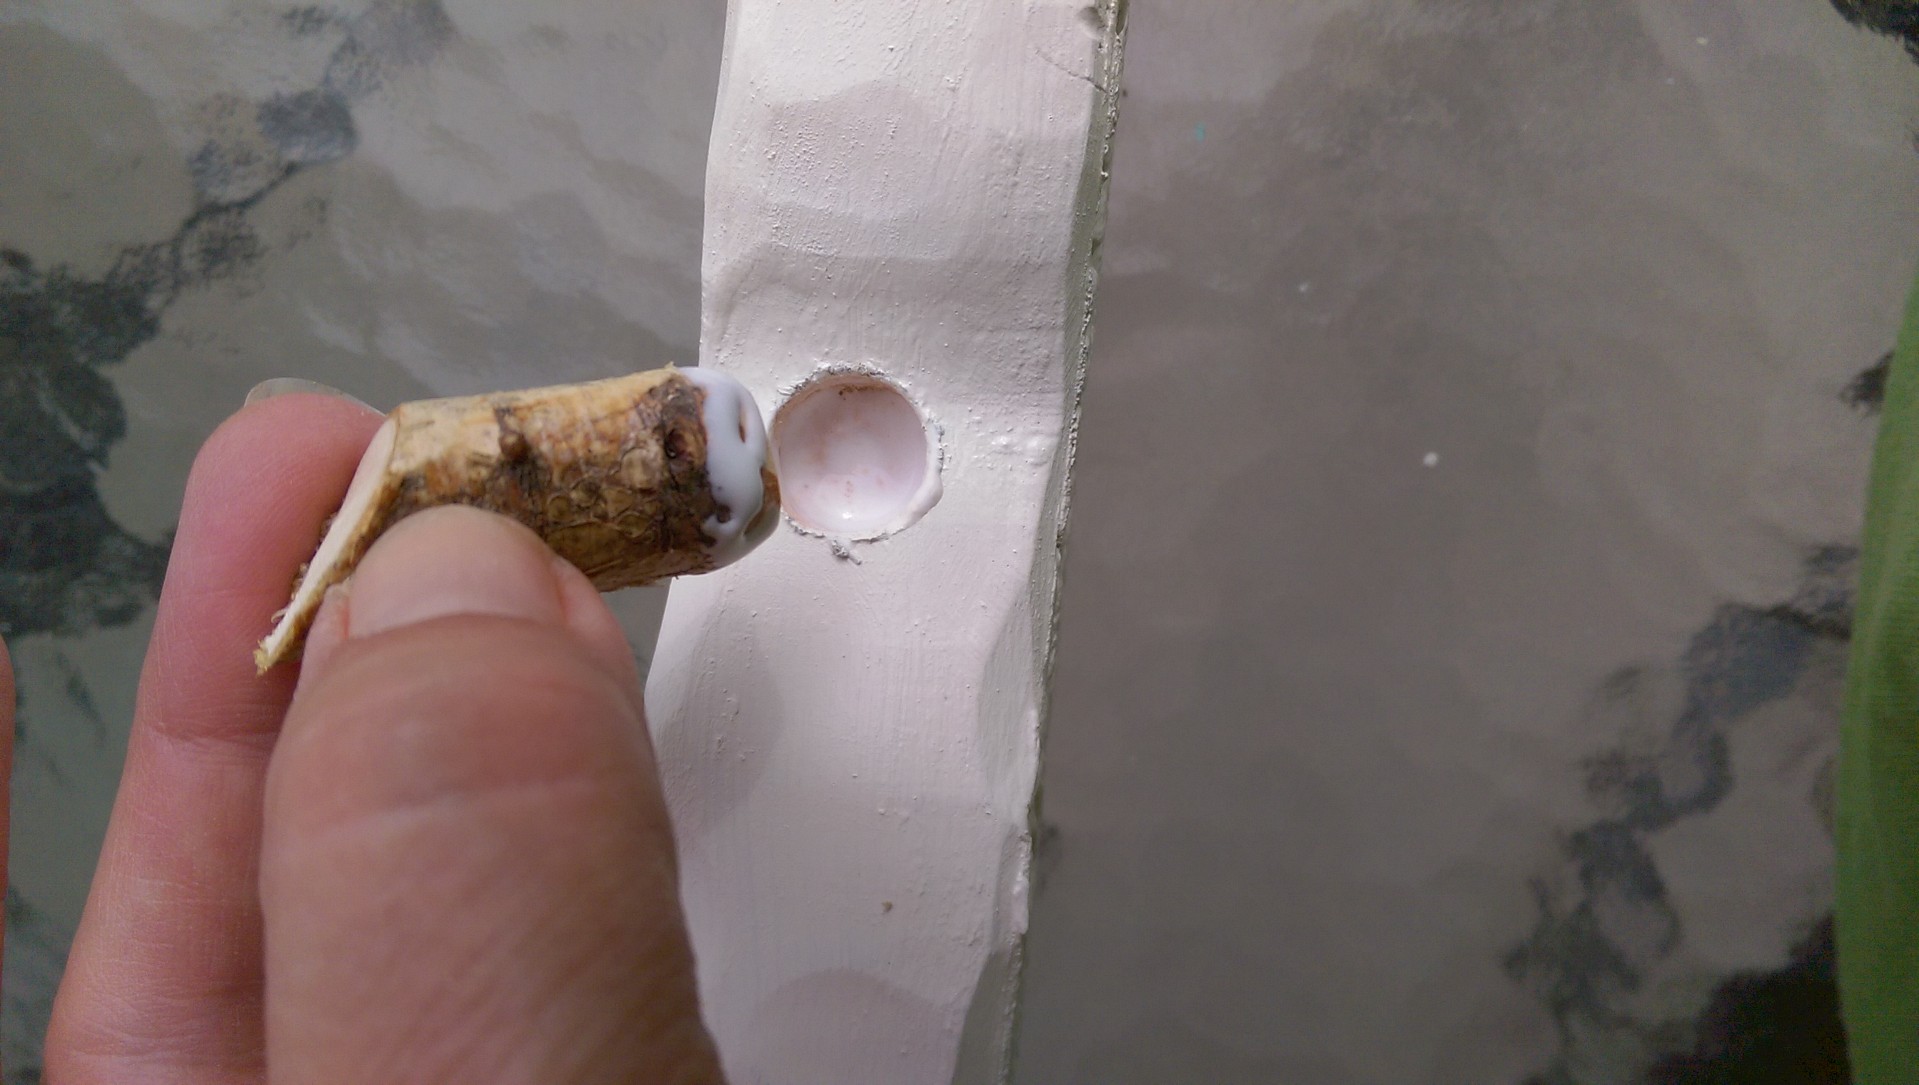
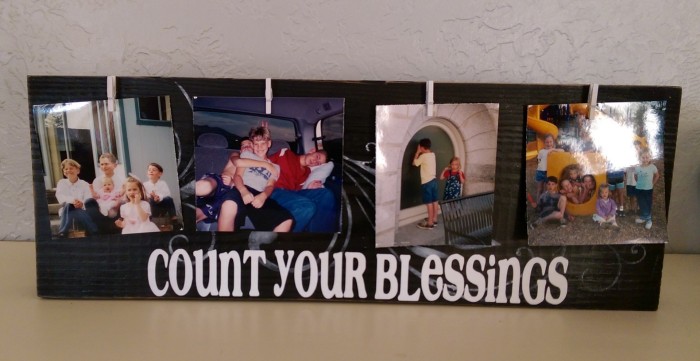
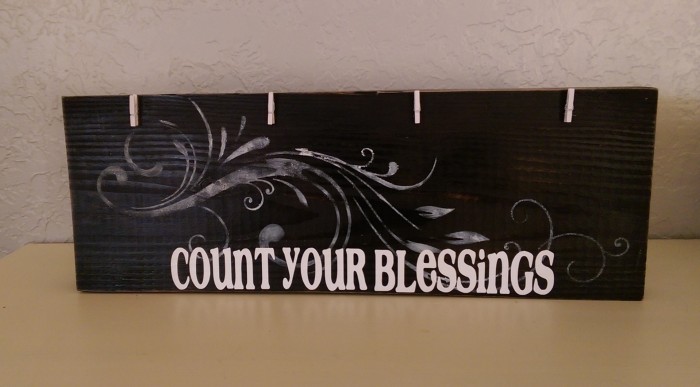
Next craft is a cute Picture Display Board.  I cut the rounded long edges off of 2 x 6 lumber so it can easily sit on a shelf, countertop, table, etc. and not fall over.  Tiny clothespins are hot glued in place to hold the pics.  The lettering is vinyl, (Café Rojo font) and I just used a stencil to add a little detail.

wp_20161023_003-1

wp_20161023_004-1

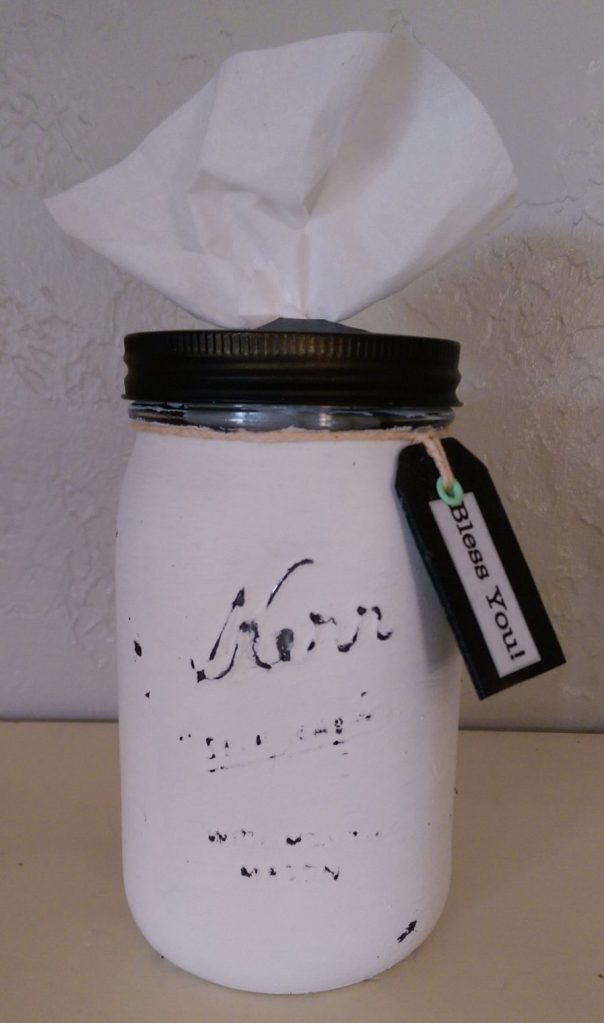
This Quart Jar Kleenex Dispenser turned out so cute!   Let’s face it, Kleenex boxes- no matter how stylish the print is- are really not that attractive.  To get this look, I first painted the jar with a dark color, then added a heavy coat of white chalk paint and sanded a bit to get the distressed look and to highlight the raised lettering.  You can click the “DIY Mason Jar Tissue Holder” link below for the tutorial on how to get the dispenser to work correctly.  This decorative jar is a really fun way to keep Kleenex’s handy:

wp_20161023_005

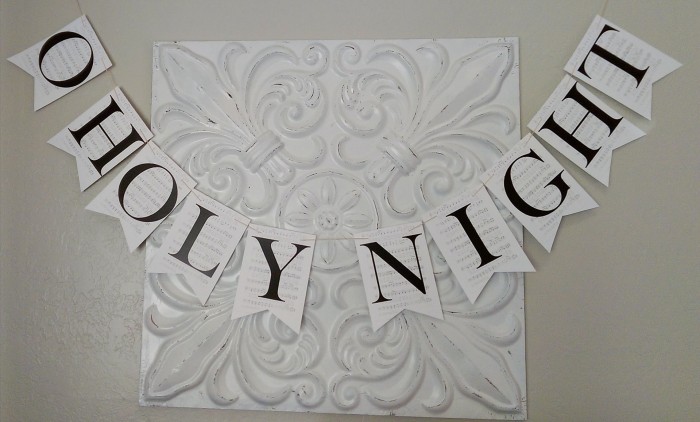
We will also be offering this O Holy Night Banner.  I was hoping to be able to download the banner letters directly from the site that I got the idea from, but the link wasn’t working.  I created my own version and had my local print shop print it up on cardstock.  If you want to print up your own set, here is the link for my version of the O Holy Night banner.  The top and sides of each page just need to be trimmed off (I removed the song title), the bottom cut into this banner-like shape and string added. Easy peasy!

wp_20161023_006-2

I’m sure that these Microwaveable Neck Warmers will be a Super Saturday hit.  They make fabulous gifts!  Look here for my tutorial.

DIY Corn Microwavable Neck Warmers

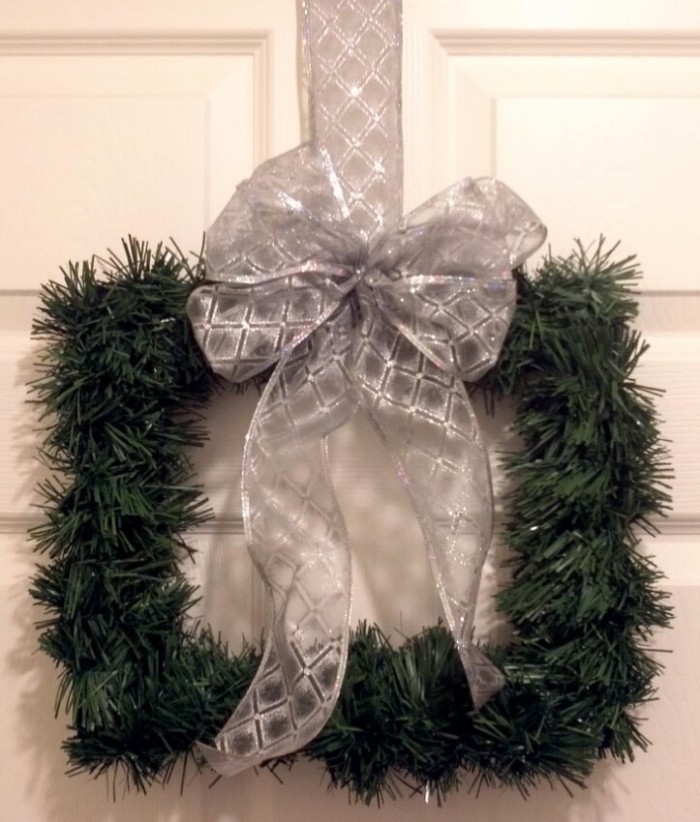
Lastly, during Super Saturday, we are going to do a demonstration to show just how easy it is to make a Square Wreath.  (Here is the tutorial.)

IMG_20141209_174922

Here are the images that inspired some of our Super Saturday craft choices:

Kudos to these awesome crafters!

Verse of the Week

Count Your Blessings Board

DIY Mason Jar Tissue Holder

O Holy Night Banner

Yep, Super Saturday is going to be awesome!

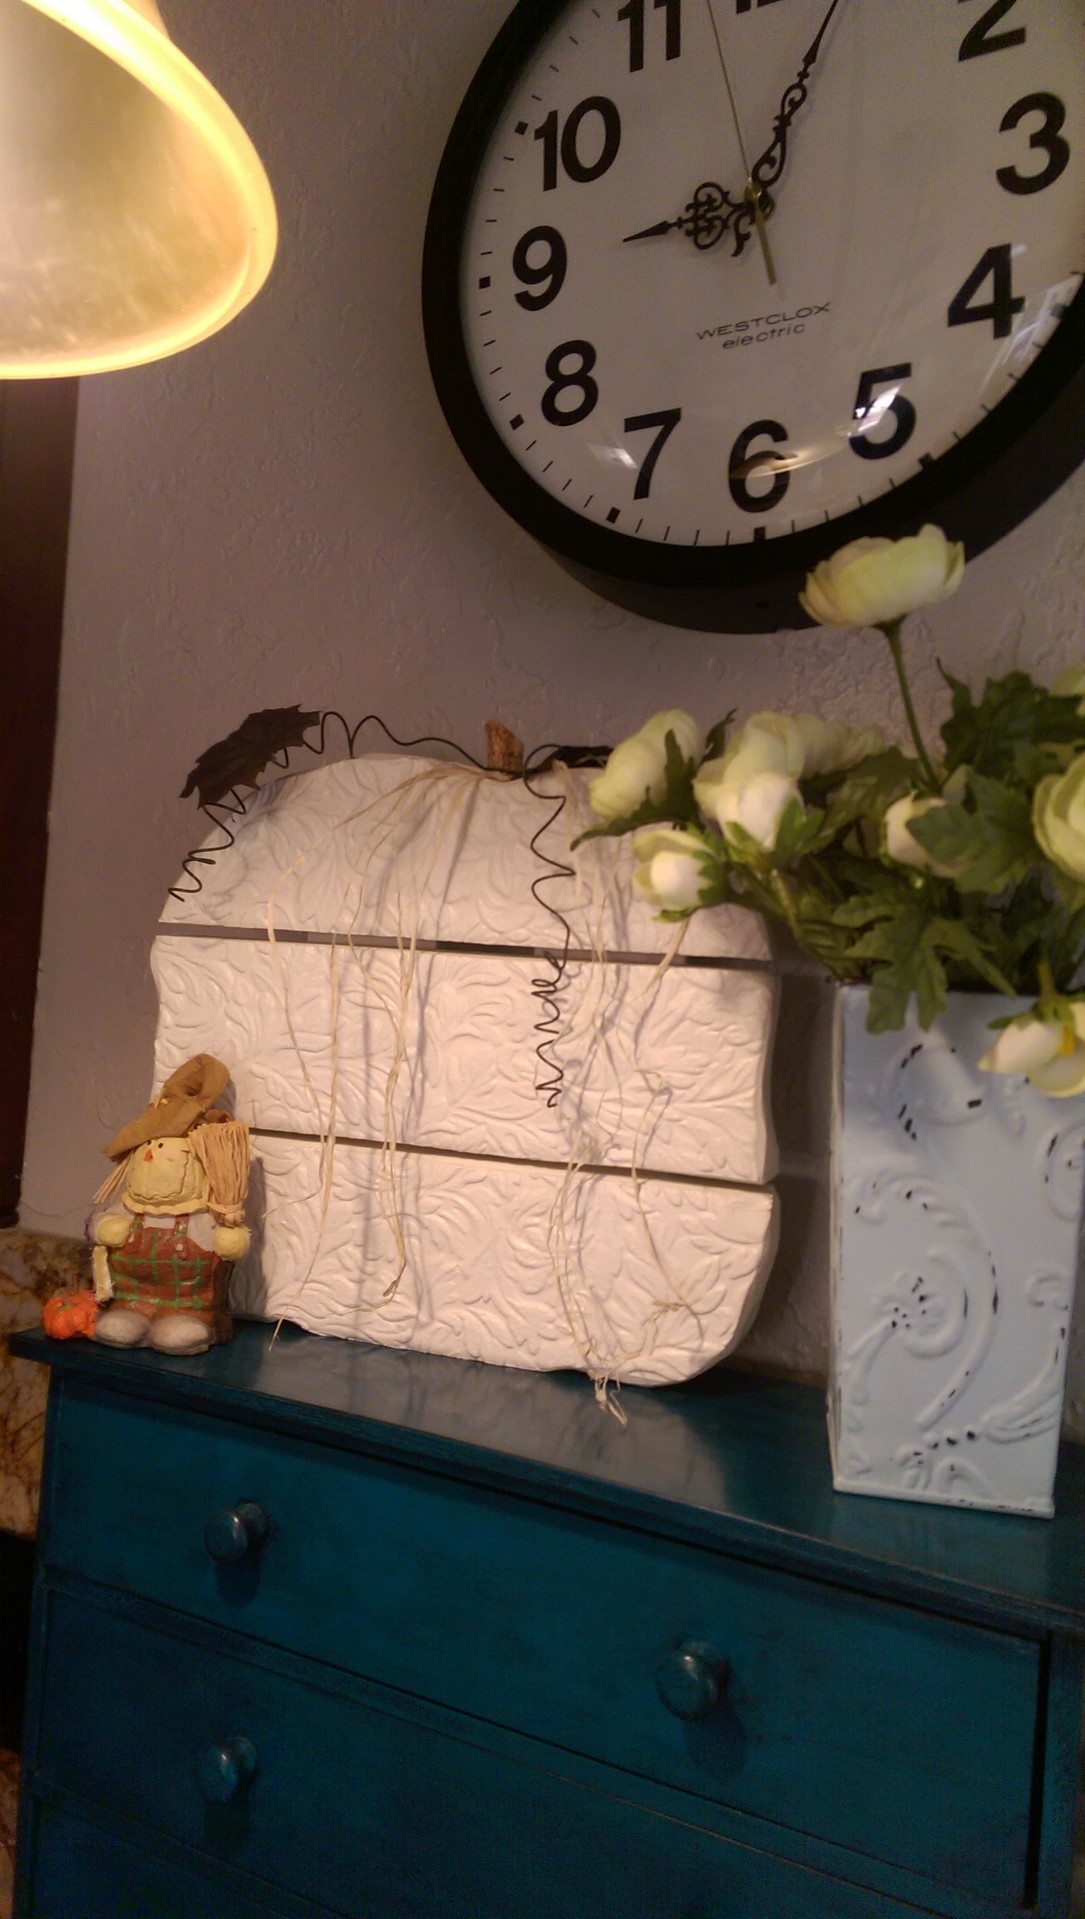
And, there you have it!  Our 2016 Super Saturday crafts.  What do you think?

Do you participate in a get-ready-for-the-holidays crafting event?  I would love to see what you are making!  Please send pics!  Maybe we will do them for Super Saturday 2017!


*********Linking up to these awesome parties*********


I was featured!

Fearlessly Creative Mammas


Christmas Home Tour 2015

I guess that I may as well jump on the blogging bandwagon and post some pics of my holiday home.  They say that a picture is worth a thousand words, so I will mostly let the pictures do the talking.

My Front Porch:

Christmas front porch santa foil wreath

Front Entry and Living Room

Pool Table Room/Library:

Kitchen and Dining Rooms:

Family Room:


Well, that about sums it up.   Thanks so much for stopping by!  I would love to offer you a nice hot cup of cocoa, but, well…you know.  You will have to really stop by my home for that to happen.  Until then, Merry Christmas to you and your family!

Concrete Look Dollar Store Pumpkins

If you have been in pretty much any dollar store in the last month or so you have likely seen lots of bright orange light-weight pumpkins.  El cheapo looking pumpkins.  But, for some reason, they inspired me in a big way.  I bought a couple of them and before I had even gotten out of the store, I knew what I wanted to do with them.  Happily enough, they turned out exactly how I envisioned them!

Concrete Pumpkin

I love them!  The process, once I figured it out was quite easy.  It took some trial and error, so to help you avoid all that, I will show you the easy way to make these concrete look pumpkins.  First, though, my base ingredients:

WP_20151104_002 1

I had noticed this half used bag of thin-set mortar in our garage recently and wondered what a person actually does with it once the tile job is done.  The trial and error portion of my project consisted of just mixing water with the thin-set mix and painting it on.   Not wanting to use a nice bowl to mix the stuff in, I cut down a gallon sized milk container.  The handle made it really easy to hold while I stirred.  I used the top part for my scoop.  See what it looked like after one coat:

WP_20151104_003 1

Too transparent for the look that I was going for so I made some changes to my thin-set mix.  First I added some white paint and then decided to add some Plaster of Paris powder, as well.  I didn’t have any specific recipe, just added until it was the consistency of pancake batter.  A couple more coats (let it dry completely first) and this is what they looked like:WP_20151106_008

As you can see, I added some short twigs to make stems for my pumpkins.  At first I added a silk leaf to the top, but removed it because I liked the starker look.  Can I just say that I’m loving the white pumpkin look this year?  Truth be told, however, these could be made in any color… of course your paint color will dictate that.  It would be fun to make gray or peacock blue or black concrete pumpkins, don’t you think?

White and chic pumpkin
White pumpkins!
White pumpkins!

Since these pumpkins are made of Styrofoam, they can be easily pierced on the bottom and place on a candlestick that has a “nail” for holding candles in place:

WP_20151106_005

Isn’t it amazing how just a few items found in most garages can make el cheapo look high end?  I’m loving my new pumpkins and plan to make several more in different sizes next year.

So, what do you think?  Are you still there, or are you grabbing the car keys and heading to your local dollar store to buy some pumpkins?


********* Linking up to these awesome parties!*********

I was FEATURED!  What an honor!

Great Ideas — 18 DIY Thanksgiving Ideas Part Two!


Welcome to 31 Days


Super Saturday Craft Day

SuperSaturday2015

One of my favorite things to do this time of year is to help organize a “Super Saturday” at my church.  Super Saturday is a day where the women from church and their friends, family, neighbors…can come together and craft.  This event is always in November so we can make holiday decorations as well as inexpensive gifts for Christmas giving.  I just thought that I would share what we are doing this year:

This Snowman/Scarecrow craft was requested by someone who had seen a similar craft online using planks.   As you can see, this craft is reversible, making it possible to have it out from October through January.  Love that!  I will do a tutorial on this soon.  Promise!  ***UPDATE: Here is the tutorial***

WP_20151104_009 WP_20151104_010

This 2 minute craft  is great for display as well as for holding a plate of holiday goodies.  It is as simple as removing the backing from the vinyl sticker that I cut with my Roland Dr. Stika machine, placing the sticker and rubbing it to smooth it out, then removing the masking layer.  Easy peasy!  I love how simplistic it looks.

WP_20151104_011

I found some little wood boxes that I thought would make perfect little chalkboards.  Before Super Saturday, I will paint the boxes white.  That day we will add a vinyl frame to use as a stencil.  After painting with chalkboard paint and letting it dry (we always use hair dryers at Super Saturday to speed up the drying process!), we will remove the frame vinyl to expose the white below.  I’m also going to do a quick demo about how to easily “write” on chalkboards.  I love that this little guy can stay up year round.  I love, love, love chalkboards and the fact that “art” can change in a matter of seconds.

WP_20151104_012

We are also going to do a demo of how to make a 5 minute pillow cover.  Soooo easy!  Here is a great video tutorial to show you how it’s done and here is one of the many pillows that I have made this way:

WP_20151104_013

Lastly, here is a craft that I patterned off of one that my friend found online and loved.  I made sure to use an image that is copyright free of the LDS Salt Lake Temple spires.  We will decoupage that as well as the saying, “Families are Forever”.  This idea can be used in a thousand different ways, using different pics (pics of children and grandchildren, family home…) and sayings.  I drilled tiny holes in each corner of the word wood so I could easily insert little brads for added detail.  I also drilled a couple of larger holes on the top for the ribbon to go in and, BAM! it’s a fabulous item to hang in your own home or to give as a gift.

WP_20151104_014

I’m so excited for this Super Saturday event…I can hardly wait!  It is so much fun to turn on the Christmas tunes and work and laugh and craft with friends.

Do you participate in a similar crafting event?   If you are not aware of a similar event around you, why don’t YOU get one started?  Grab your friends and family and get crafting!  You just might end up with some pretty cool stuff and warm memories as a result.


********* Linking up to these awesome parties!*********

Welcome to 31 Days

Textured Wooden Pumpkin

Textured Wooden Pumpkin2

Fall is in the air…isn’t that exciting?  Around here, that means that we are no longer having triple digit temperatures.  Woo hoo!  With daytime highs of less than 85 degrees and night time lows in the 50’s, I’m in the mood for everything Autumn.  The other day I got the hankering to just make something new to add to my Fall decorating.  I gave myself a challenge.  Do you ever do that?  My challenge was that I would use materials that I already own and create something I’ve never seen before.  Here is what I decided to work with:

WP_20150923_010

Some stained old textured wallpaper and 3 scrap pieces of 2×4 left over from a garage shelving project.  Are you inspired?  I was.  Wanna see what I made?

WP_20151027_001

Turned out okay, don’t you think?  I happen to love it!  Would you like to see how I made it?  Alright.  Here we go:

Textured Wood Pumpkin collage

First step, I cut out the textured wallpaper.  I wanted a continuous pattern so I traced around the 2×4’s, stacked vertically, on the back side of the wallpaper.  After cutting out the wallpaper, I glued a strip down on each of the 2×4’s using regular white glue.  Easy.  To make sure that it didn’t bubble, I stacked them up and weighed them down with books.  As the glue dried I made up a pattern.  Kind of.  I’m not an artist so I went to the computer and found a basic pumpkin template.  I printed it out then cut the image in 4 pieces so I could stretch it out to make a larger size.  After taping it down to a large sheet of (pieced together) paper, I drew in my own lines.  Next step, I cut out the paper template and then transferred the pumpkin shape to my textured wallpaper 2×4’s, again making sure that the pattern was continuous.

After cutting the individual pieces out, I sanded random dents in the edges to make them more rounded and textured. See?

WP_20150929_007

I wanted the pumpkins to look nice and finished and not thrown together so I made sure to “caulk” the edges with spackling.

WP_20150930_001

See how much better the spackled part looks?

I chose to paint my pumpkin a nice white, but orange, black, aqua or teal would be equally nice.  I had originally painted mine black with the intention of sanding the edges to allow the black to show through, but ended up liking the white, un-distressed look.

My stalk is a cut piece of a branch from a tree in my yard.  If wishes were fishes, I would have made it longer, but by the time that I decided that, the darn thing was too attached to remove.

WP_20150930_003

Once the paint dried, I assembled the pieces:

A few twist of baling wire forms the tendrils.  I also added some silk leaves and some natural raffia…

And, there you have it… a finished pumpkin.

WP_20151002_003

I’m kind of liking my new pumpkin.  What do you think?

WP_20151027_005

********* Linking up to these awesome parties!*********

———This post was FEATURED!!!———–

Live Randomly SimplePieced Pastimes

http://www.cozylittlehouse.com/2015/11/tweak-it-tuesday-166.html

Welcome to 31 Days

Funky Junk Interiors: DIY Salvage Junk Projects

Intelligent Domestications  101 + Pumpkin Decorating Ideas: