If you have been in pretty much any dollar store in the last month or so you have likely seen lots of bright orange light-weight pumpkins. El cheapo looking pumpkins. But, for some reason, they inspired me in a big way. I bought a couple of them and before I had even gotten out of the store, I knew what I wanted to do with them. Happily enough, they turned out exactly how I envisioned them!

I love them! The process, once I figured it out was quite easy. It took some trial and error, so to help you avoid all that, I will show you the easy way to make these concrete look pumpkins. First, though, my base ingredients:
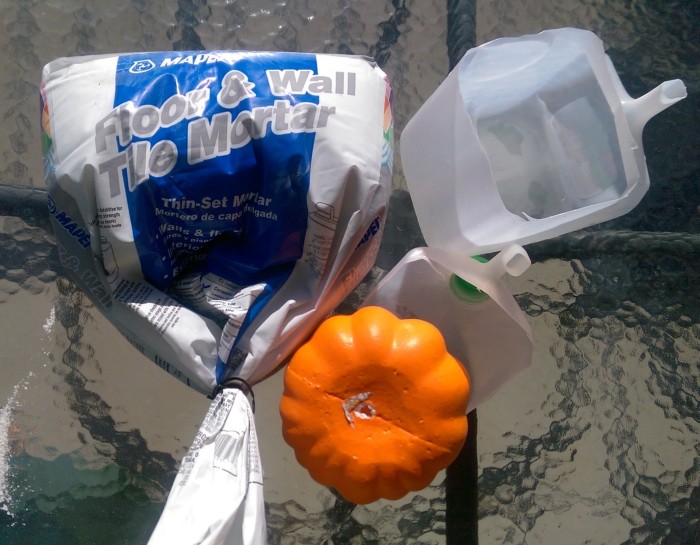
I had noticed this half used bag of thin-set mortar in our garage recently and wondered what a person actually does with it once the tile job is done. The trial and error portion of my project consisted of just mixing water with the thin-set mix and painting it on. Not wanting to use a nice bowl to mix the stuff in, I cut down a gallon sized milk container. The handle made it really easy to hold while I stirred. I used the top part for my scoop. See what it looked like after one coat:
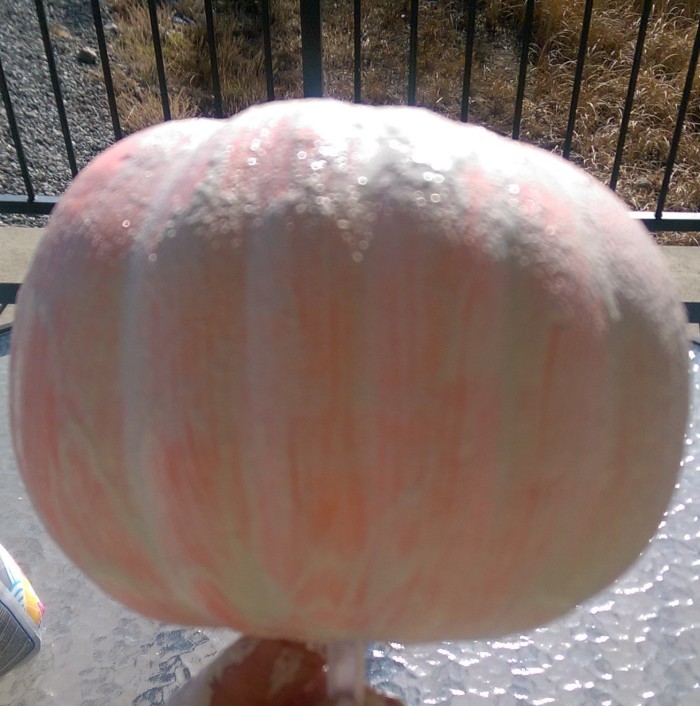
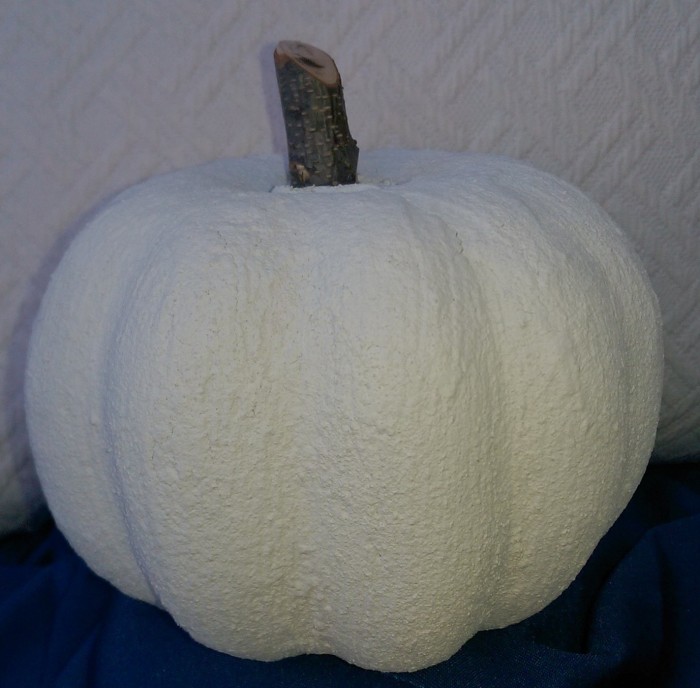
Too transparent for the look that I was going for so I made some changes to my thin-set mix. First I added some white paint and then decided to add some Plaster of Paris powder, as well. I didn’t have any specific recipe, just added until it was the consistency of pancake batter. A couple more coats (let it dry completely first) and this is what they looked like:
As you can see, I added some short twigs to make stems for my pumpkins. At first I added a silk leaf to the top, but removed it because I liked the starker look. Can I just say that I’m loving the white pumpkin look this year? Truth be told, however, these could be made in any color… of course your paint color will dictate that. It would be fun to make gray or peacock blue or black concrete pumpkins, don’t you think?

Since these pumpkins are made of Styrofoam, they can be easily pierced on the bottom and place on a candlestick that has a “nail” for holding candles in place:

Isn’t it amazing how just a few items found in most garages can make el cheapo look high end? I’m loving my new pumpkins and plan to make several more in different sizes next year.
So, what do you think? Are you still there, or are you grabbing the car keys and heading to your local dollar store to buy some pumpkins?
********* Linking up to these awesome parties!*********
I was FEATURED! What an honor!


Oh that’s a great look! We have some home improvement projects that should be happening in the next few months and I will have to keep this in mind to use of some of the leftover materials.
I am co-hosting the #HomeMattersParty link party this month and would love to have you stop by for a visit. The current party closes tonight but another one will be opening on Friday. http://alaynascreations.co/2015/11/06/home-matters-linky-party-62/
LikeLiked by 1 person
Thanks for the invite…I like to hang out at the Home Matters Party. Good luck with all of your home improvements!
LikeLike
I love how these turned out!!!! Pinned<3 New follow:)
LikeLike
A great idea here! Thank you for sharing your talents with us at Brag About It this week!
~Laurie
LikeLike
I love the effect! I would have never thought of that 🙂
I hope you’ll share your pumpkins with Idea Box this week :
http://milaslittlethings.com/2015/11/idea-box-link-party-36.html
xx
Mila
LikeLike
Why thank you! I will be sure to link up at Idea Box this week.
LikeLike
What a neat look for pumpkins. I really like them on the candle pillar holders. Thanks for sharing at The Creative Circle.
LikeLike
Thanks! I keep moving them throughout my house. I will definitely make several more next year to spread throughout the house.
LikeLike
[…] Easy DIY “Concrete” Pumpkins @ Armchair Decorator […]
LikeLike