Peacock Blue Furniture Re-Do

peacockbluetitle

If you are anything like me, you love a deal.  Am I right?  Of course I am!  Lowes recently had their paint samples on sale for $.99 so I snagged a few for a project that I have been itching to do for a long time.  Did you know that they can custom make any color in the 8 oz. sample size?  How amazingly cool is that?

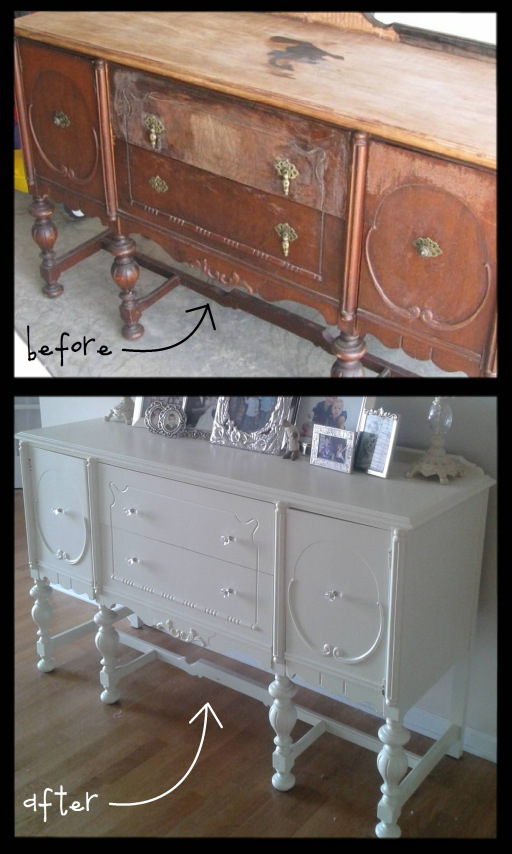
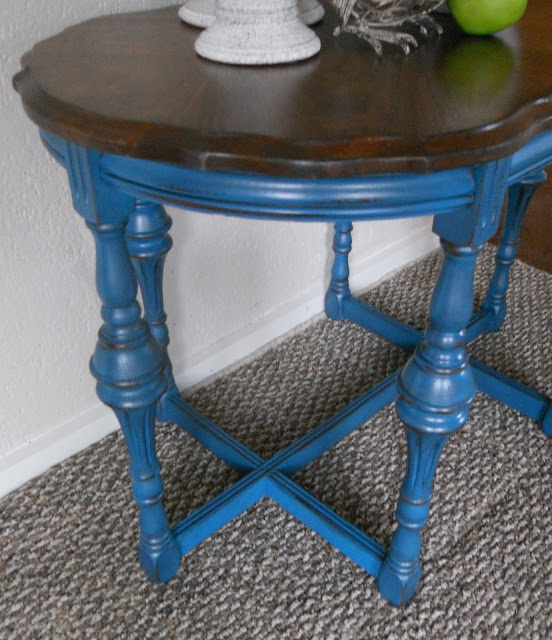
Do you like the color Peacock Blue?  I do, I Do, I DO!  What exactly is peacock blue?  Well, it isn’t teal or navy…it is something in between.   Lately, I have been drooling over blue painted furniture.  Check out this beautiful leggy table from Create Inspire

createinspire-table

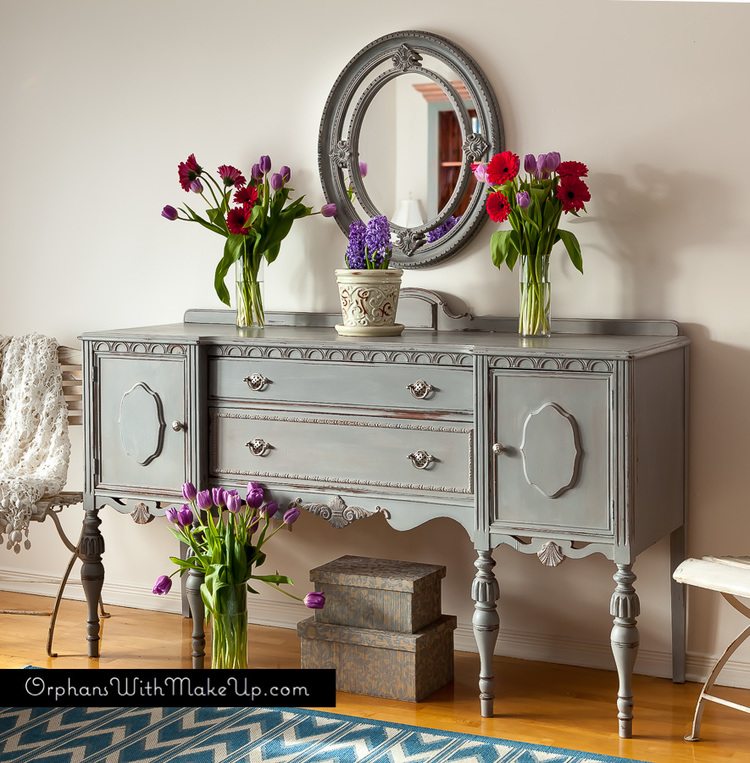
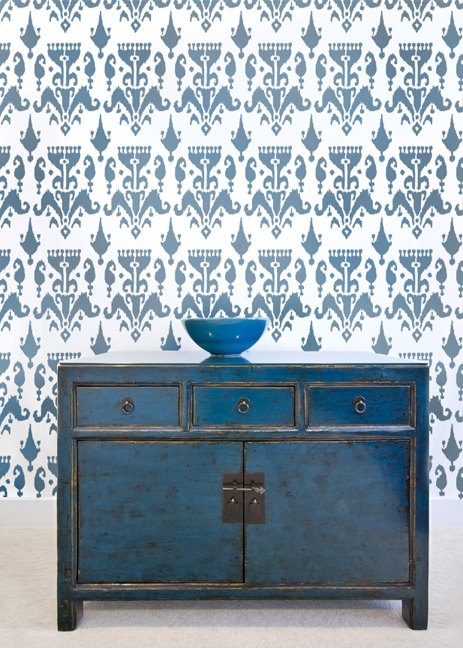
…and this awesome distressed peacock  blue cabinet (isn’t that stenciled wall amazing?!)

peacock blue cabinet

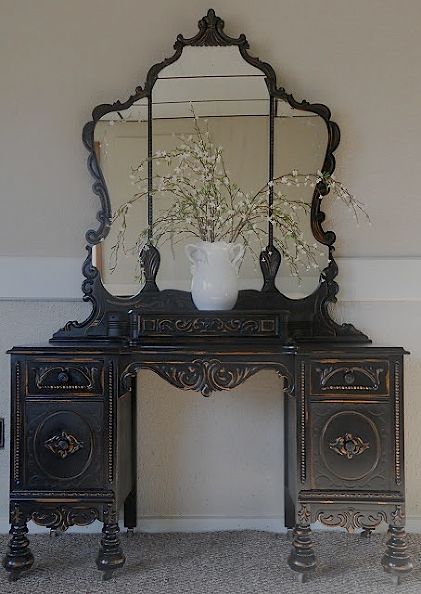
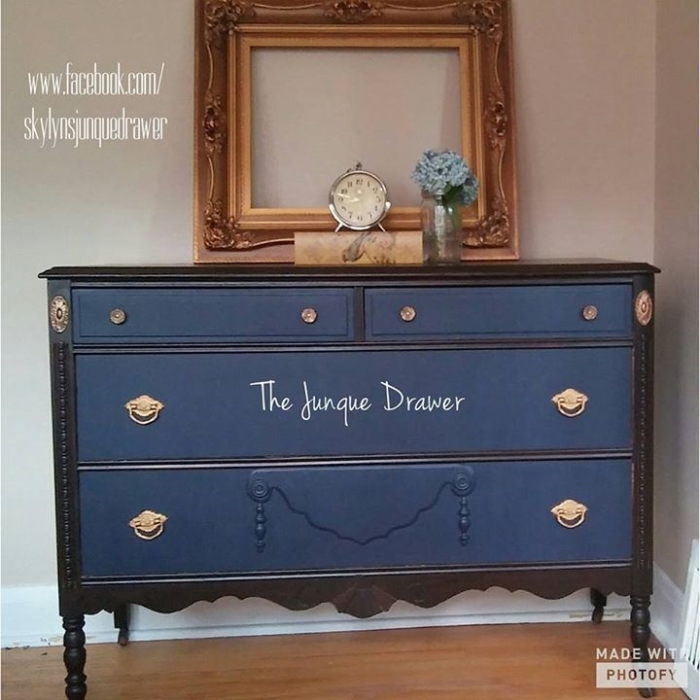
…what about this stunning and black dresser (swoon!)

fb_20160905_09_25_42_saved_picture

… and this glossy dresser

peacock-dresser

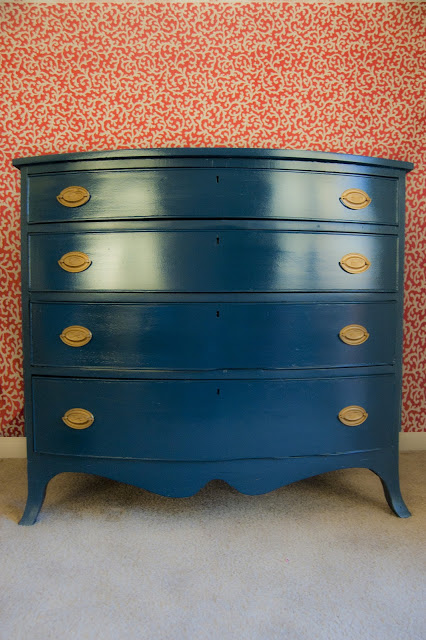
They are all amazing, don’t you think?

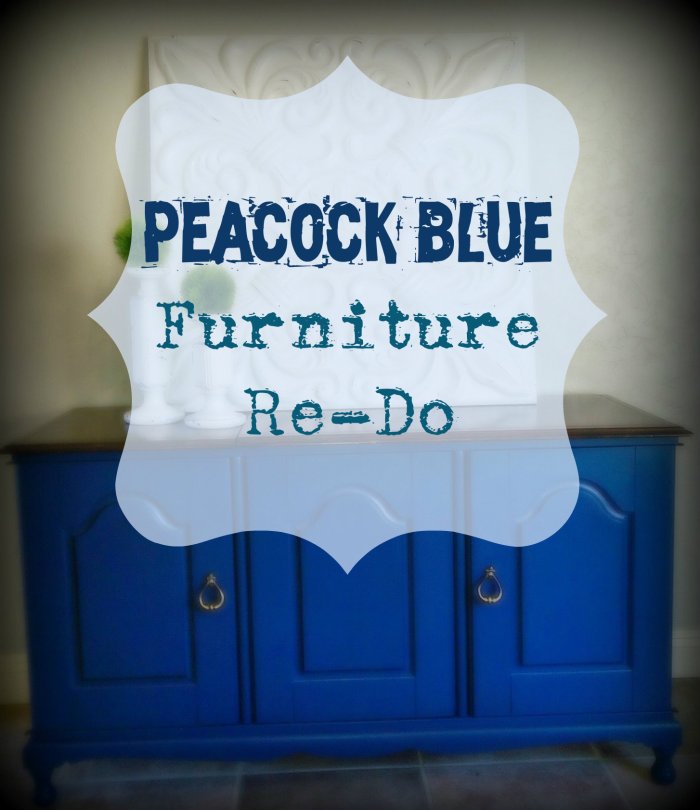
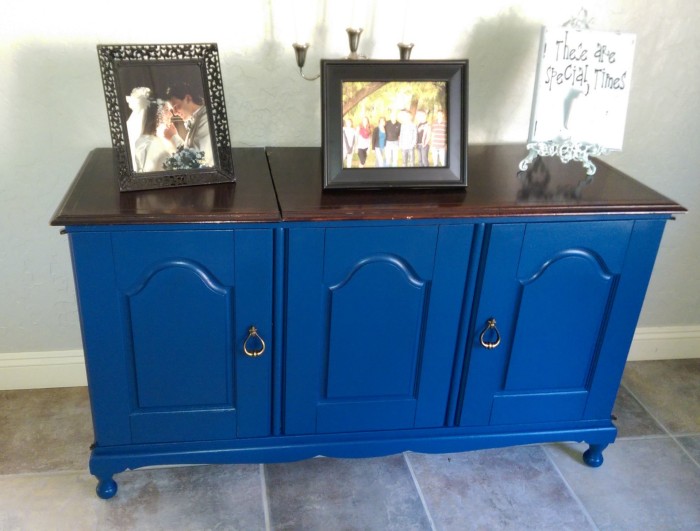
I have been craving me some peacock blue and guess what?  I got some!   Here’s a peek:

Olympic Celestial Blue Paint

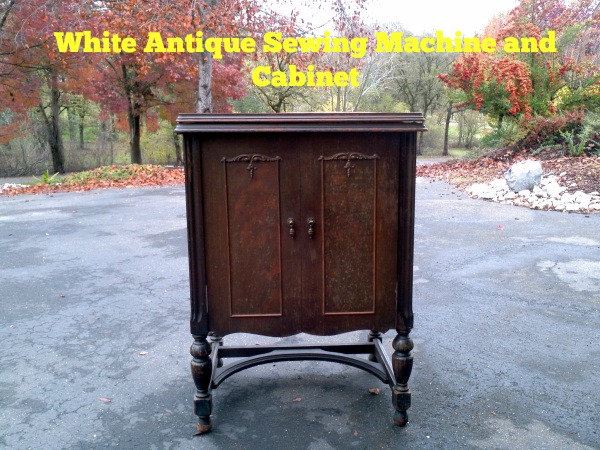
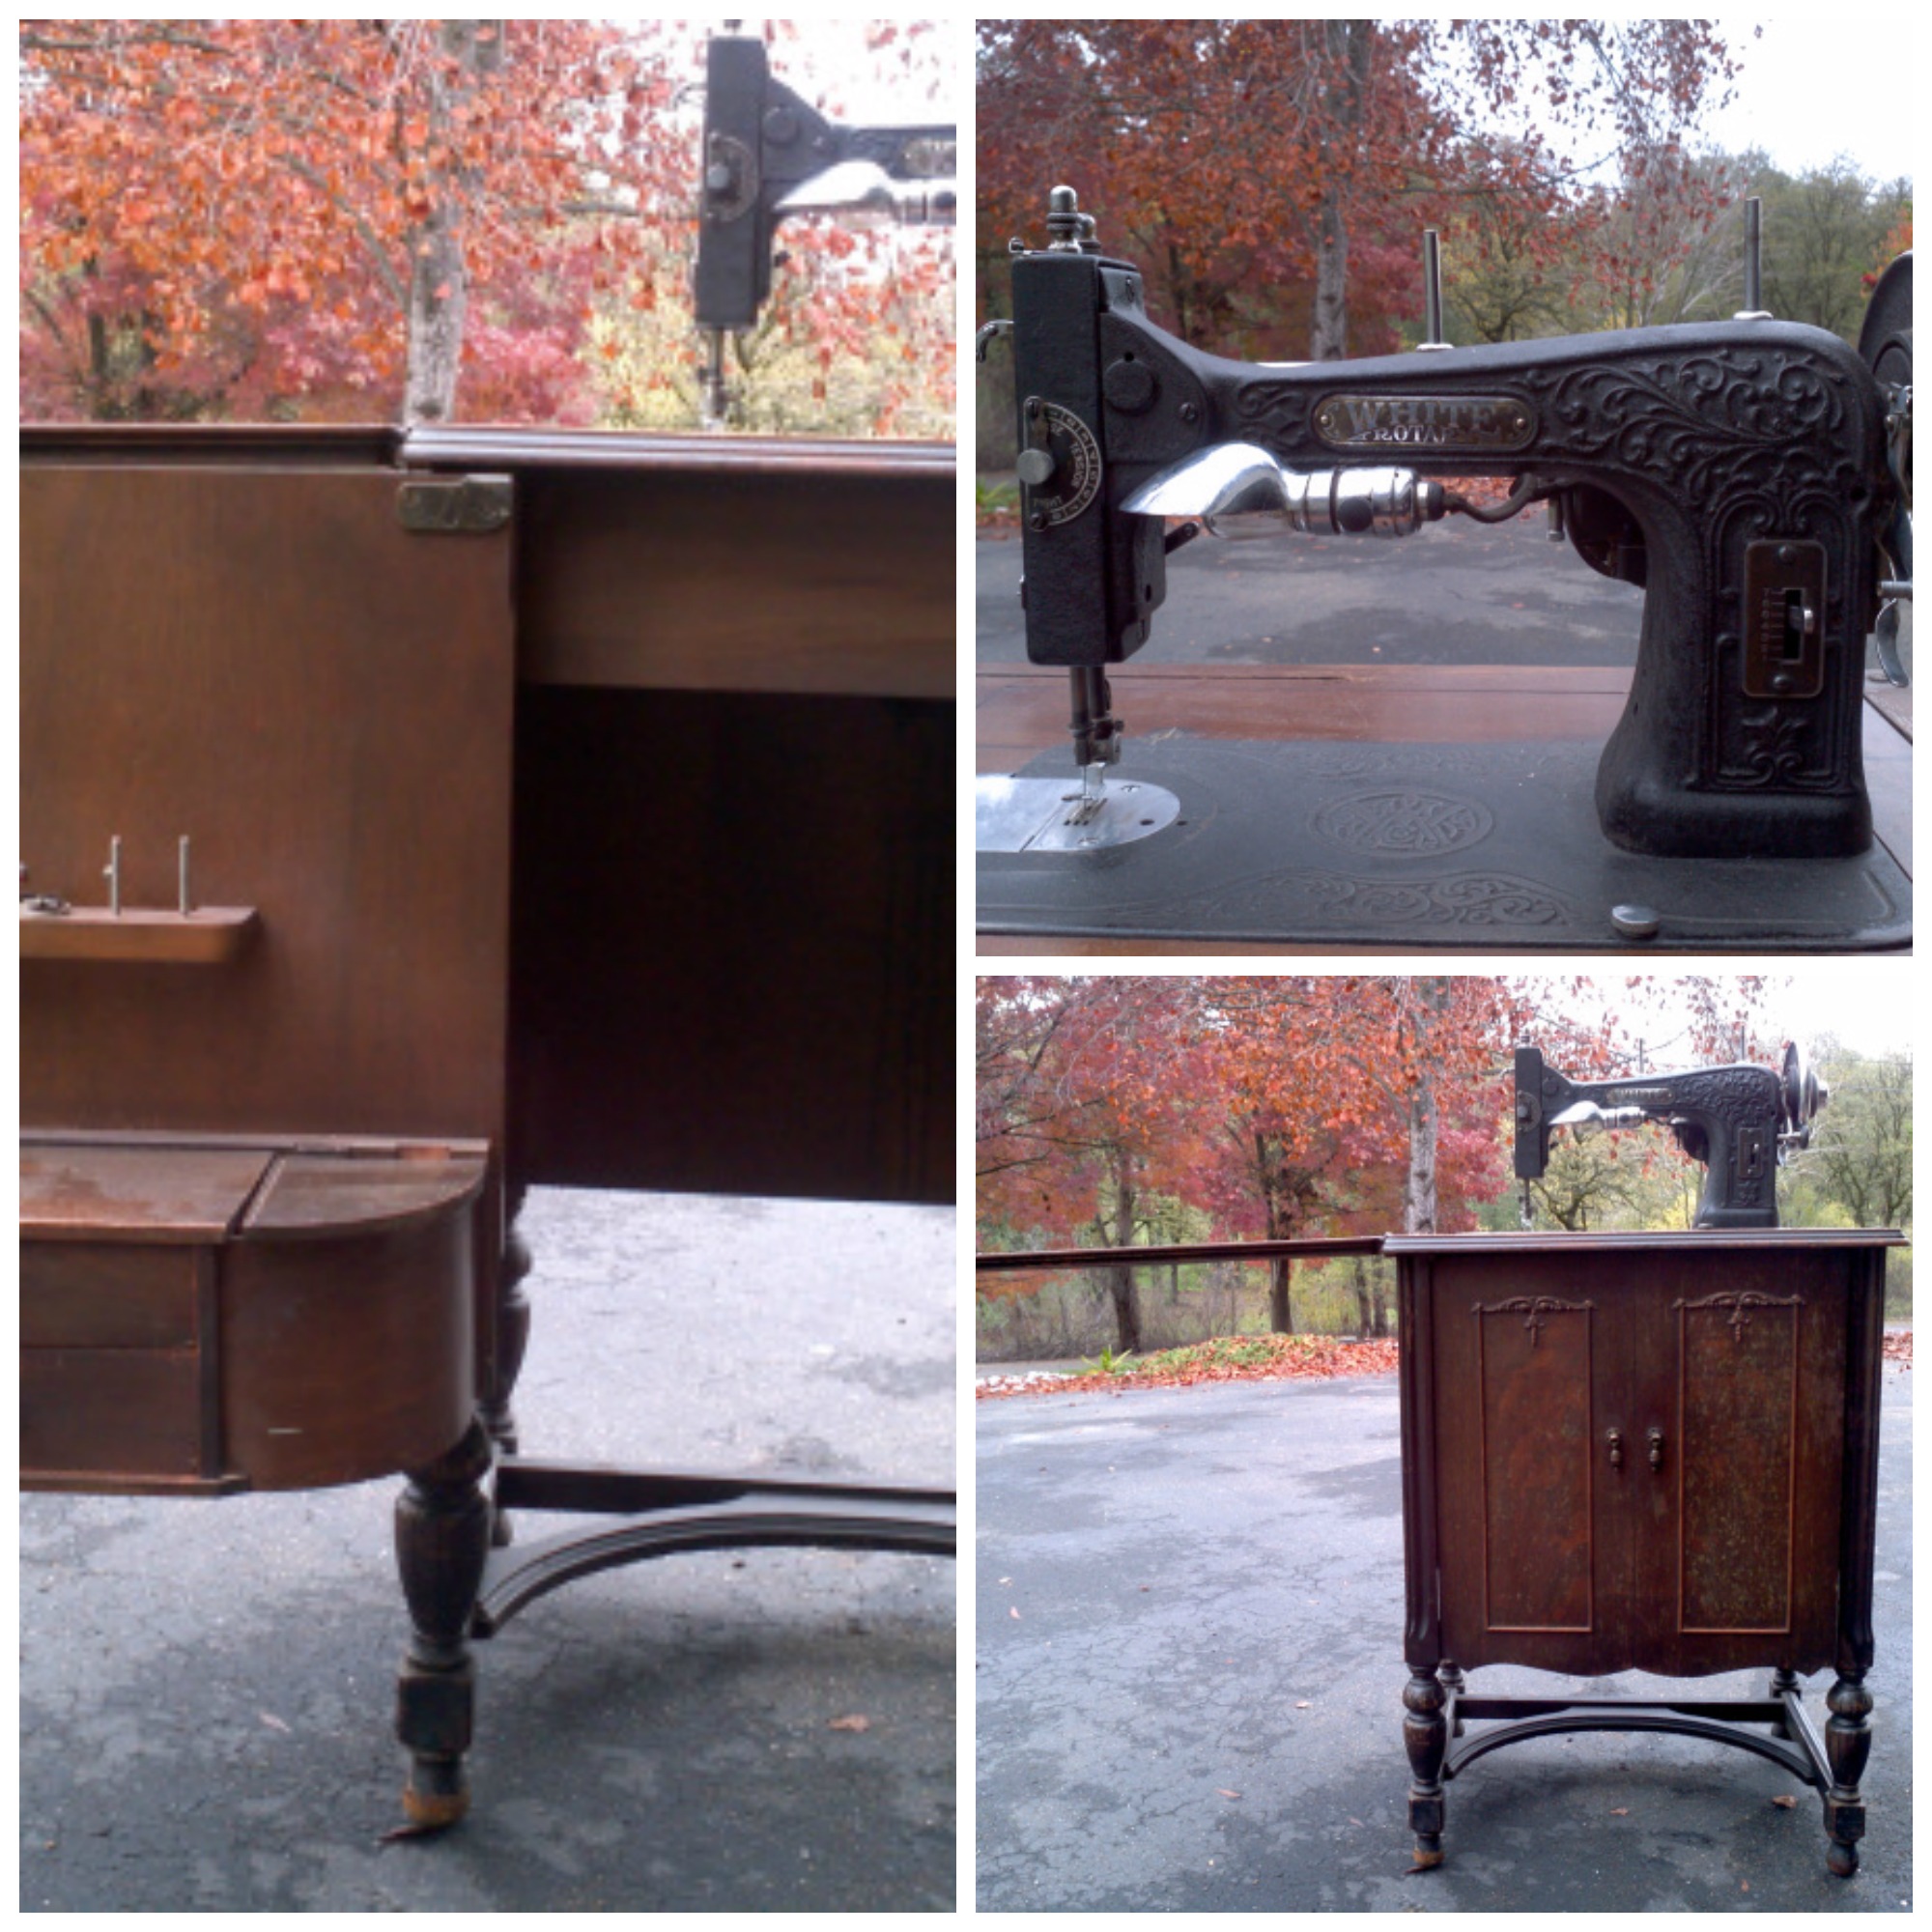
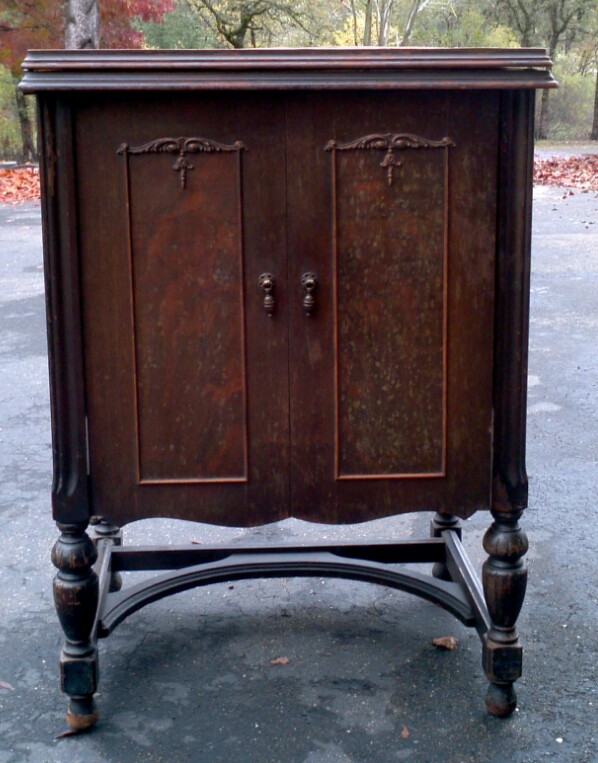
This is what I started with:

Before: Black stereo cabinet

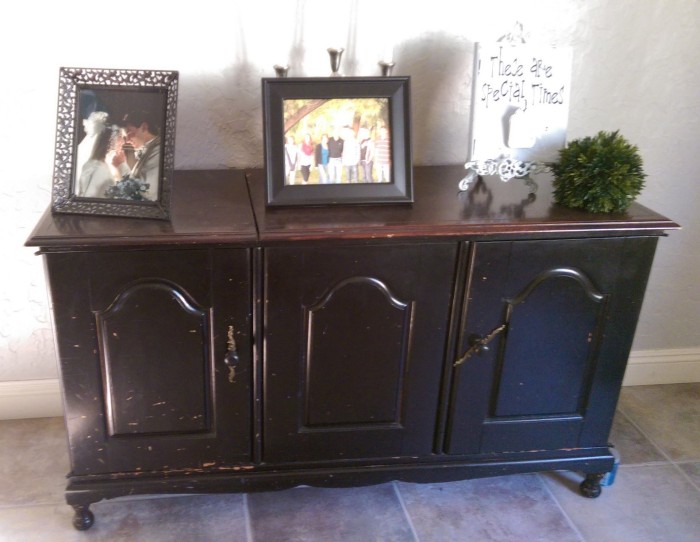
It’s an old stereo cabinet that I painted black years ago, but it was pretty beat up looking.  Ugly!  Before painting the whole thing, I had to decide which of my paint samples I was going to use:

Blue paint sample colors

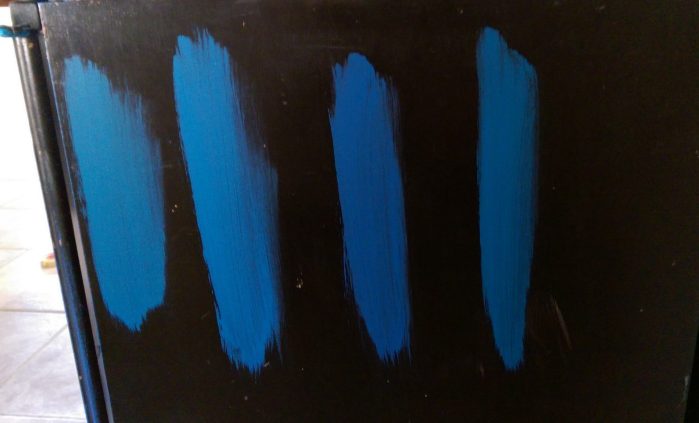
I chose Blue #3 which is Olympic One Celestial Blue.

Those of you who haven’t painted furniture before might think that it is a big undertaking to paint a piece furniture, but…it’s…not!  This project took me no more than 90 minutes start to finish, including drying time.  Less than two measly hours!  And, the coolest part was that I was able to get 2 coats of paint from one little $.99 paint sample with paint left over.   Even if you had to pay full price for the sample, $3.48, that is a killer deal for a “new” piece of furniture.  And, trust me, it does seem like we have a new piece of furniture.  Check it out:

Peacock Blue Cabinet Re-Do

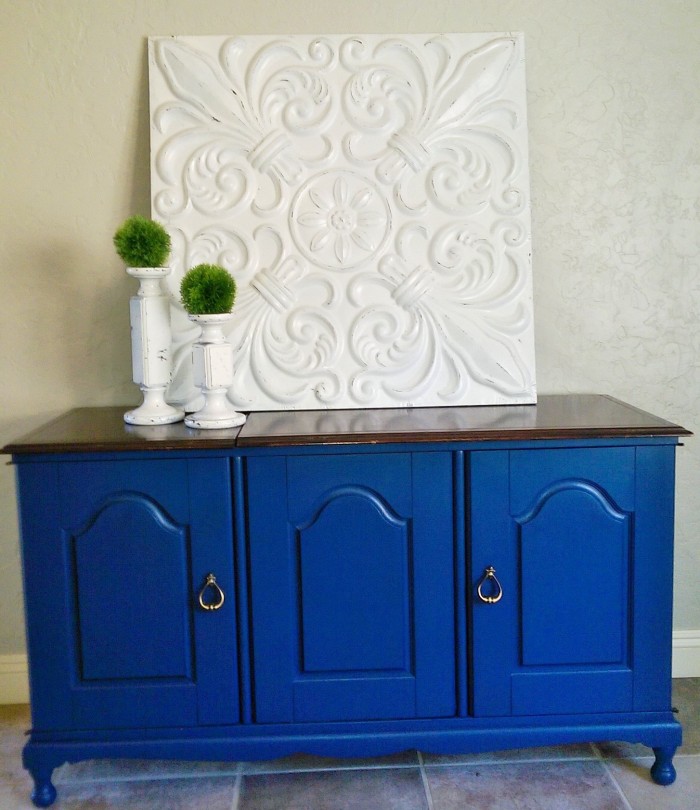
Let me just say that it is really hard to photograph this color accurately in my dining room.  In real life, it is the perfect peacock blue.

You may recognize those door pulls from my haul that I got at the Roses and Rust Vintage Market in Redding, CA last year:

Various furniture hardware

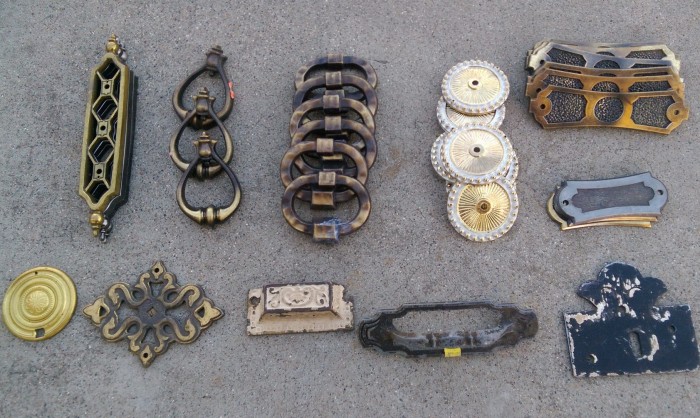
They were 3 for $1!  What a deal!  What a steal!  I guess that if I were being realistic, I would tack that extra $.66 on my title, but I’m not going to.

Are you craving some peacock blue, too?  Grab a paint sample, pick a piece of furniture and do a re-do, too!

Peacock Blue painted cabinet


*********Linking up to these awesome parties*********

I was featured!

Scraptastic Saturday Featuredsm


Painted Furniture: Say “Yes” to Distress?

painted-furniture-distress-title

Happy day friends!  In my last post about the free Craigslist nightstand that I painted, I told you that I wasn’t done with it yet.   This is how it looked when I finished painting it:

White chalk painted Craigslist nightstand

Not half bad, right?  Whenever I paint a piece of furniture, I always get to this point and wonder, “Should I distress it?”.  Do you do that?  It almost goes against the grain to make something look so nice and then take sandpaper to it, doesn’t it?

My experience with distressing painted pieces goes way back to the late 1980’s.  I had attended a church craft night with my sister and after we had painted the wooden craft, they passed out sandpaper to distress the edges.  I thought that they were crazy.  I had just painted the piece to perfection…why would I want to sand off a perfectly good painting job?  I refused and my craft project came home with me with pristine edges.

Let me just say that, in the decades since (holy cow, that makes me sound SO old!), I have come to embrace distressed painted furniture.  Embrace it with big open arms.  Want to see my distressed painted nightstand?  Why do I ask?  Of course you do!

Distressed Painted Nightstand

Yeah, I know the picture is kind of dark.  Sorry about that, but, can you see the difference?

How about some close ups?

Here are a few other painted items in my home that I have done this same subtle distressed finish on:


before-after-distress-collage
Unfortunately, the lighting in these Before and After pics is totally different, but you get the general idea, right?

Here’s the distressed nightstand in its final resting place, our guest room:

wp_20161005_001-1

So, what do YOU think?  Do YOU like the clean, pristine perfect paint look, or do you like the look of subtle distressing?  Personally, I like…both.  Wimpy answer, I know, but sometimes I prefer the subtle distressed look, sometimes I don’t.  I have found that, if I end up hating the distressing on a project, all it takes is a quick brush of paint on the sanded areas and “poof”, we have the pristine look all over again.  Easy peasy, lemon squeezie!

So, again I ask…what’s your take on the matter of painted furniture?  Do you say “Yes” to distress?

distressed-paint-collage


*********Linking up to these awesome parties*********

My Price-less (seriously, it was FREE!) Nightstand

Cover Pic Free Nightstand

Do you want to know my favorite price?  Free, of course!  Same with you?  I like to peruse the Free section of Craigslist every once in a while.  Have you ever done that?  People give away all kinds of stuff:  pianos, boats, yard sale left overs, plaid couches, building supplies, pets, etc., etc., etc..  For the most part, I’m not the least bit interested in what I see, but a few months ago I saw this awesome nightstand posted:

Free Craigslist Nightstand Unpainted

School lesson:  The suffix “less” means “without”.  In other words, without a price.  Free.  Remember…that’s my favorite price.  Yep, this nightstand was price-less.  You can bet that I snapped it up!  Once I got it home, it went straight to the back of my garage, where all good projects go to wait their turn to become awesome.  Soon thereafter, HomeRight kindly sent me this awesome paint sprayer:

homeright-finish-max

The HomeRight Finish Max Fine Finish HVLP Sprayer.  Imagine a choir of angels singing…I swear that’s what I heard when the package arrived.  Thank you HomeRight!

My free (I love saying that!) nightstand was the first project that I decided to tackle with my new sprayer.  Piece of advice…read the instructions + follow the instructions when you are tackling the unknown.  Smart people wrote those instructions, but, after reading them, I decided that I know what I’m doing.  I have painted a lot.  I mean, a lot, so I decided that there was no need to thin the paint.  Big mistake.  Once I humbled myself and thinned the paint like I should have in the first place, the thing worked like a dream.  I think it took about 3 minutes to paint the whole first coat.  Seriously, it took more time to open the paint, mix a batch of chalk paint (thinned a bit…the instructions show just how much), and walk out to the garage than it did to paint my nightstand.  I was insanely impressed!

Hold it!  I’m getting ahead of myself.  Before I started painting I had some prep, of course.  Worst part of painting furniture, wouldn’t you agree?   Actually, it was just a bit of hand sanding.  I lived through it, somehow.

Even though it is widely known that chalk paint can go on pretty much any surface, I decided to spray on some canned primer just because.  I remember watching a YouTube video years ago of Annie Sloan hand painting a dresser and she painted the handles at the same time with the same paint that she painted the dresser.  I really like the look of the handles being more of a texture, not a standout color, so I decided to also spray a coat of primer on those.

Spray Primed Decorative Nightstand

Ready for the after?  Want to see what 2 coats of paint and about 6 minutes of total spraying time with my new HomeRight sprayer can do?  Well, here you go!

White Painted Decorative Nightstand

Do. You. Love. It?  My price-less nightstand?  I totally do, but I’m not done yet.  Check back soon to see the finished product.  I also plan to share some things that I have learned by using my paint sprayer.  I’ll keep you posted.  Now, head right over to your local Craigslist and check out the Free section.  Hope you find something good!


*********Linking up to these awesome parties*********


Scraptastic Saturday Featuredsm


Couch Cushions: Frumpy to Fab

We have a pair of twin couches that are over 10 years old and have been looking pretty frumpy for a while now.

WP_20151013_014

See what I mean?  Lumpy, bumpy back cushions.  Ugghh.  When we bought these years ago, the back cushions were just stuffed with, well, stuffing.  No foam cushion and no structure.  I ended up removing half of the stuffing and inserting some foam from my old couch to shape them up.

Flash forward a decade and the fluffy stuffing turned lumpy.  Time for a quick and easy fix.  First, I pulled everything out of each cushion and found a lot of matted stuffing that I was ready to trash right away until I realized how easy it is to un-mat it.

I was so surprised to see how just a few tugs on the matted masses turned them nice and fluffy.  It really is as simple as stretching and pulling in different directions.  Kind of relaxing even.  Next, I laid out some quilt batting and placed my foam cushion on one end and added fluffed up stuffing to one side…

WP_20151013_005 1

…flipped it over (after covering that side with batting) and repeated it on the other side.  I even added fluff to the top, thin side of the cushion.  When all of that was done, it looked like this:

WP_20151013_006 1

At this point, I tried a trick that I saw years ago on some HGTV show:  I cut a slit in a garbage bag to make it easier to slide into the cushion cover.  I could have used a larger bag, but this worked just fine:

WP_20151013_007

As soon as the cushion was in, I just pulled the plastic out.  It was way easier than I thought I would be.  After that, I just shoved in handfuls of fluffed up stuffing in all of the edges, making sure to stay between the layers of quilt batting to avoid a lumpy look.

Voila!  So much better, don’t you think?

It almost seems like we got new couches, but of course, we didn’t.  This was way cheaper, too.  Less than $20 for enough batting for 2 couches after using my JoAnn’s coupon.

WP_20151013_012

I’m thinking we can get another decade out of these couches now.

How are your couches looking?  Is it time to smooth them out or fluff their stuff?  My advice is to go for it.  I think you’ll be glad you did.

Frumpy-Fab


*********Linking up to these awesome parties*********


Amazing Find: Antique White Brand Sewing Machine and Cabinet

Can I just say….WOW!  Look what I just got for 50 smackeroos!  This cabinet!

WhiteSewingTable2

Take a moment and adore it with me.  Aaaahhh.  Ohhhh.  OK, that’s enough.  Thanks!

WhiteSewingCabinetCollage

I was in our local small town, tiny thrift shop the other day and saw this baby.  She was opened up with all kinds of misc. junk displayed all over the table top.  Hard to even see it for all of the junk on it.  But… then I stepped back and saw the details and was whooped.  Price tag said $100, but everything in the store was 50% off that day.  So, like a dummy, I left the store.  Dum-mm-y.  The whole drive home I thought that I should turn around and go get it, but I didn’t.  Once at home, I agonized about driving back the 10 minutes to go get it until it was just too much to take.  I grabbed my 14 year old, bribed her to go inside a thrift store with me and hustled back down there.

As soon as we walked into the store, we headed right to the machine and started removing all of the junk from it and another lady came up and started checking it out.  I subtlety hinted that it was mine and she graciously backed away… for a minute.  She then kept coming back, cursing herself for not nabbing it sooner.  She even went and got her husband to come and look at it, all the while making sure that I was indeed going to buy it.  Now, it is not in my nature to be mean, at all, but I was not about to walk away from this find again.  Poor lady.  I really do feel bad for her.  She was 15 seconds too late to buy this:

IMG_20141121_104553

Check this out:

IMG_20141121_104957

…you use your knee instead of a foot petal.  Really…how cool is that?  Want to see how easy it is to stow the sewing machine away?

IMG_20141121_105128

You just lift up and close the extended side table and it disappears into the cabinet.   I really hope that this post doesn’t sound all braggy.  I am just super excited and thought that I would share.

Now, the Million Dollar Question:  Should I leave it as is or paint it.  I know that some people (my husband and my dad included) would want to slap me silly (in a non-violent way!) for even thinking of painting this antique.  I tend to prefer painted wood over non-painted.  It’s just me.  Ask my hubby.  He will go on and on about how I painted over his 8″ oak trim molding that he planed to perfection and made a decorative edge with his router.  I will go on and on about how much better it looks painted white.  I painted that and just about every other bit of molding, trim, wood ceilings, etc., etc., etc. in our old house.  Totally improved the place.  My opinion.  But look at these examples:

http://www.hometalk.com/1420436/vintage-vanity-in-black


http://campclem.com/2012/03/05/scoring-and-refinishing-a-craigslist-furniture-deal-how-to/


http://orphanswithmakeup.com/journal/2014/4/5/paris-grey-antique-sideboard

See what I mean?  Hard decision.

IMG_20141121_105736

So….what would YOU do?  Leave it or paint it?