Snowman/Scarecrow Craft

scarecrow-snowman

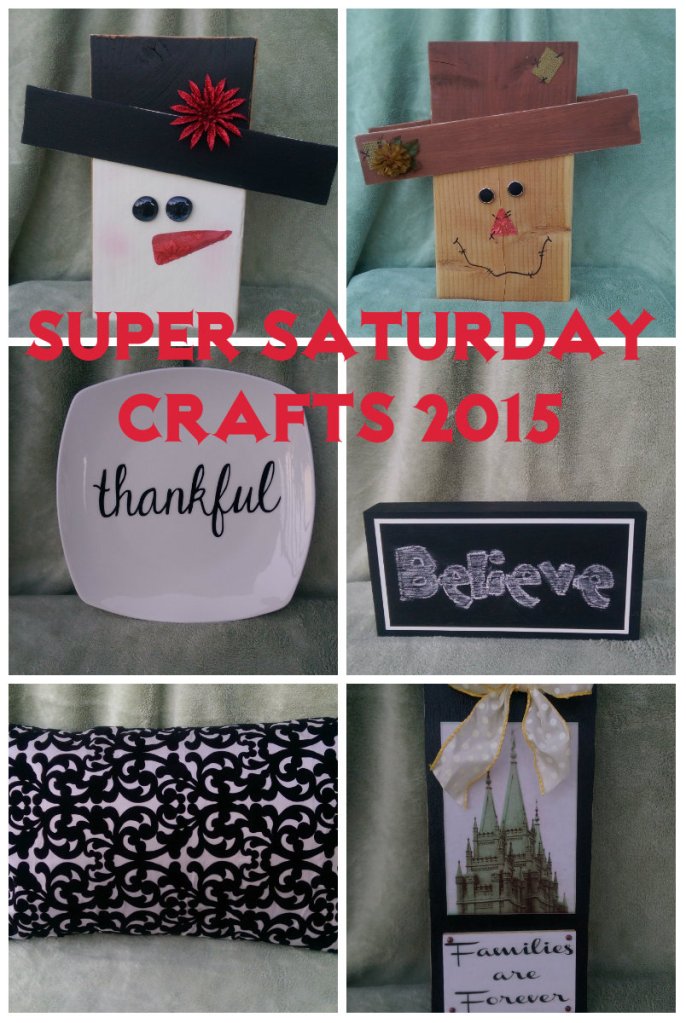
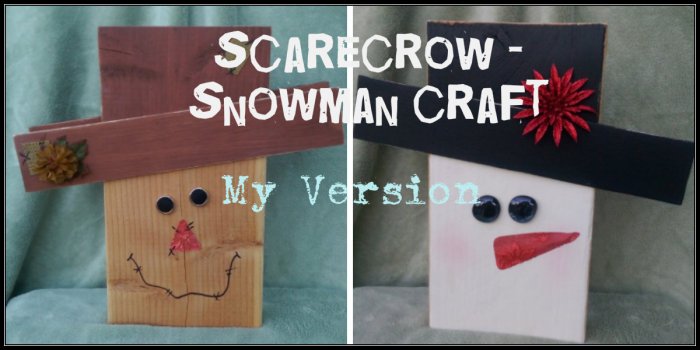
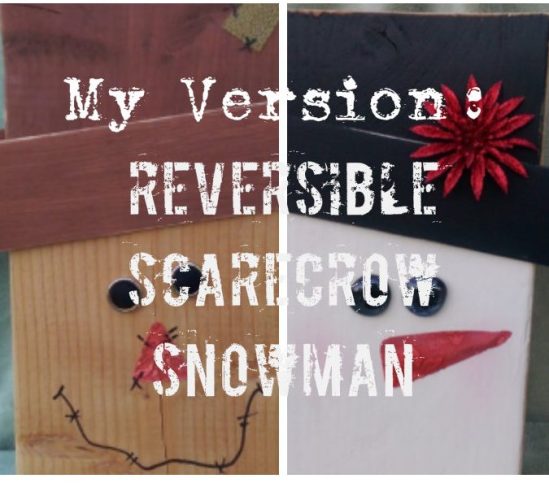
Scarecrow/Snowman Craft: My Version

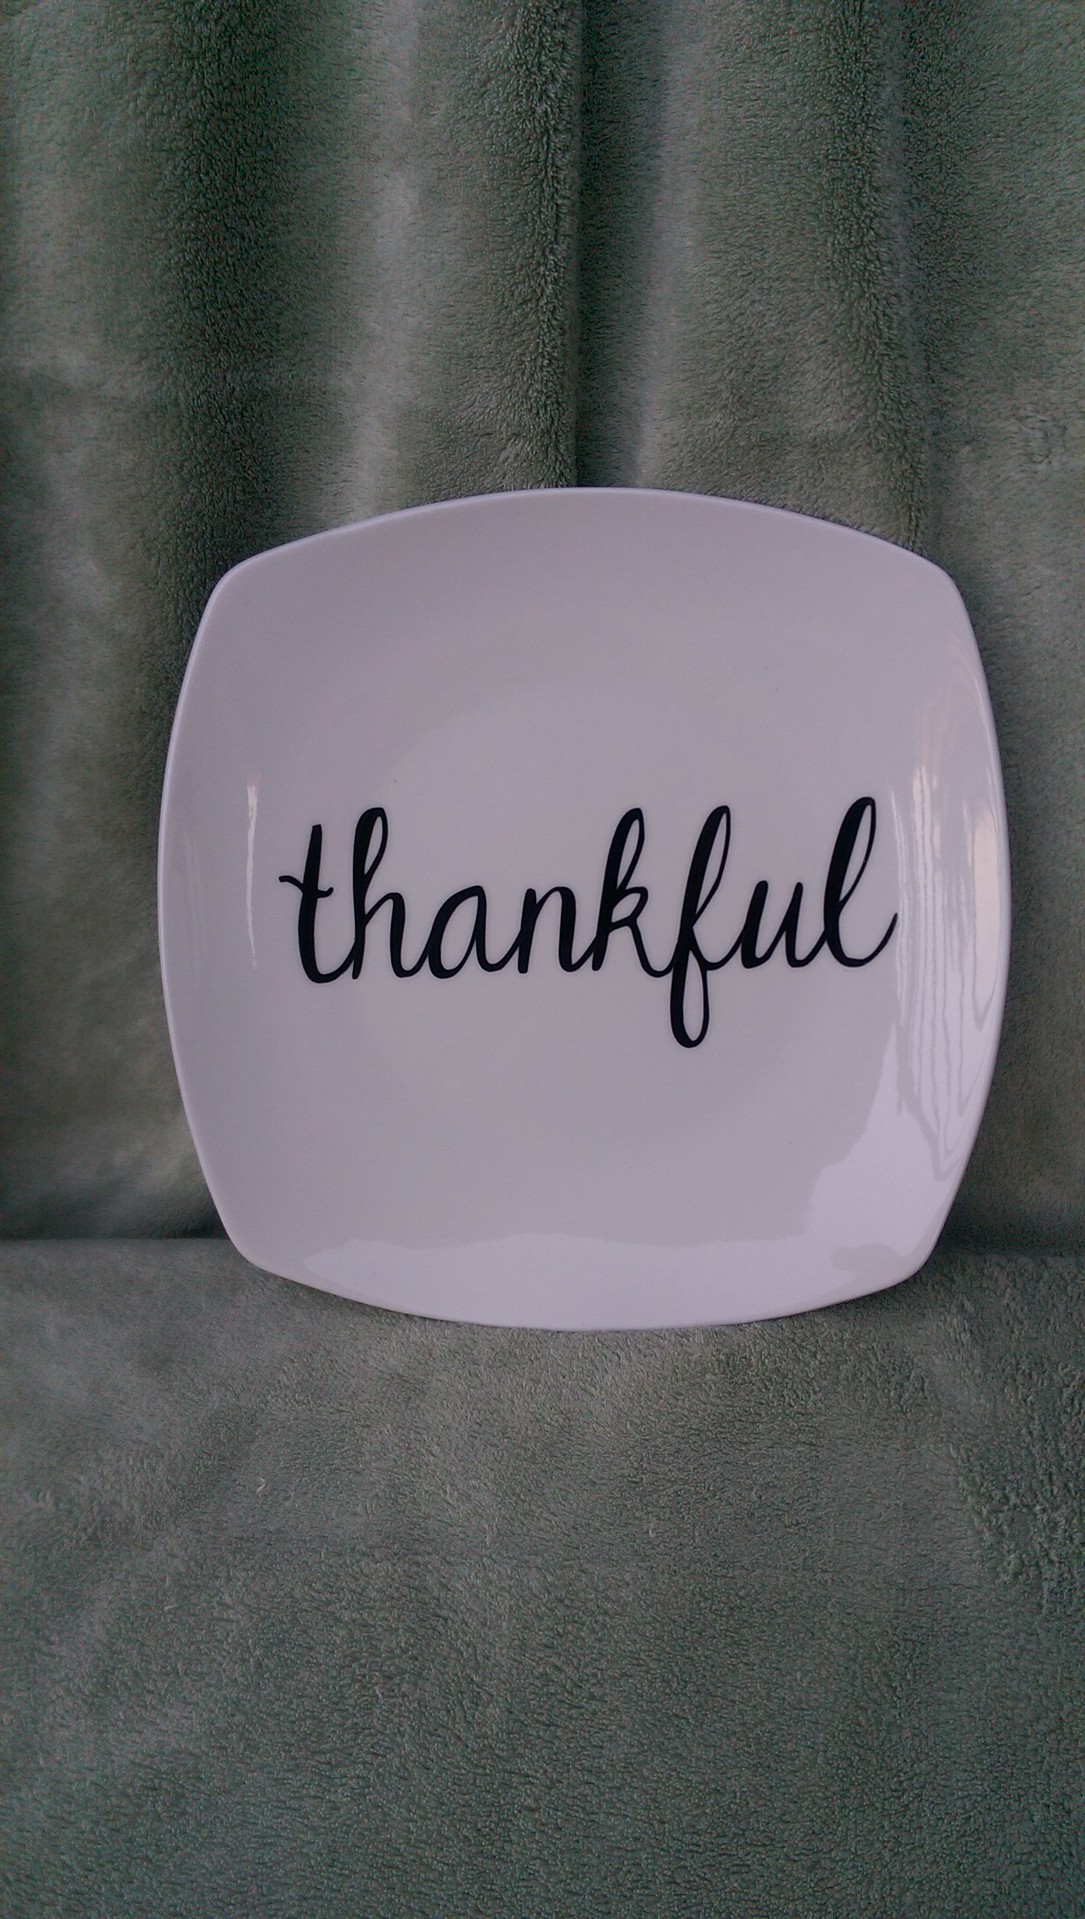
Lookie, lookie!  I am finally posting my version of a craft that I’m sure most of you have seen out there in the crafting/Pinterest/blog world:  A dual purpose, two-side craft with a scarecrow face on one side and a snowman face on the other.  I designed this craft for our Super Saturday craft day event in 2015 and promised to included a tutorial way back then.  Yep…I forgot to do that, so now I’m keeping that promise.  All of the other versions of this craft that I have seen are done with pallet boards or bead board, but I wanted a simpler-to-make version.   If you go to Pinterest and search “Scarecrow Snowman Reversible”, you will see oodles of versions of this craft.  But, here is how I did mine:

Supplies:

Supplies for Scarecrow Snowman

2 x 8 Lumber-  13 1/2 inches

Wood trim- 13 1/2 inches (can be flat or decorative trim)

White, black, brown and orange craft paint

Textured paper for noses (mine is wallpaper)

Q-Tip (to add dimension to the carrot nose)

Two large flat marbles (Dollar Tree)

Two large buttons

Misc. embellishments for decorating

Black Sharpie

Noses Pattern

Powdered blush (raid your makeup drawer!)

Glue gun

Ready?  OK!

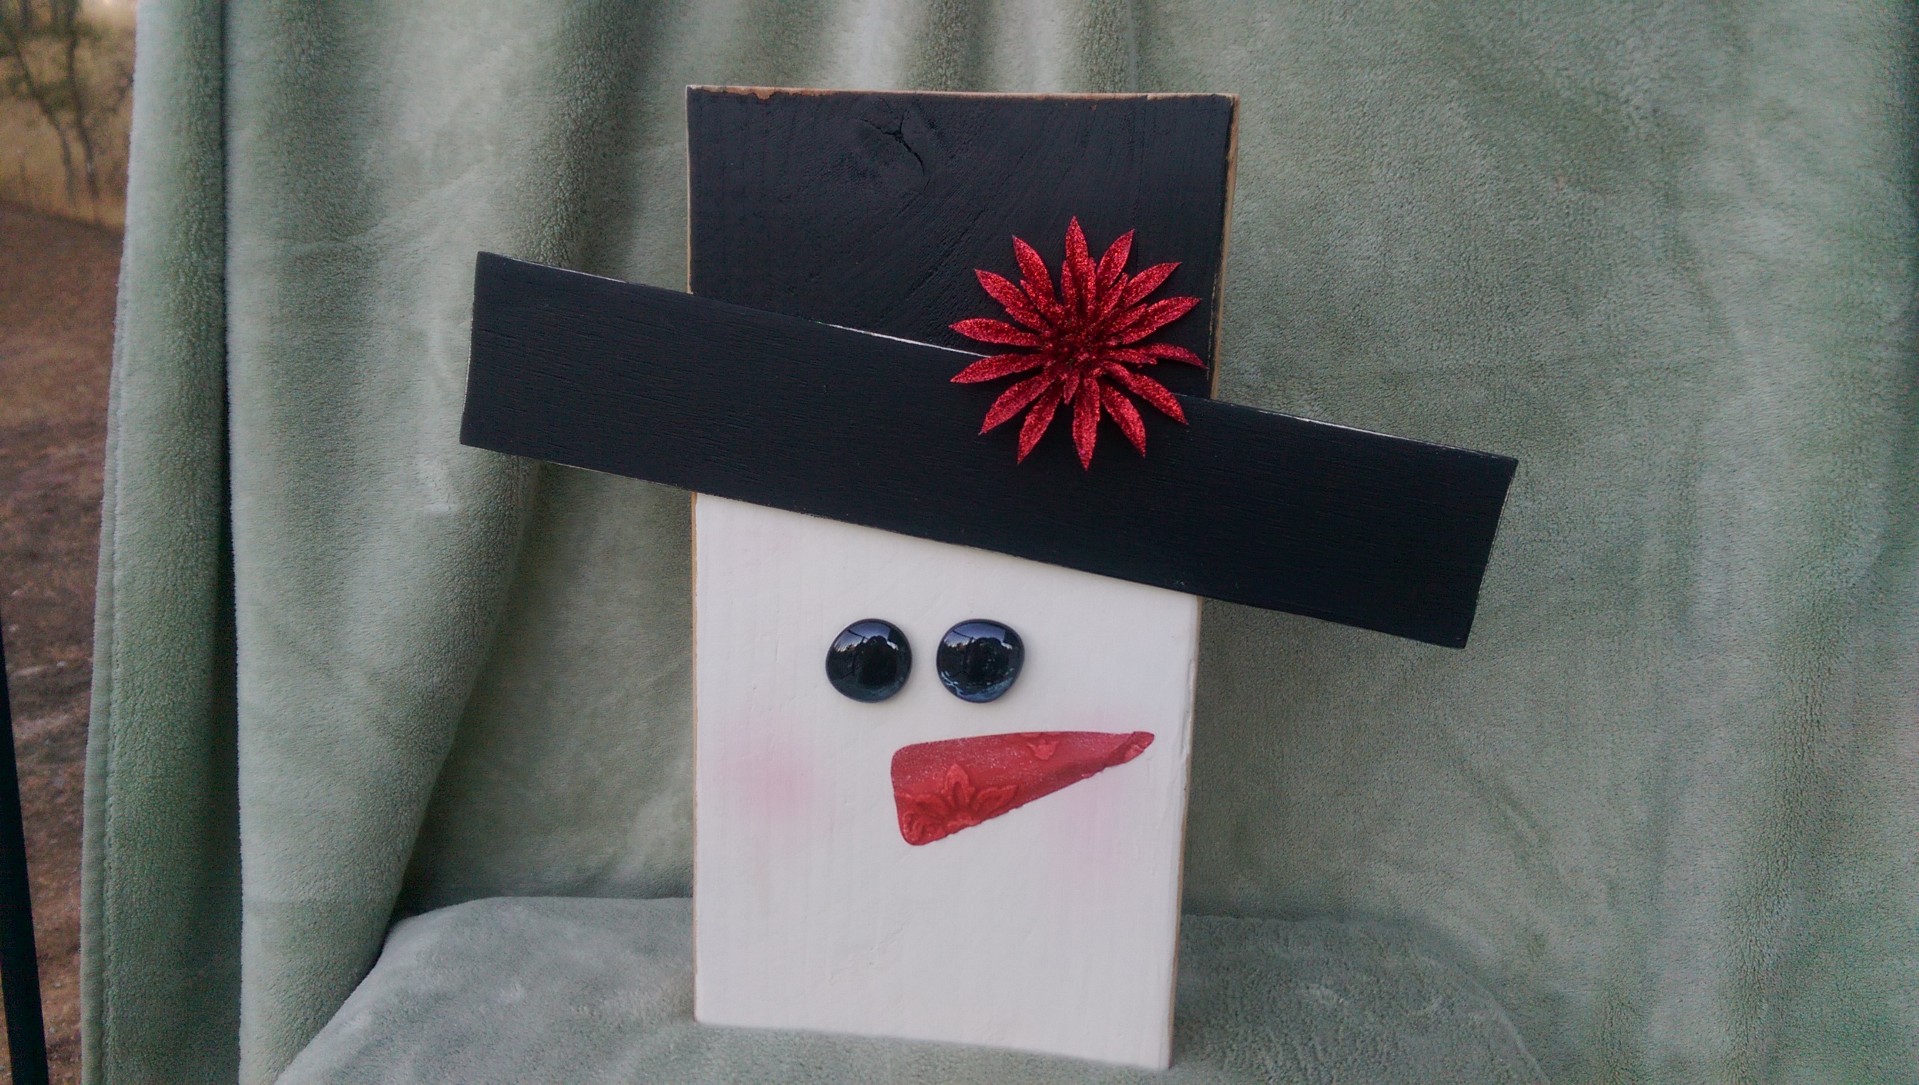
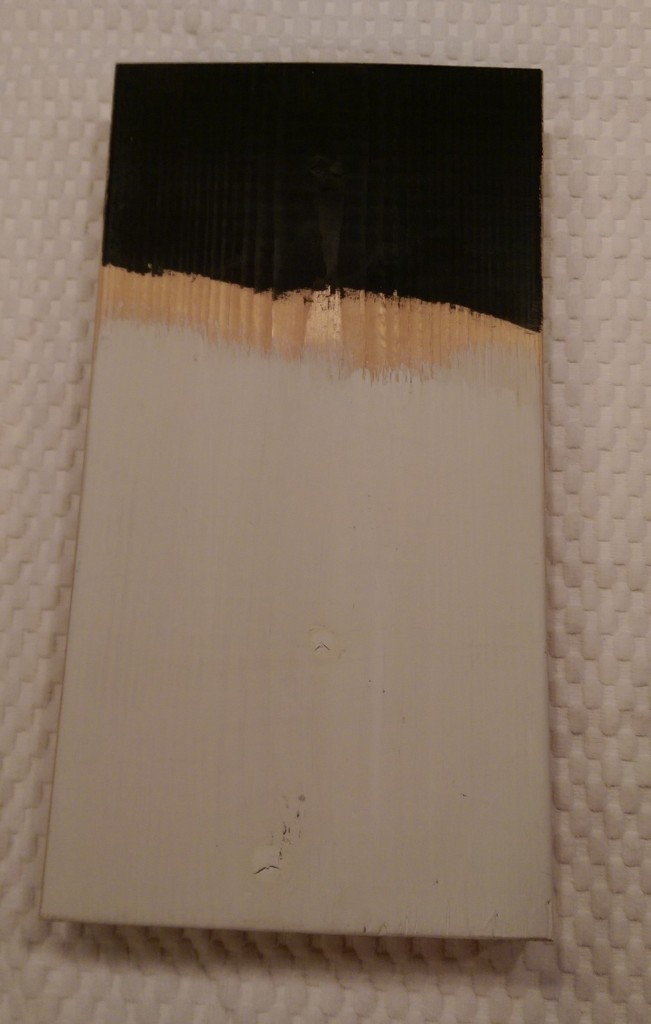
First, figure out where you want your wood trim hat brim angle to be.  I just placed it where I wanted it, traced down each side of the trim with a pencil, then roughly painted white on the bottom and black on the top.  Don’t worry about painting the sides of the wood…just the top only, since this craft is reversible.

Snowman Craft rough painting

The board is sturdy enough to stand, so you can paint the scarecrow side, as well.  Matching the angle from the snowman side, roughly paint the top only of the opposite side brown.

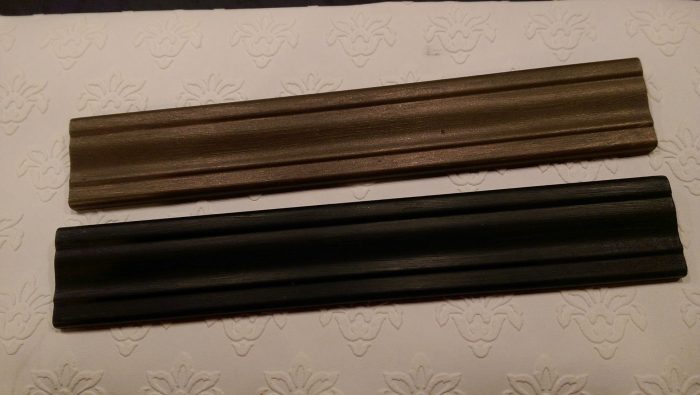
While you have black or brown paint on your brush, paint both sides of your trim pieces, one side black and one side brown.  To be clear, when you are looking at the snowman side, you will be able to slightly see the back of the rim from the scarecrow side so you want to see black paint, and vise versa, so each trim piece has one side painted black and one side painted brown.  A hair dryer comes in handy to help speed up drying time !

Painted wood trim hat brims

Next , create those snowman eyes.  I just dipped my finger tip in black paint and dabbed a fairly thick coat of paint on the back side of each flat marble.  I think these “eyes” look so reflective and dreamy!  Don’t you agree?

snowman-eyes-and-nose

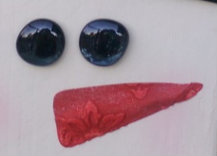
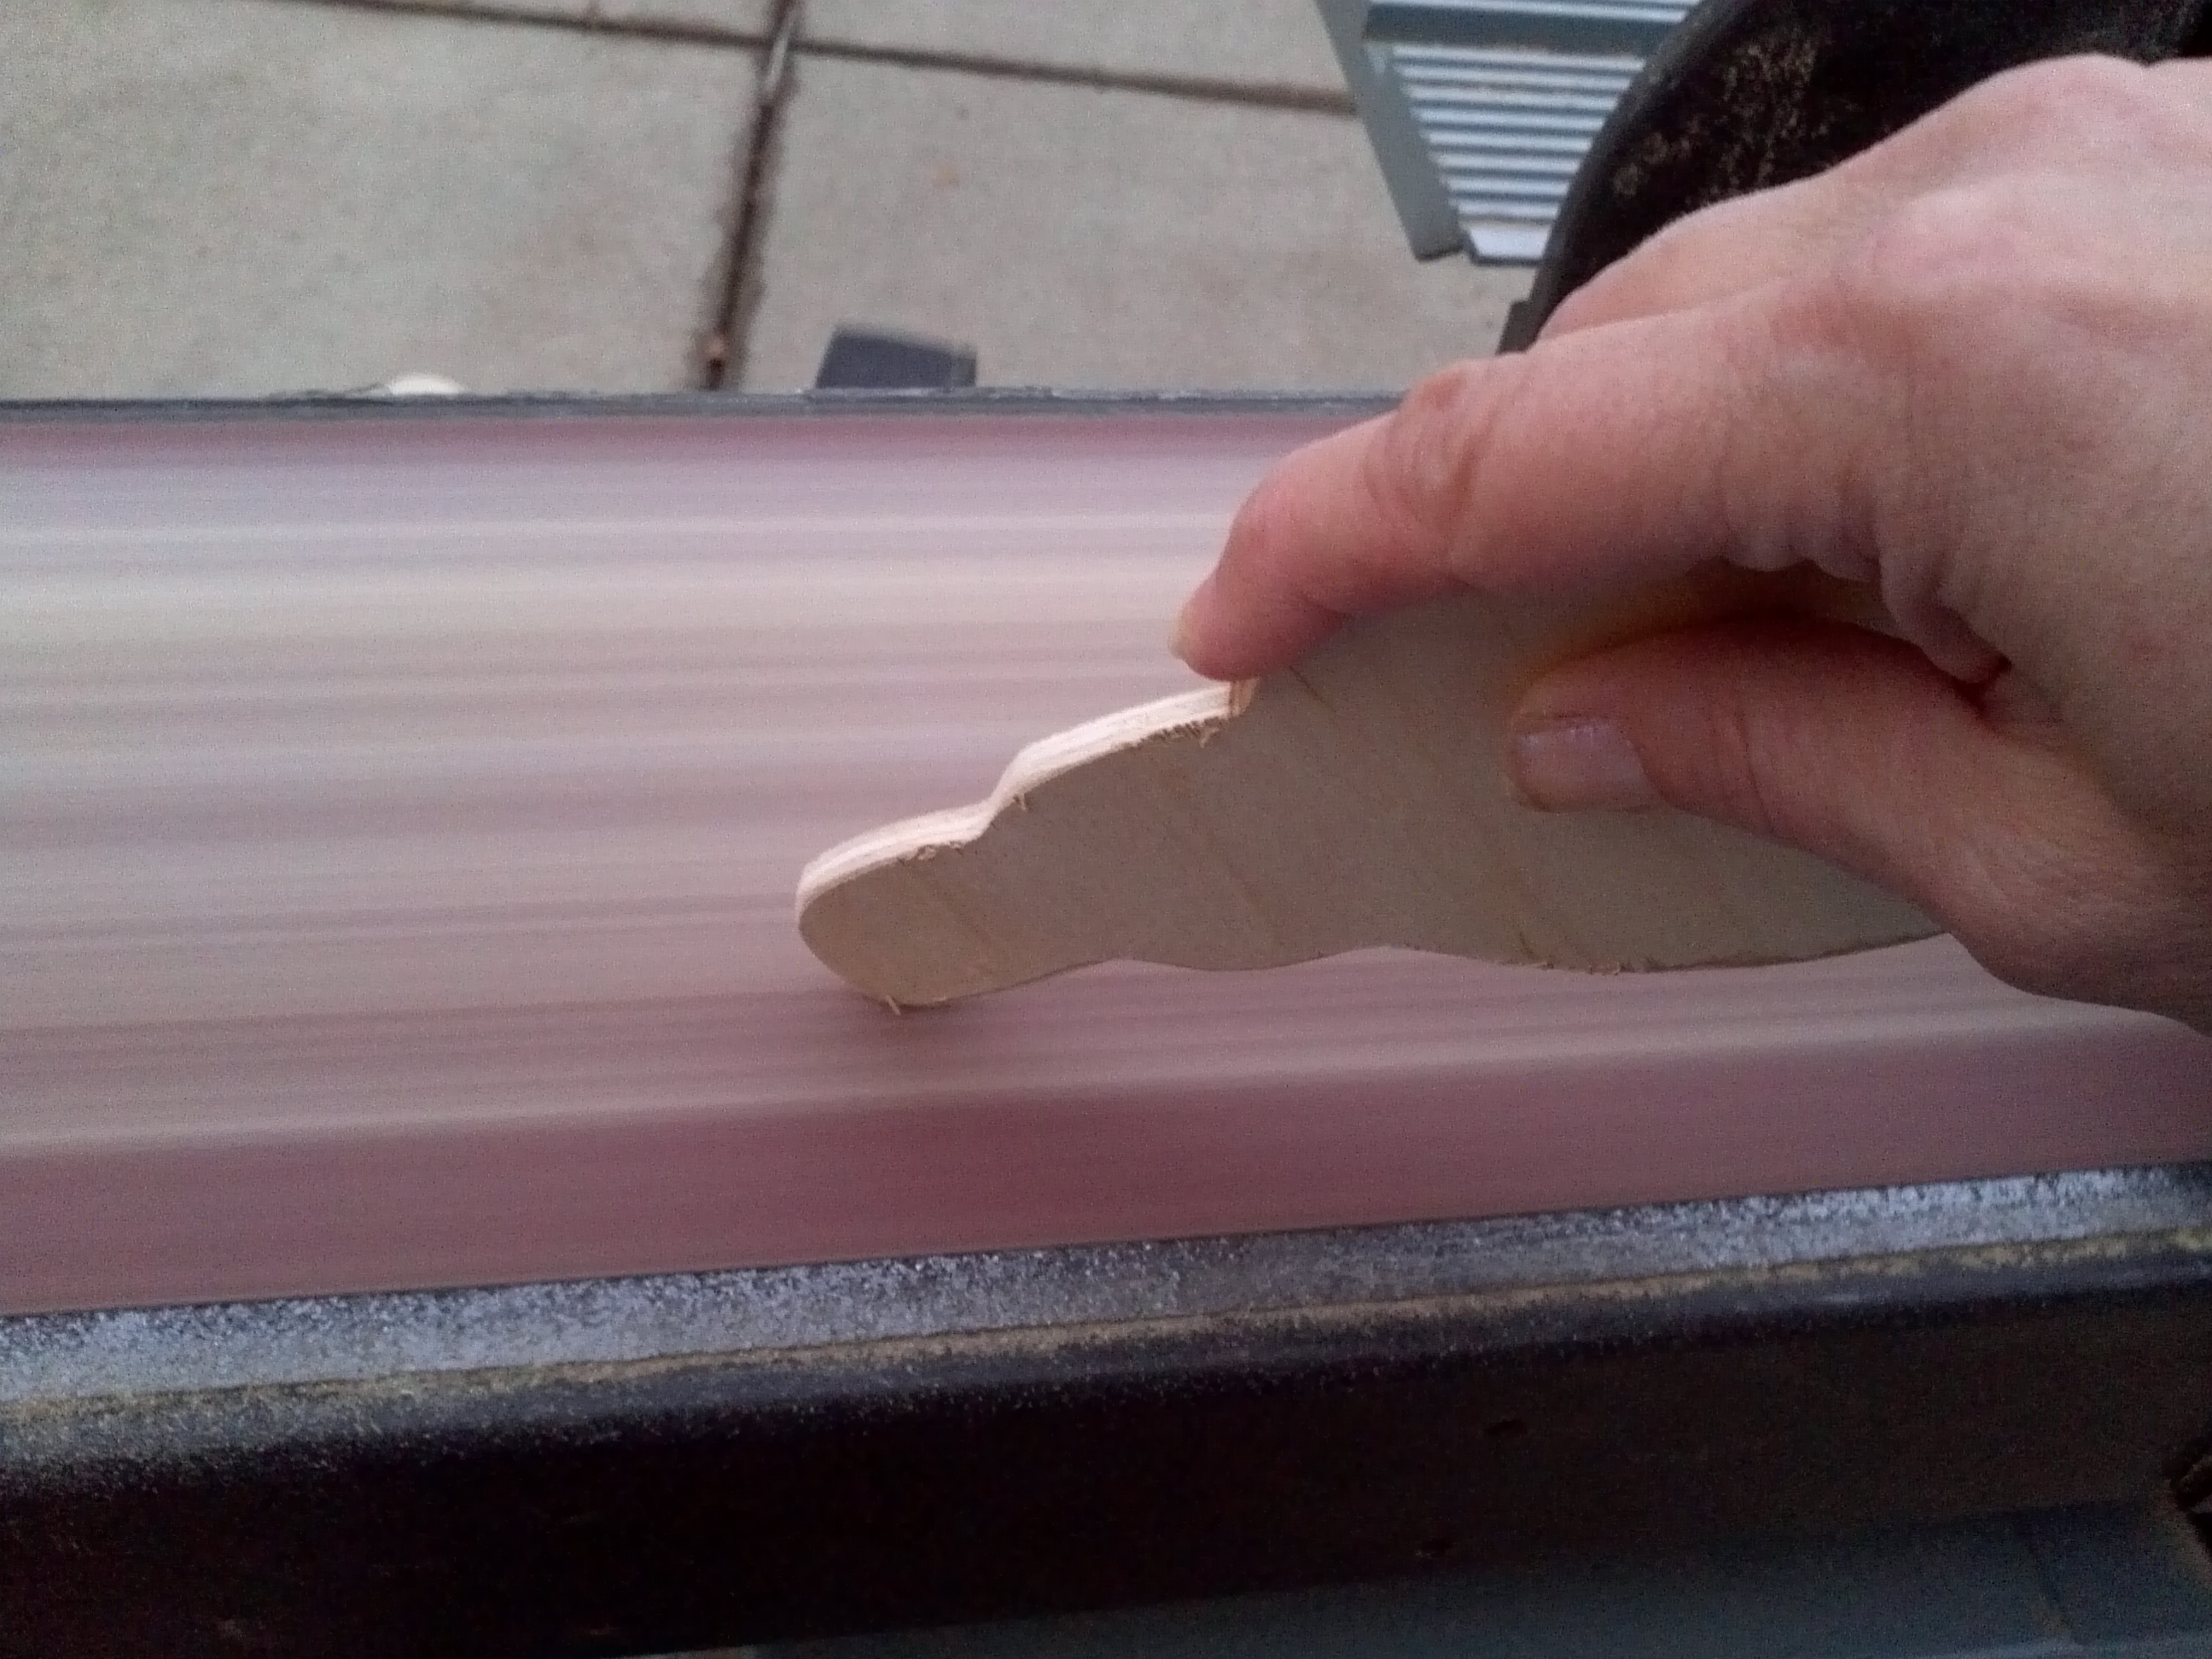
While the paint is drying, cut out and paint (if not already orange) the textured paper noses.  Click on this blue Noses Pattern link to print out the pattern that I created, or make your own shapes.

Time to assemble:

Use hot glue to secure both hat brims.  I also added a small flat head screw to ensure that brim will never fall off.  You can hide that with embellishments.

The faces are where you can get creative.  Play around with the “eyes” and “noses” to see how you want to place them.  On my scarecrow, I placed one button eye slightly lower then the other for a playful look.  For my snowman, I place the eyes fairly close together.

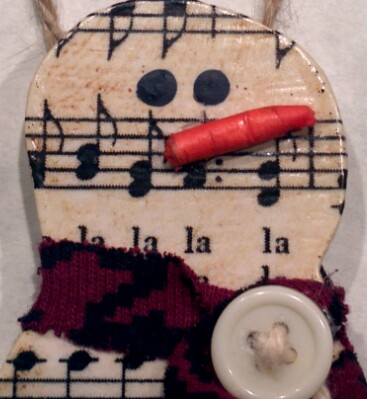
I added “stitch marks” with a Sharpie for my scarecrow nose.  To add dimension to the snowman’s carrot nose, I grabbed a Q-Tip  and glued it right where I wanted the nose placed, then hot glued the carrot shape on top of it, securing all of the edges.

The scarecrow got a large Sharpie-drawn smile with “stitch marks”.  The snowman didn’t get a mouth, but I used my finger to rub a bit of blush on his cheeks.

Personalize:

Give these two some personality by adding silk or glittery flowers, patches of fabric, raffia, ribbon…whatever your heart desires.  To distress, or not to distress- that is the question.  You get to choose whether or not to take sandpaper to the edges.

Now, here is the best part…

You can pull this cute craft out for your holiday decorating in September as you decorate for fall, using the Scarecrow side.  After Thanksgiving, flip it around to display the Snowman side and let him stay there all through January.  I love that!

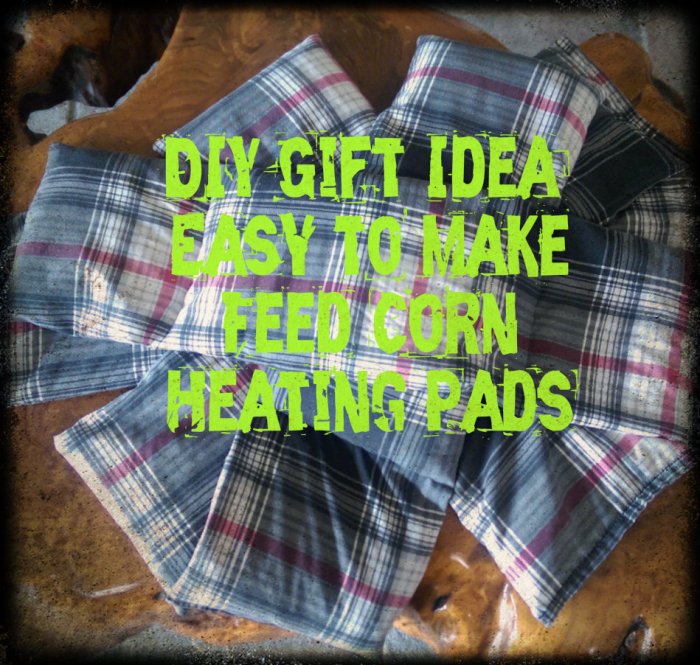
All in all, this is a super-simple, super-cute craft that gives double your pleasure.  They make super cute gifts!  I should know…I gave mine away last year.  I’m off to make another one, (well, two) right this very minute.  Why don’t you go do the same?

scarecrowsnowmantitle


*********Linking up to these awesome parties*********


I was featured!

Sarah Celebrates


Easy DIY Gift: Corn Heating Pads

DIY Corn Heating Pads

It’s that time of year again!  Eeeek!  The Holidays!  Thanksgiving…Christmas…New Year’s…I love it all!  Right now I should be packing for our trip to Utah, but I just have to share what I have been working on (instead of packing!).  Making microwavable feed corn heating pads!

Last year I blogged about making rice heating pads using pillow cases.  They really are simple to make and we love using them.  After being over-heated too many times, however, the burned rice smell can get a bit nauseating,  so I decided to try something different: Feed corn.

Feed Corn

My friend Patrice told me about feed corn heating “bags” years ago and how they don’t smell like rice does and how they hold the heat longer than rice.  I decided to give corn a whirl.

Just so you know, feed corn is dirt cheap.  I paid $12 for a 50 lb. bag.  For the fabric, I found a really nice heavy full size flat sheet with a plaid pattern that is a dream to sew on.  I love plaid because the lines make it easier to cut and sew straight lines.  I like to start out with a piece of fabric that is about 25 inches by 14 inches, but really, you can make these any size and shape.

WP_20151124_005

With this size, I add 2 scant cups of corn to each of the outside edges and 2 1/2 cups to the larger center section.  Again you can go to my tutorial to see how to make these.  Once you get the hang of it, you could probably rival Santa’s elves in gift making!

WP_20151124_010

Oh, another fabric idea:  My son had outgrown his Grinch pajama bottoms, so I just cut off the legs, straightened out the seams to form rectangles and made microwavable heating pads out of them, as well.

WP_20151124_013

As a side note, these take a bit longer to heat up than the rice ones do.  I would start with 2 1/2 minutes, but I like how it feels after 3 minutes.  For heaven’s sakes, don’t overheat them and fry yourselves!  Or anyone else!

WP_20151124_011

 If you are stumped about what to get for anyone this Holiday season, I guarantee that these microwavable feed corn heating pads will be a hit.  Moms, dads, grandparents, teachers, siblings, friends, children of all ages will love them.   They are great for aches and pains, for warming cold tooties and pre-warming a bed on a cold winter night.  Trust me on this one…these heating pads are a popular commodity in our home.

*********Linking up to these awesome parties*********


Super Saturday Craft Day

SuperSaturday2015

One of my favorite things to do this time of year is to help organize a “Super Saturday” at my church.  Super Saturday is a day where the women from church and their friends, family, neighbors…can come together and craft.  This event is always in November so we can make holiday decorations as well as inexpensive gifts for Christmas giving.  I just thought that I would share what we are doing this year:

This Snowman/Scarecrow craft was requested by someone who had seen a similar craft online using planks.   As you can see, this craft is reversible, making it possible to have it out from October through January.  Love that!  I will do a tutorial on this soon.  Promise!  ***UPDATE: Here is the tutorial***

WP_20151104_009 WP_20151104_010

This 2 minute craft  is great for display as well as for holding a plate of holiday goodies.  It is as simple as removing the backing from the vinyl sticker that I cut with my Roland Dr. Stika machine, placing the sticker and rubbing it to smooth it out, then removing the masking layer.  Easy peasy!  I love how simplistic it looks.

WP_20151104_011

I found some little wood boxes that I thought would make perfect little chalkboards.  Before Super Saturday, I will paint the boxes white.  That day we will add a vinyl frame to use as a stencil.  After painting with chalkboard paint and letting it dry (we always use hair dryers at Super Saturday to speed up the drying process!), we will remove the frame vinyl to expose the white below.  I’m also going to do a quick demo about how to easily “write” on chalkboards.  I love that this little guy can stay up year round.  I love, love, love chalkboards and the fact that “art” can change in a matter of seconds.

WP_20151104_012

We are also going to do a demo of how to make a 5 minute pillow cover.  Soooo easy!  Here is a great video tutorial to show you how it’s done and here is one of the many pillows that I have made this way:

WP_20151104_013

Lastly, here is a craft that I patterned off of one that my friend found online and loved.  I made sure to use an image that is copyright free of the LDS Salt Lake Temple spires.  We will decoupage that as well as the saying, “Families are Forever”.  This idea can be used in a thousand different ways, using different pics (pics of children and grandchildren, family home…) and sayings.  I drilled tiny holes in each corner of the word wood so I could easily insert little brads for added detail.  I also drilled a couple of larger holes on the top for the ribbon to go in and, BAM! it’s a fabulous item to hang in your own home or to give as a gift.

WP_20151104_014

I’m so excited for this Super Saturday event…I can hardly wait!  It is so much fun to turn on the Christmas tunes and work and laugh and craft with friends.

Do you participate in a similar crafting event?   If you are not aware of a similar event around you, why don’t YOU get one started?  Grab your friends and family and get crafting!  You just might end up with some pretty cool stuff and warm memories as a result.


********* Linking up to these awesome parties!*********

Welcome to 31 Days

DIY: Snowman Ornament Carrot Nose

Do you like snowmen?  I adore snowmen!  I even have a snowman themed tree that I put up in my dining room each year.  It rarely snows where I live in N. Cal, but I still give myself permission to keep snowmen decorating my home until February.  Over the years I have crafted up all kinds of snowmen:  ornaments, wall hangers, large porch sitters, fabric ones, wood ones, etc, etc.  I have come to the conclusion that a carrot nose can either make or break a snowman.  Is that weird?

In this post I showed my latest snowman that I crafted for a Super Saturday craft day and promised that I would show how I made the carrot noses.  Before I go on, I want to make it clear that I am NOT the originator of this cute sheet music idea… I’ve seen a few different versions of him on Pinterest.  Anyway…this is my snowguy:

IMG_20141201_173620

Notice his cute little carrot nose? Want a closer look?

IMG_20141201_172310

Looks like a carrot, doesn’t it?  Do you want to know how I did made it?  I will give you a clue:

IMG_20141201_173214

I was creating my snowman ornament just before Halloween and as I was decoupaging him, I wondered how I was going to make the carrot nose.  Just painting it on seems so flat and boring.  I happened to look into our Halloween bowl of candy sitting there, ready for trick or treaters and, whammo, I knew what I was going to do.  That is what I am going to share with you right now.

Supplies that you will need:  sucker sticks, pencil sharpener, orange marker, scissors, a glue stick (optional), and about 20 seconds of time.

First, the sucker sticks.  You can use sucker sticks with the suckers still attached or run to the craft store and get yourself some of these:

I already had these and personally wouldn’t go buy them just for snowman noses.  Suckers still taste the same even with shorter sticks.  Next, sharpen your stick with the pencil sharpener.

IMG_20141201_174046

I tried to use my electric pencil sharpener, but it didn’t work as well as this old-fashioned manual one.  Make it as sharp or rounded as you want.  If the paper seems a bit raggedy, don’t worry.  You can fix that later.  Before cutting the carrot to your desired size, use your orange marker to color it.  I used a Sharpie which is more waterproof than a Crayola, but both will work… the sucker sticks are just paper, after all.

IMG_20141201_174501

At this point I added little dents with my butter knife (not sure why my knife photographed like that!).  You can also use your fingernails or scissors or whatever you want.  These dents are what make it look so carrot-y.  Now grab your scissors and cut the end off to your desired length.  Watch it, though.  These little stinkers tend to fly off and get lost.  Eyes on the carrot!

IMG_20141201_175009

Now it is time to paint the white end.  At this point, if you have little papery-fibers sticking up, just rub a finger across a glue stick and smooth those babies down.  Done!

IMG_20141201_172310              IMG_20141202_113159

Don’t you agree that the nose really DOES make the snowman?


*********Linking up to these awesome parties*********


funtastic friday 98 featured button


DIY: Scroll Saw Tips For Cutting Multiples

ScrollsawSnowmen

Christmas time is coming (squeal!) and for me, that means it’s time to think of what gifts to make for neighbors, kid’s teachers, friends, etc., etc.  “Am I right?  Or am I right? Or am I right?” (Groundhog Day movie reference).   I tend to volunteer in November each year to be in charge of a few crafts for Super Saturday, which is basically a craft day where women at church come and make crafts to give as gifts/ decorate their homes.  It seems like tree ornaments are usually a hit and this year was no different.  Yep,  we crafted this little guy by the oodles:

IMG_20141119_105709

Does he look familiar?  I would guess that many of you have seen some variation of this ornament all over Pinterest and I would even hazard a guess that you have actually pinned this idea.  Cute, right?  As I was cutting out all of these snowmen,

IMG_20141114_231436

I got to thinking that maybe some women out there would like to do similar gifts for Christmas and don’t realize just how simple it is to make a plethora of cutouts.  Really it is.  Do you think that I would cut out each of these babies, one by one?  Ain’t nobody got time for that!  (Sorry, I couldn’t resist).  Let me show you the easy way to get it done.

First of all, you need to have access to a scroll saw.  Do you have one?  I’ll give you a minute while you go check.  I’m not going to get into the nitty-gritty details of HOW to use a scroll saw.  You can ask your hubby, dad, whoever, or just check it out on YouTube.   I am going to show how I cut out multiples of small things.

I will say that scroll saws are relatively safe to use… the little blade can’t take off a finger like a table saw or chop saw can.  If you can use a sewing machine, (even if you can’t), you can use a scroll saw.  I just purchased thin, birch plywood at Lowe’s.  You can buy 4’x8′ sheets if you want, but I just bought smaller pre-cut sizes for about $5 each.  For about $12 worth of wood, I cut out 76 snowmen.  Cheap, cheap, cheap!

IMG_20141114_113322

First I made up my pattern and cut it out on thin cardboard (think empty cereal box), then traced around the pattern repeatedly for one row on my board.  The process is the same as if you are making shaped sugar cookies:  you want to fit as many shapes as you can with as little wasted wood as you can.   It may not be too apparent, but I actually have 2 sheets of plywood stacked up.

You can see that I traced 8 snowmen here, then using my scroll saw I cut just below the shapes.  Since the wood can only go so far (see how the saw itself interferes with cutting any further on the right side of the above pic?), I had to back up (keeping the saw blade moving makes it easy to back up) and then come from the opposite side to meet up in the middle:

IMG_20141114_113453

You can also use a table saw or circular saw to do this.  Side note: scroll saws are not necessarily used for doing long straight lines (thus my hurriedly executed wavy lines).

IMG_20141114_113721

Here you can see that I traced along the wavy line that I had just cut and then cut along that traced line (again, double stacked plywood).

IMG_20141114_114006

Remember, the idea here is to cut out as many cutouts at a time as you can.   If you are cutting thicker wood, just stack 2 or three layers, instead.

IMG_20141114_114736

Next, I just cut to separate each snowman to make the size a bit more manageable.

IMG_20141114_114940

Like I said before, I cut 4 at a time.  You can hold on tight and cut with the pieces just stacked up, but I like to tape the pieces together using plain, old scotch tape.  It holds the pieces together quite well and then easily peels off afterwards.  This eliminates the need to have white knuckled fingers trying to hold all of the 4 layers together.  (Just ignore that white knuckle!  I was trying to take a picture with my tablet at the same time that I was cutting.)

IMG_20141114_115157

Now cut.  See that?  One cut=4 snowmen.  8 cuts=32 snowmen!  Something that I have learned is that, if you don’t cut exactly on the traced lines… oh well.  No biggie!  Who is going to know?

IMG_20141114_170339

Often times sanding is needed to smooth things up a bit.  Since some of my snowman looked a bit wonky, I just used my sander to shape them back up.  A power sander makes it easier, but a piece of sandpaper and a bit of elbow grease works, too.

IMG_20141114_231436

Which brings me back to this:

IMG_20141115_125910

and this:

IMG_20141115_123127

One smart lady brought her own fun stuff to personalize snowmen for her grandkids.

Of course this stack method isn’t limited to snowmen.  If you are new to using a scroll saw, though, I would say that snowmen are a perfect shape to start with.

Click here for a tutorial on how we made these ingenious (if I do say so myself) little carrot noses.  I’m not going to detail out how to decorate the snowmen.  Basically decoupage (think Mod Podge) the sheet music to the snowman cutout. Be sure to note where you want the eyes to go and cut the sheet music accordingly because you want the black dots (eyes) to stand out from the black print. Use stain, dark furniture polish or brown shoe polish (rubbing shoe polish in too much turns the paper yellow) to antique the sheet music.  Add “buttons” and eyes by dotting black paint on (use the end of a skinny paintbrush), then add fabric, buttons and string to dress them up. You can find the sheet music that we used here: DecoupageDeckHalls.

So, get cutting…Christmas is coming!


********* Linking up to these awesome parties!*********

I was featured!