Organize Your Closet by Color: 10 Minute Tidy

Cover pic organize your closet by color

Ready for another 10 Minute Tidy Tuesday challenge?  How about getting your closet a bit more organized?  I prefer to hang items up rather than fold them and put them away in a drawer.  That said, I have lots of hangers and lots of clothes on hangers.  Years ago I started organizing my clothes according to color and, I must say, it is a HUGE timesaver.   I can easily put together outfits and I never have to look and look and look for a particular item of clothing.  If I know the color, I know how to find it.

I recently switched out my summer wardrobe for my winter wardrobe.  If you don’t do that, I would highly recommend it.  I gave several reasons for doing this seasonal switcheroo here.  I’m not going to lie…that wardrobe switch takes longer than 10 minutes.  BUT, organizing by color does not.  Seriously, go try it right now.  Set a timer first!

Of course you can arrange your colors however you want, but I will share how I do it:  From left to right I organize my clothes in Browns, Blacks, Greens, Aqua and Teals, Blues, Purples, Reds, Oranges, Yellows, Grays, and lastly Whites.  Patterned clothes just go in the color area of the most dominant color in the pattern.  You might notice that I have some short sleeve tops in my closet even though this is my winter wardrobe.  I like to keep a few around to layer under sweaters, ect.

Organize closet by color

Before I let you loose on color coding your closet, I’m assuming one thing…that you already have your closet organized with like items hanging together.  For example, blouses and tops in one area, skirts in another, dresses in another and jackets/sweatshirts in another.  I personally fold pants and sweaters and place them on shelves.  If you haven’t organized like items together yet, there is no time like the present.  Just turn that timer off until you are done.

I don’t recommend emptying everything out of your closet.  You will definitely spend more than 10 minutes if you do it that way.  I would suggest deciding your color organizing order and start on one side of the rod, pulling clothes out and placing them in the correct area until everything is in its proper place.  It’s actually fun.  If you have a huge closet (lucky you!) and lots of clothes, just focus on one area (tops, skirts, etc.) per 10 minute session.

Once your closet is done, go organize your husband’s closet, or your child’s or your coat closet.  You will love the rainbow you see each time you open a closet door. Color coding your closet…10 minutes well spent!


10 Minute Tidy: Messy Kitchen

10 Minute Tidy #2

Do you ever look at a task and find it too daunting to do.  You don’t even want to start because you figure it will take for-ev-er to finish?  Or, you know that you are short on time, so you don’t even try?  I’m convinced that at least half of getting something accomplished is just starting it.  Case in point… my kitchen.  I was gone way too late last night and we ate dinner way too late and it seemed way too late to clean up after dinner.  Knowing that I had to get up way too early in the morning, I did some thing that I very rarely do:  I went to bed with a messy kitchen.  This is the kitchen that I woke up to:

WP_20151110_001

Ugggh.  This is really horrifying for me to show, but I know that we all get messy kitchens.  We’re friends here, right?

See that window above my sink?  That is the front porch.  Translation: anyone who comes to my door can see if my kitchen is clean or dirty.  This is a good incentive for me to keep a clean kitchen!

I decided that this would be a great 10 Minute Tidy activity…to clean up my messy kitchen.

WP_20151110_002

First, and probably most importantly, I started my oven timer…10 minutes on the clock.  I told myself that when the timer sounded, my work was done.  To be truthful, the dishwasher was already empty, so that helped me out time-wise.  Usually my family puts their own dirty dishes in the dishwasher, but the clean dishes didn’t get removed until, you guessed it…too late last night.  Excuses, excuses!   As I hurriedly cleaned, I kept glancing at the clock to make sure that I would be done in time, and just as I was rinsing out the just scrubbed sink, time ran out.  Perfect.

I’ll be honest.  When I’m trying to beat the clock like this, it doesn’t really seem like work.  More like a game.  Or a race…without a lot of sweat…or shin splints…or calories burned.  Darn!  But, my reward today was a clean kitchen:

WP_20151110_004

Ten little minutes and I can forget all about it.  Until the next mess comes along because, as we all well know:  A clean house is a temporary thing.

What 10 minute tidy are you going to do today?


********* Linking up to these awesome parties!*********

I was featured!

Fearlessly Creative Mammas


10 Minute Tidy Bathroom Drawer

TimeToTidy#1

This is my first post of what I plan to make a regular feature at ARMCHAIRDECORATORBLOG:  10 Minute Tidy posts.  Before I get started with my Tidy project, let me explain where this phrase came from.  When my kids were younger, we had a couple of VCR cassettes of “The Big Comfy Couch”.  At the end of each episode, Loonette the clown looks around her messy living room and says, “Who made this big mess?” and then speed cleans it with a “10 second tidy”.  I incorporated this idea as a way of getting my 5 children to help tidy up the house quickly.  The time limit depended on how messy the house was, usually 2, 3, or 5 minutes.  A 2 minute tidy equated to 12 minutes of fast work if you added up all 6 of us busting a move to clean up.  My kids really didn’t complain very much about these “tidies” because they knew that there was a limit.

These days, I still challenge myself to do speed tidies, especially when there is a task that I would rather not do.  The chores seem so much easier, and I swear I work 5 times faster when I’m focusing on beating a clock.  Think how fast you accomplish tasks when you know company is almost due to arrive at your front porch.

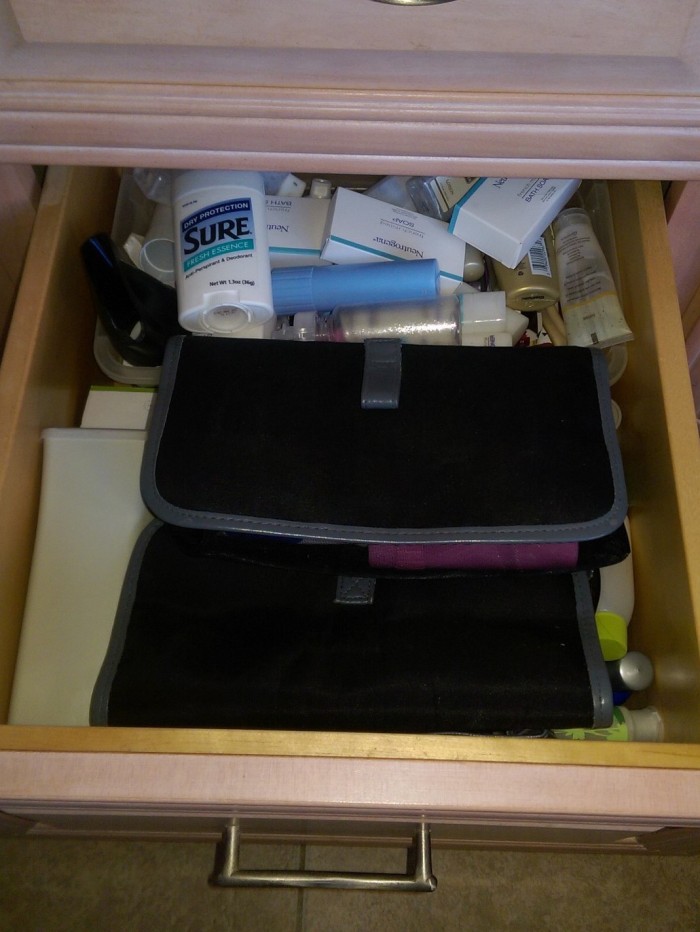
So, 10 Minute Tidy project #1 is my bathroom junk drawer:

WP_20151029_002

Way to much stuff in this drawer.  I have been putting off cleaning it out for a long time.  Realistically, I knew that the job was really not a biggie…it was all mental.  With a 10 minute time frame in mind, I quickly emptied everything out and sorted like items together.

WP_20151029_007

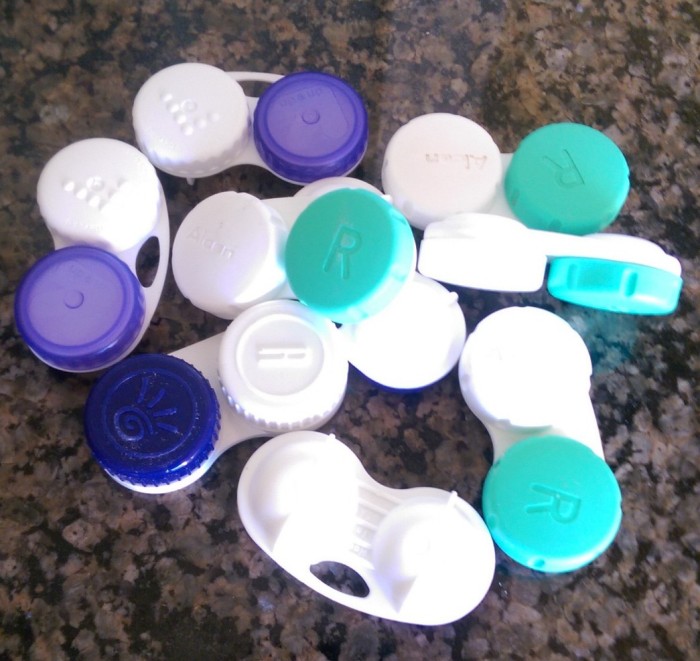
Ridiculous!  Who needs this many contact lens cases!

WP_20151029_003

All of those little bar soaps that you get from hotels?  We don’t even use bar soap around here.  Note to self: from here on out… leave them at the hotel!  Time to donate to a good cause.

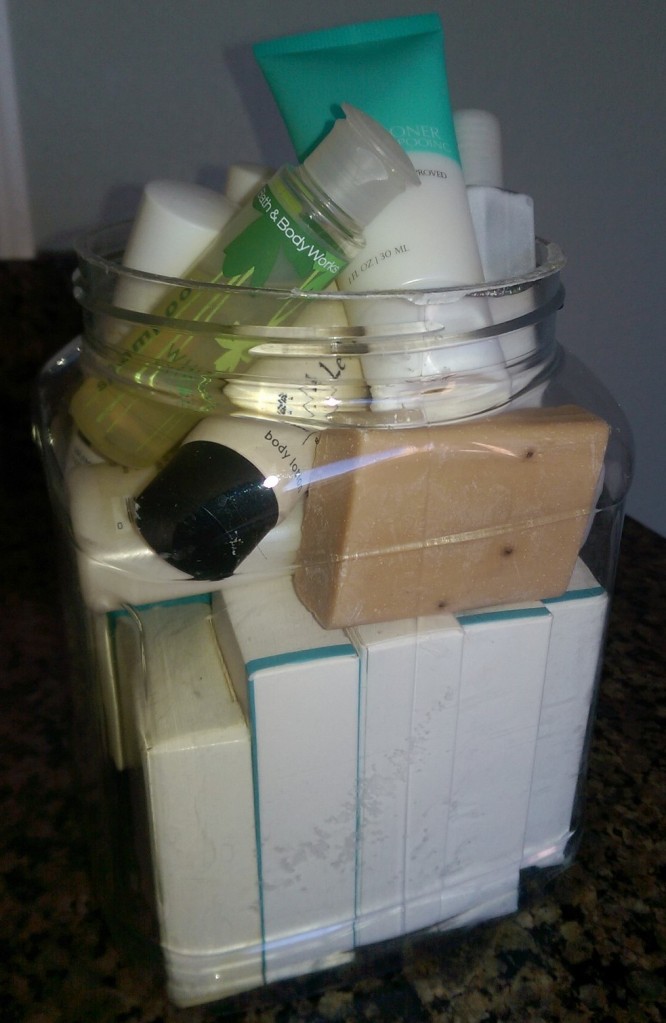
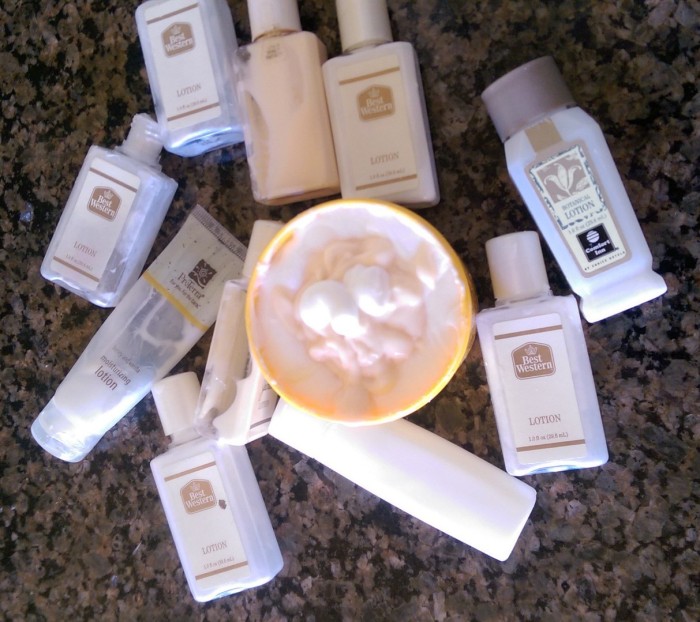
I started throwing all of the half used hotel lotions in the trash until I came up with a great plan:

WP_20151029_001

My body butter tub was nearly empty, but after squeezing the contents of all of our mini lotion containers, it was full.  Free lotion!  Those, I will keep bringing home from hotels.

Less than 10 minutes later…

WP_20151029_004

…my bathroom junk drawer is noticeably less cluttered.  I don’t hate opening it anymore!

What quickie project could you go do right now?  How about a bathroom drawer?  On your mark…get set…TIDY!


********* Linking up to these awesome parties!*********


Medication Organization Made Easy

A huge part of having a beautiful home is having an organized home.  A place for everything and everything in its place.  You can have the most beautiful furniture and décor, but if it is cluttered by stuff and stuff and stuff, you will not notice the beauty.  That is why every so often I like to share organizing tips.  An organized home is way easier to keep clean than a disorganized home.  An added bonus is the stress that is saved from having to search high and low for items you need.

Years ago I kept all of our medications in a couple of plastic boxes above the freezer.  I had 5 little children at the time and wanted to keep meds out of reach.  Whenever I needed a med of any kind, I had to search through both boxes to find what I needed.  It was more than a little frustrating.  I then organized the 2 boxes by making wooden inserts that divided the boxes into sections and that worked better, but stuff would still overflow into other sections.

After my children got a little older we moved into a bigger place with lots of kitchen cabinetry and that is when I created my meds organization system that we have now used for the past 7 years.  There’s no going back now.  This will be the way I organize them forever more:

IMAG00231

Basically, I just got some sturdy dollar store bins, labeled them with vinyl (I love my Roland Stika vinyl cutter!) and then separated everything into appropriate bins.  I’ll admit that I don’t even try to keep each bin orderly.  They are small enough that I can easily find what I need.

IMAG00233

If you don’t have a vinyl cutter, no biggie.  Just print out your medical category using your computer, a fun font and your printer and tape it on with clear tape or make a sturdier tag to attach.  Heck, you can even grab a sharpie and handwrite it.  The point is to label the bins for your family’s specific needs, throw them in a cabinet, closet, drawer…wherever you have the space, and forget about it.  At least until the next medical need arises.

Done and done!


(Check out the Link Parties that I like to link at)

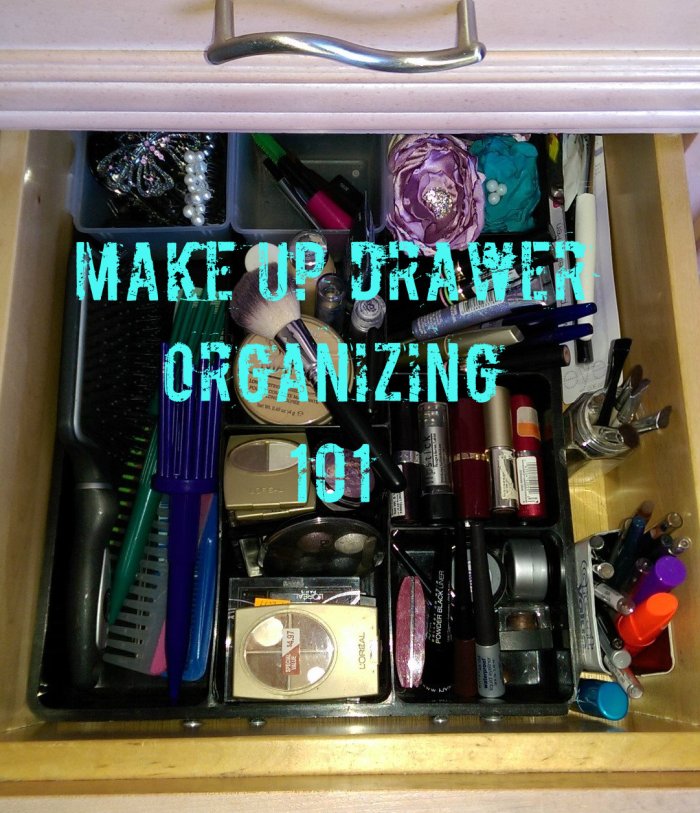
Make Up Drawer Organizing 101

Make Up Drawer Organizing 101

Do you every get distracted?   Mean to do one thing and then start another totally different thing?  I did that today… and now I have a fully organized hair and make up drawer as a result.  Distraction: not always a bad thing!

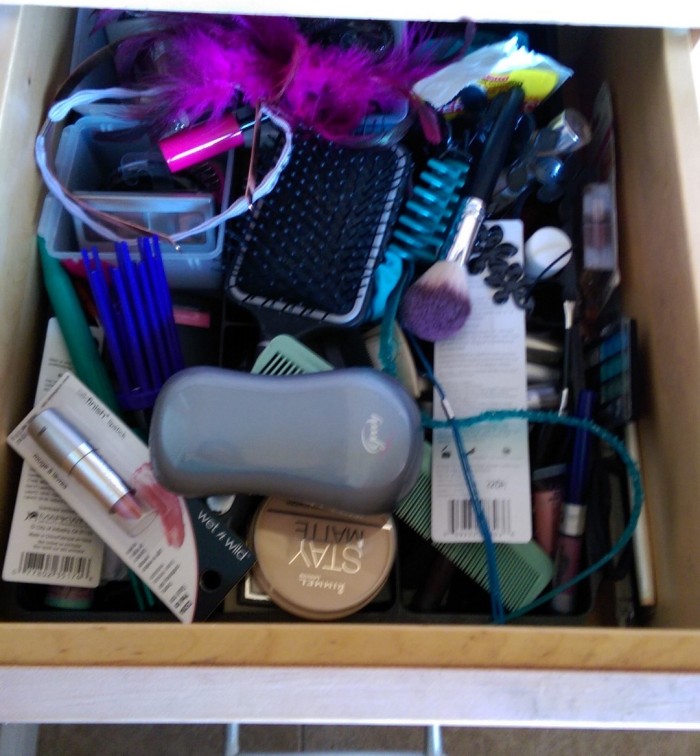
This is what I started with:

IMAG00031

Gross, huh?  A mish-mash of lipsticks, eye shadows, combs, make up brushes, hair ties, etc., etc. . There was a drawer organizer down there somewhere, but the junk on top hid it.

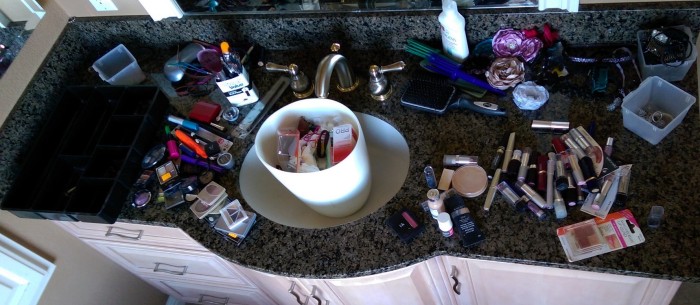
First thing, I took everything out and divided it into like piles.  Of great importance was the garbage container that I placed in the sink for easy access.

IMAG00032

Then it was time to put everything (well, not everything) back.  A fair amount of stuff ended up in the garbage and another bit got transferred to my teenaged daughters.  This drawer was housing all of their hair stuff (barrettes, bobby pins, hair ties, mini elastic bands, clips…).  Not any more.  Now that my girls are older, they tend to keep their own hair stuff in their bedrooms.  My hair is now quite short and I rarely use hair stuff (see above) any more. Why in the world was I allowing all of that stuff to clutter up my drawer?  Gone.

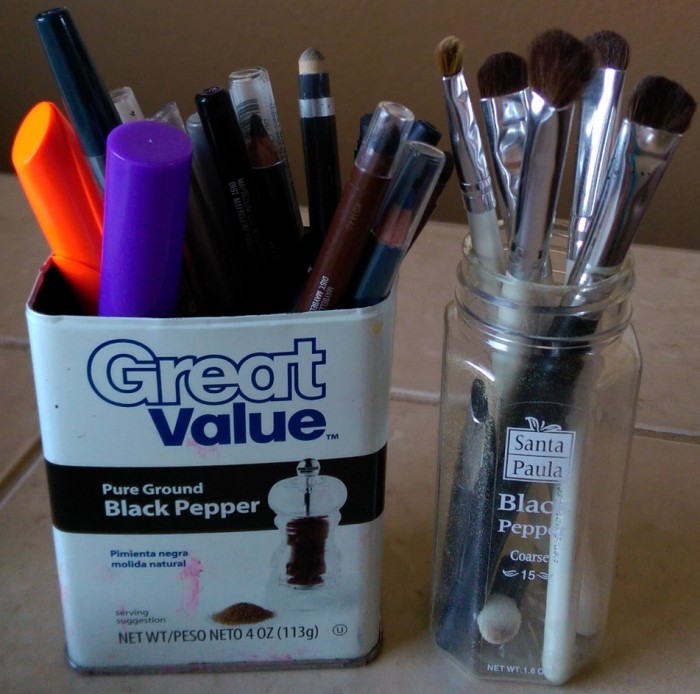
To make my eye make up brushes, eye liners and mascaras easily accessible I looked as far as my spice cupboard.

IMAG00039

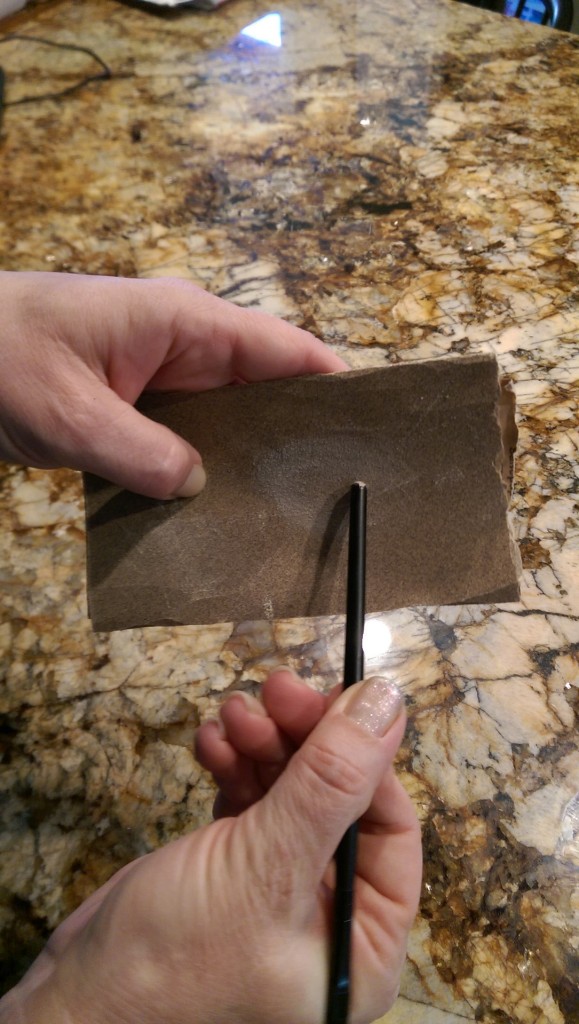
Tacky?  Maybe. Who knows, maybe I will spray paint the tin and add a decorative paper label some day.  Not today.  Once they were placed in the narrow space left over after the drawer organizer was in place, I didn’t even notice the labels.  Another thing, once I put the brushes in the drawer, there were a couple that were a bit too tall to stand upright.  No problem.  I just used wire cutters to trim a little off of the handle and then sanded them into a rounded end, which I then repainted using dark fingernail polish.  Easy fix.

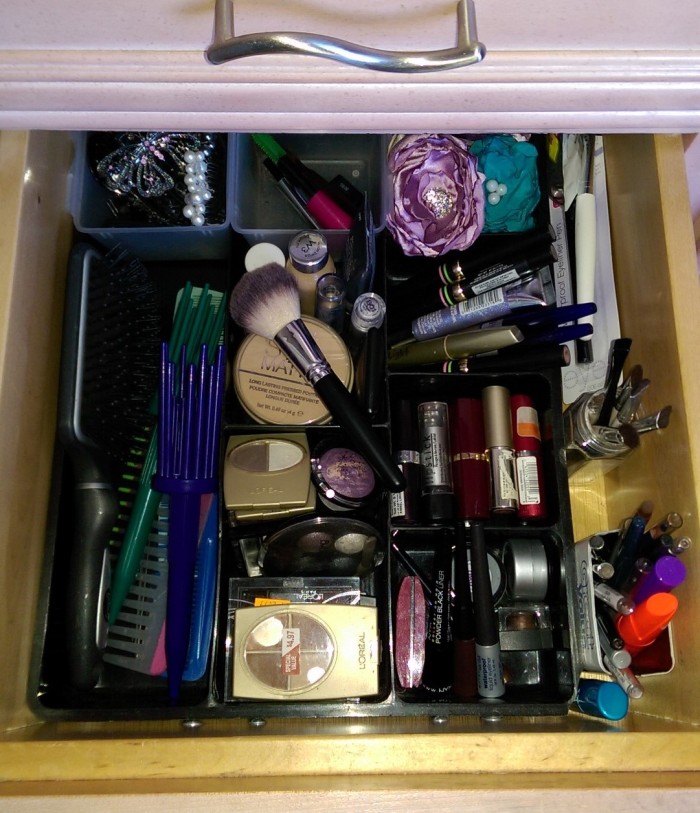
IMAG00035

The rest of my quickie organizing project consisted of placing like items together, utilizing my drawer organizer and a couple of dollar store containers.  Looks MUCH better, doesn’t it?

IMAG00043

Make Up Drawer Organizing 101 Summary:

* Empty everything out of your drawer

* Toss out/move/give away what you don’t use any more. (I tried on every single lipstick to make sure they were keepers.)

*  If you don’t have a drawer organizer, get a simple silverware drawer organizer (not the kind with the spoon shapes).

* Put like items with like items.

* For heaven’s sake, don’t put anything back in the drawer that you will not use.

* CLASS FINAL:  Jump up right now and organize a drawer.  Any drawer.  Time yourself, start to finish and just for fun, take before and after pictures.  I want to see!

Sometimes we think that a project is too gigantic to do and so we don’t even start it.  I have learned over the years that the only way to get a project done is to dive…right…in.  Plain and simple.  Get started.  The pride of a job well done is well worth the 25 minutes that I spent reorganizing this drawer.  That is why I think it is great to get distracted sometimes… I have an absolutely organized drawer now.

(Don’t have a drawer that can be used solely for make up and hair stuff?  Stay tuned… I can help with that, too!)