Creative Tablecloth Ideas

Creative Table Cloth Ideas

I love tablecloths.  I really do!  Do you wanna know why?  Since dining tables are usually at least somewhat large, when you change the tablecloth, you can change the whole look of a room.  Do you believe me?  Think about what a huge difference it makes to throw a different bedspread or comforter on your bed, it’s the same idea.  Bingo!  The whole room seems to change, am I right?  Of course I am!  Changing the tablecloth could almost be akin to painting a wall.  Only much quicker, less messy and, for fickle decorators like me, much easier to change the look of a room on a whim.

I have plenty of tablecloths.  More than I should have, probably.  I’m fickle, remember?  I’ve noticed that in recent months, however, I really don’t use my real tablecloths very often.  I have gotten creative and now use drapes and shower curtains instead and, I must say that I like the look of them so much more than my real tablecloths.  Want to see?

First, my current favorite:

Decorative Shower Curtain Used as a Tablecloth

This Moroccan-looking number is the most amazing shade of blue.  I can’t figure out how to photograph the color perfectly.

Close up of decorative shower curtain

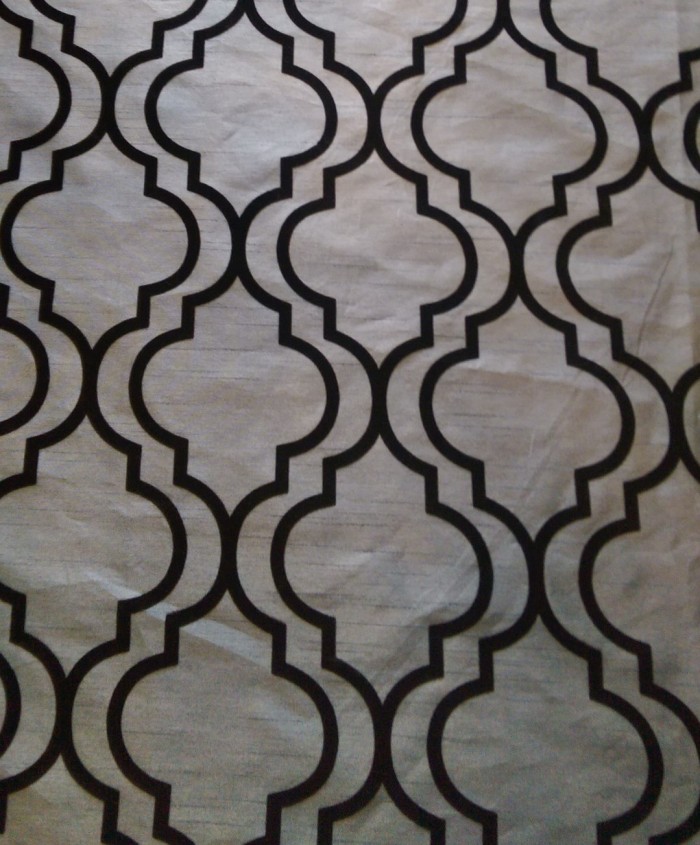
I love how the black flocked design is so bold.  Yep, I love this shower curtain…turned table cloth.

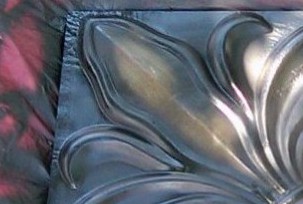
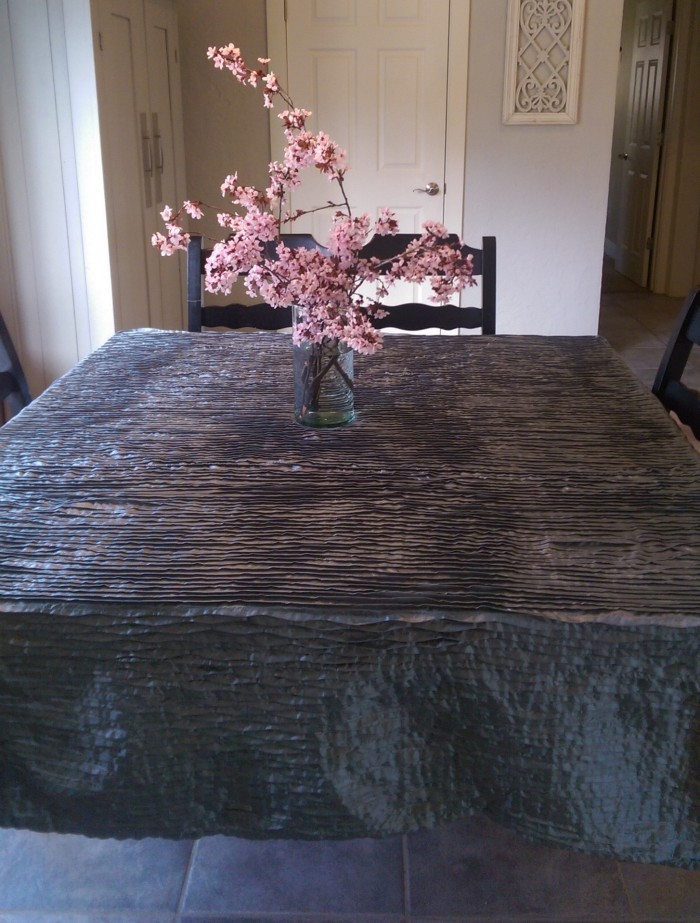
Here is a shower curtain that I bought at Goodwill for $3.  I love-a-love-a-love it!  It is practically dripping with texture:

Decorative shower curtain used as a tablecloth

Close up of decorative shower curtain

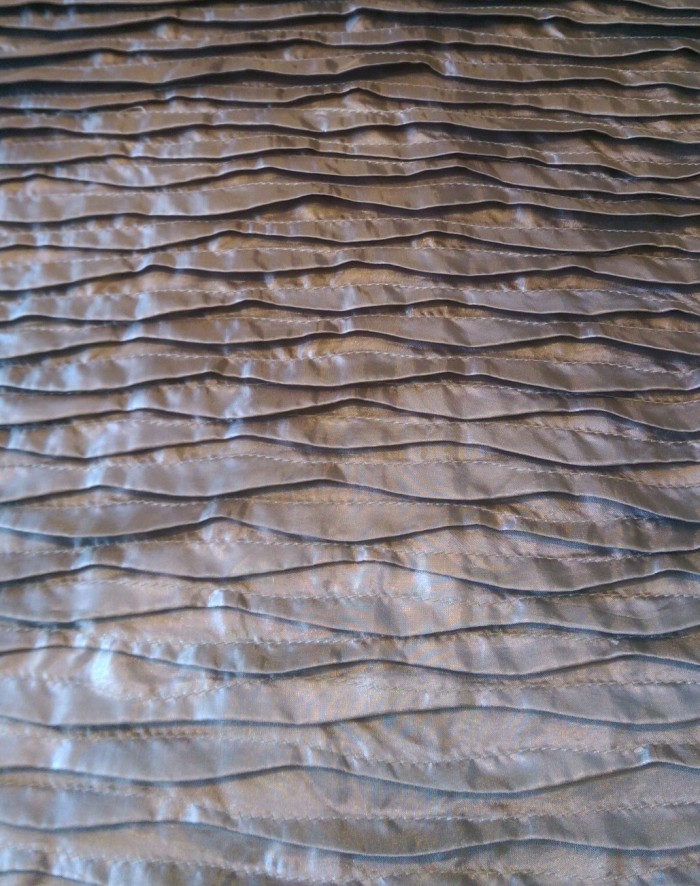
I also have some curtain panels that I like to use as tablecloths:

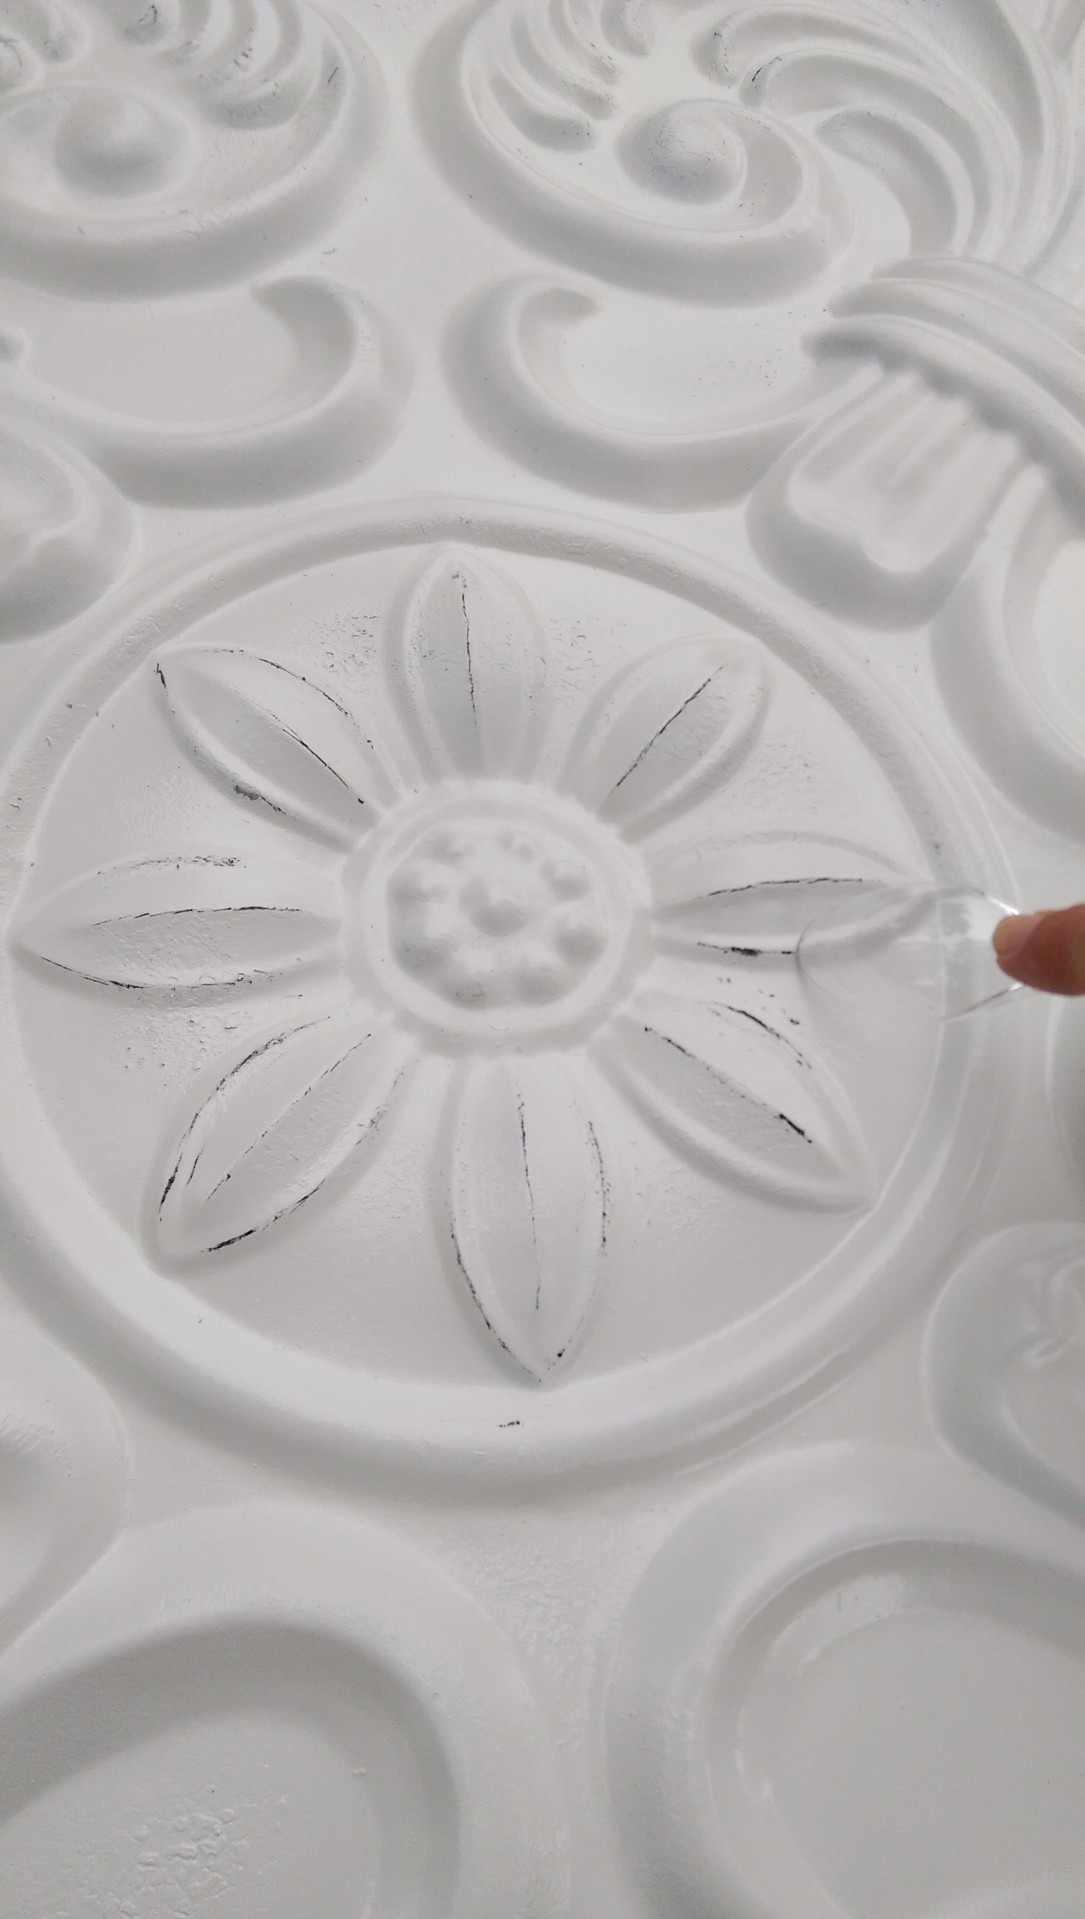
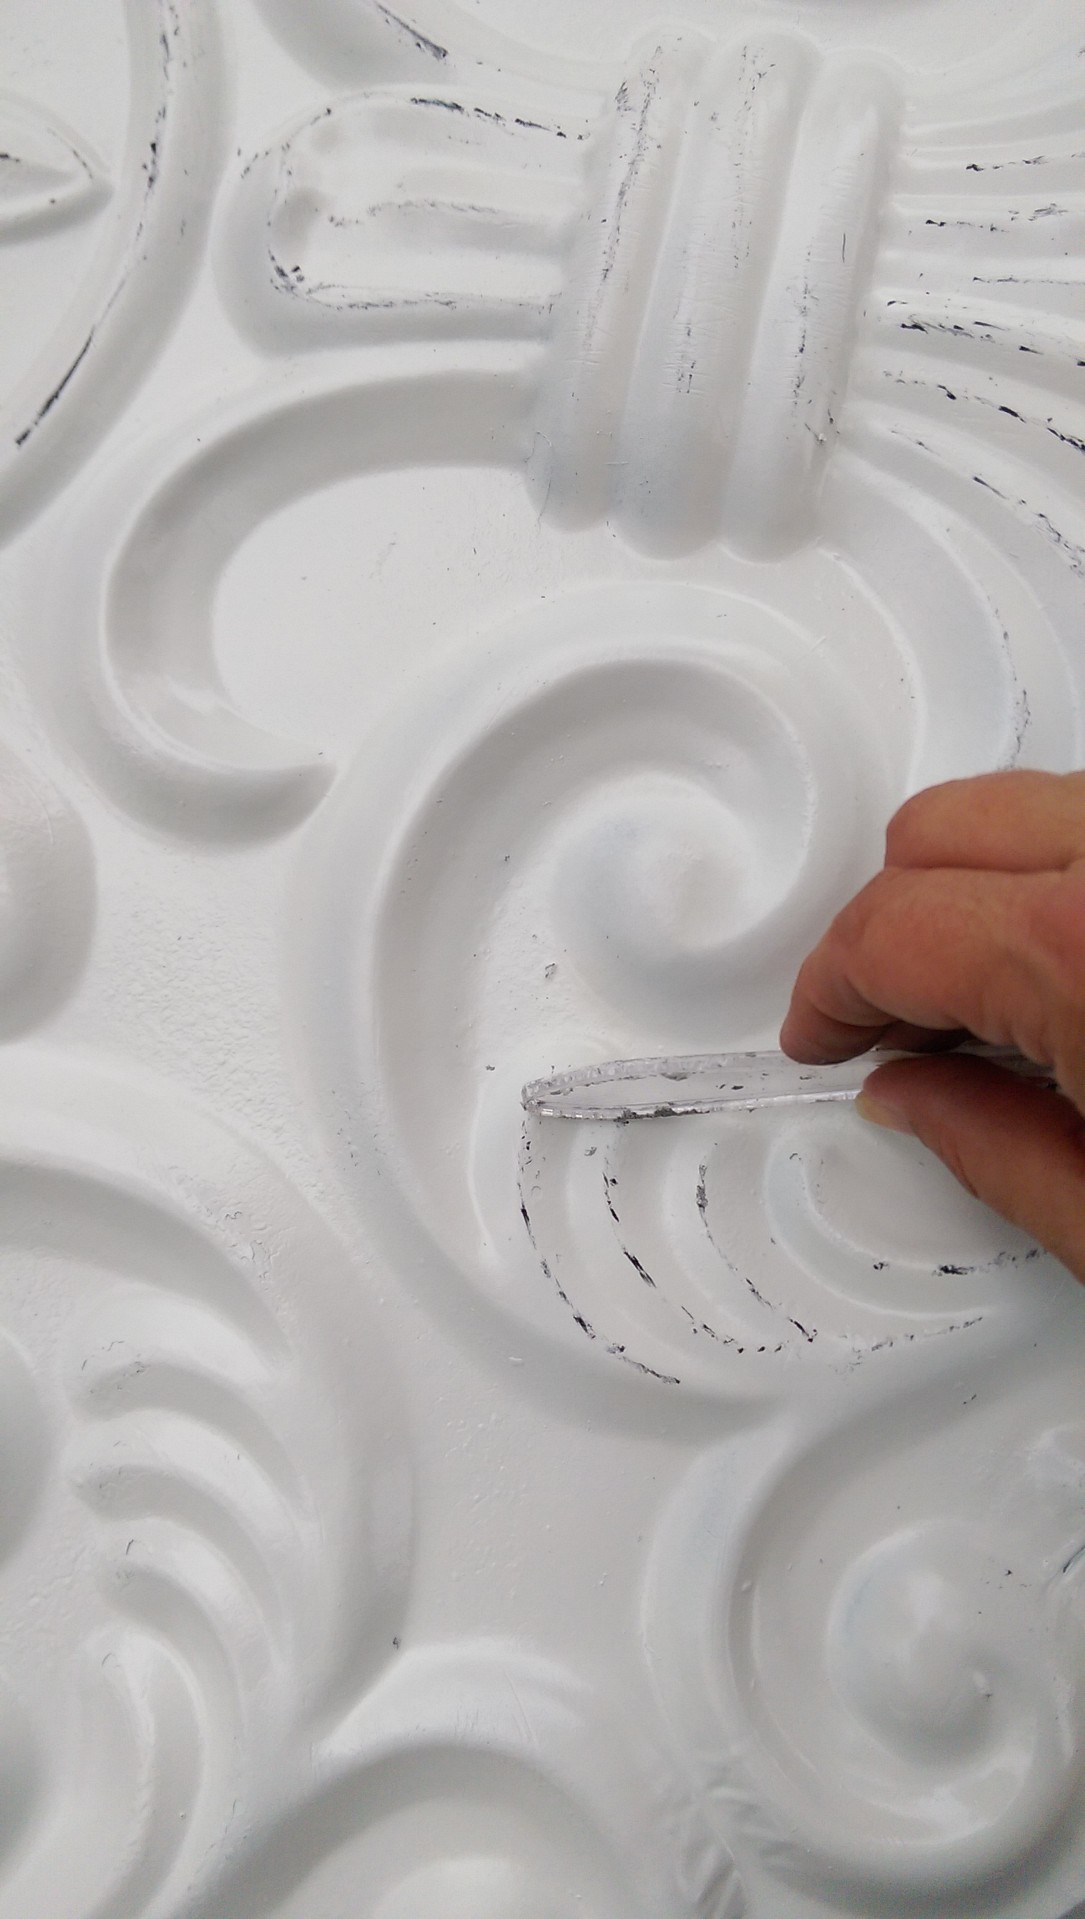
Here are some close-up pics so you can really appreciate the textures:

Yeah…I really like my pseudo-tablecloths.  They don’t look exactly like what I see over and over in the tablecloth departments of stores.  It’s a pretty fair bet that I’m not going to walk into anyone else’s home and see that their table matches mine.  Call me crazy.  Call me creative.  Just don’t call me late for dinner (set on one of these creative table cloths, of course!).

What do you think?  Have you ever stepped outside of the box and used something other than a tablecloth for a table cloth?


*********Linking up to these awesome parties*********

Organize Your Closet by Color: 10 Minute Tidy

Cover pic organize your closet by color

Ready for another 10 Minute Tidy Tuesday challenge?  How about getting your closet a bit more organized?  I prefer to hang items up rather than fold them and put them away in a drawer.  That said, I have lots of hangers and lots of clothes on hangers.  Years ago I started organizing my clothes according to color and, I must say, it is a HUGE timesaver.   I can easily put together outfits and I never have to look and look and look for a particular item of clothing.  If I know the color, I know how to find it.

I recently switched out my summer wardrobe for my winter wardrobe.  If you don’t do that, I would highly recommend it.  I gave several reasons for doing this seasonal switcheroo here.  I’m not going to lie…that wardrobe switch takes longer than 10 minutes.  BUT, organizing by color does not.  Seriously, go try it right now.  Set a timer first!

Of course you can arrange your colors however you want, but I will share how I do it:  From left to right I organize my clothes in Browns, Blacks, Greens, Aqua and Teals, Blues, Purples, Reds, Oranges, Yellows, Grays, and lastly Whites.  Patterned clothes just go in the color area of the most dominant color in the pattern.  You might notice that I have some short sleeve tops in my closet even though this is my winter wardrobe.  I like to keep a few around to layer under sweaters, ect.

Organize closet by color

Before I let you loose on color coding your closet, I’m assuming one thing…that you already have your closet organized with like items hanging together.  For example, blouses and tops in one area, skirts in another, dresses in another and jackets/sweatshirts in another.  I personally fold pants and sweaters and place them on shelves.  If you haven’t organized like items together yet, there is no time like the present.  Just turn that timer off until you are done.

I don’t recommend emptying everything out of your closet.  You will definitely spend more than 10 minutes if you do it that way.  I would suggest deciding your color organizing order and start on one side of the rod, pulling clothes out and placing them in the correct area until everything is in its proper place.  It’s actually fun.  If you have a huge closet (lucky you!) and lots of clothes, just focus on one area (tops, skirts, etc.) per 10 minute session.

Once your closet is done, go organize your husband’s closet, or your child’s or your coat closet.  You will love the rainbow you see each time you open a closet door. Color coding your closet…10 minutes well spent!


10 Minute Tidy: Messy Kitchen

10 Minute Tidy #2

Do you ever look at a task and find it too daunting to do.  You don’t even want to start because you figure it will take for-ev-er to finish?  Or, you know that you are short on time, so you don’t even try?  I’m convinced that at least half of getting something accomplished is just starting it.  Case in point… my kitchen.  I was gone way too late last night and we ate dinner way too late and it seemed way too late to clean up after dinner.  Knowing that I had to get up way too early in the morning, I did some thing that I very rarely do:  I went to bed with a messy kitchen.  This is the kitchen that I woke up to:

WP_20151110_001

Ugggh.  This is really horrifying for me to show, but I know that we all get messy kitchens.  We’re friends here, right?

See that window above my sink?  That is the front porch.  Translation: anyone who comes to my door can see if my kitchen is clean or dirty.  This is a good incentive for me to keep a clean kitchen!

I decided that this would be a great 10 Minute Tidy activity…to clean up my messy kitchen.

WP_20151110_002

First, and probably most importantly, I started my oven timer…10 minutes on the clock.  I told myself that when the timer sounded, my work was done.  To be truthful, the dishwasher was already empty, so that helped me out time-wise.  Usually my family puts their own dirty dishes in the dishwasher, but the clean dishes didn’t get removed until, you guessed it…too late last night.  Excuses, excuses!   As I hurriedly cleaned, I kept glancing at the clock to make sure that I would be done in time, and just as I was rinsing out the just scrubbed sink, time ran out.  Perfect.

I’ll be honest.  When I’m trying to beat the clock like this, it doesn’t really seem like work.  More like a game.  Or a race…without a lot of sweat…or shin splints…or calories burned.  Darn!  But, my reward today was a clean kitchen:

WP_20151110_004

Ten little minutes and I can forget all about it.  Until the next mess comes along because, as we all well know:  A clean house is a temporary thing.

What 10 minute tidy are you going to do today?


********* Linking up to these awesome parties!*********

I was featured!

Fearlessly Creative Mammas


Easy DIY: Distressed Metal Art

Chippy Metal Art

Check out this awesome piece of metal art that I bought 4 years ago at Ross.

IMAG00853

I thought that the design was okay-ish and the size, awesome (3 feet by 3 feet),  but above all, I loved the price:

IMAG00855

7 bucks?  That, I can do! I’m thinking that it was discounted because it was kind of scraped up in a few places…

IMAG00854

…which is ok since I didn’t like the finish on it anyway.  So after moving it from place to place in my garage for the past 4 years, it got some attention today, and I LOVE it!

IMAG00862

Wanna see how I did this uber-easy project?  Of course you do!  First I grabbed a can of black spray paint and mainly focused on painting the edges and raised portions:

Sorry, the dappled sunlight makes it kind of hard to see, but if you look at the upper left corner of the above pic, you can kind of see the black edges which will be visible once the piece is distressed.   Next, came two coats of a semi-gloss white paint:

IMAG00859

Of course I could have called it “Done” at this point if I was going for a clean modern look, but I wanted to take it a step further and distress it up a little to highlight some of the details.  Of course that is why I painted it black in the first place.

***Very Important*** If you plan to do a similar project, spray the top coats with only a short time between coats and distress while the paint is still a bit tacky.  They make spray paint so well these days that it dries to form a really tough surface, which is really what we want, right?  SO, if you are distressing spray paint, you have just a short window of time to accomplish that task.  Even though the distressing process took me about 10 minutes, I could tell a big difference between how easy it was when I started, compared to when I was finished.  Work fast, ok?  If, heaven forbid, you miss that window of time, you can try using some fingernail polish remover and a Q-tip like I did with my metal star project.   Just make sure that you change Q-tips often to avoid a smudgey look.  Got it?  Good!

Now, do you want to see my high-tech distressing tool?  Of course you do:

IMAG00866

Let me be honest:  I started out by using my thumbnail and realized that I would likely wear it away to nothing so I figured that a plastic spoon would do the trick and it did.  Sometimes I scraped away with the spoon part…

IMAG00860

…and sometimes I used the handle to cover more area at a time…

IMAG00861

Here is the finished project…

IMAG00862

…which I LOVE!!!  With the new finish, it is no longer “okay-ish”, it is fabulous.  I thought that I knew exactly where I was going to place this baby, up high in my dining room, but now I want it more front and center.   Hmmm.  The easy part was re-creating this piece.  The hard part is deciding where to put it:

What do you think?  Where should it go?


Yep, I can honestly say that I love this piece.  Love!   So, do you have something hidden away in YOUR garage that could use a couple of coats of paint and a spoon?


********* Linking up to these awesome parties!*********


Updated Metal Star

Once upon earlier this morning, I had a metal star that looked like this:

IMAG00759

I bought this 28 inch metal star at a garage sale about 5 years ago for $1.  Loved the price, but I wasn’t crazy about the finish.  Still, I slapped it up on my wall and forgot all about it.   It was up high enough that the unfortunate color and scraped-off paint didn’t really look too bad against the beige wall it was hanging on.  As you may or may not know, I’m going gray in my house.  The metal star came down so the gray paint could go up.

I will give you a preview of what this star looks like now:

IMAG00777

Kind of looks like something that you would see in the aisles of Hobby Lobby, doesn’t it?   Do you wanna know how I got this look?  So easy!  First I spray painted the whole thing black and once that dried, I sprayed on 2 coats of a nice shade of aqua:

I tell you, spray paint these days dries so fast.  Of course, the reason that I painted the star black in the first place is because I wanted to be able to distress it and have black showing through the aqua.  You already knew that, right?

To distress projects that I paint with water-based paints, I usually rub the areas that I want exposed with a damp rag or scrubbing sponge, but water really didn’t have the same effect with spray paint.  I ended up going with pure acetate nail polish remover.  I messed around using the scrubbing sponge…

IMAG00764

…but ended up liking the look achieved by using Q-tips and cotton balls the best.  As the acetone hits the paint, it tends to smear the black beneath into the top coat so I messed around with that a bit :

Here’s some practical advice:  be smart and wear gloves.  Trust me on this one.

IMAG00770

After re-spraying the portions that I over-distressed (which was way easier than I thought it would be) I favored using the Q-tips.  Be prepared to use a lot of Q-tips to avoid a smeary look.  Really, it is so super easy.

IMAG00773

Perched on the same screw that it originally hung from, my updated star really shines.  Never to be ignored or forgotten again.  I must say that I L*O*V*E the finished project.

Updated Metal Star

What do you think?


********* Linking up to these awesome parties!*********