Easy DIY Gift: Corn Heating Pads

DIY Corn Heating Pads

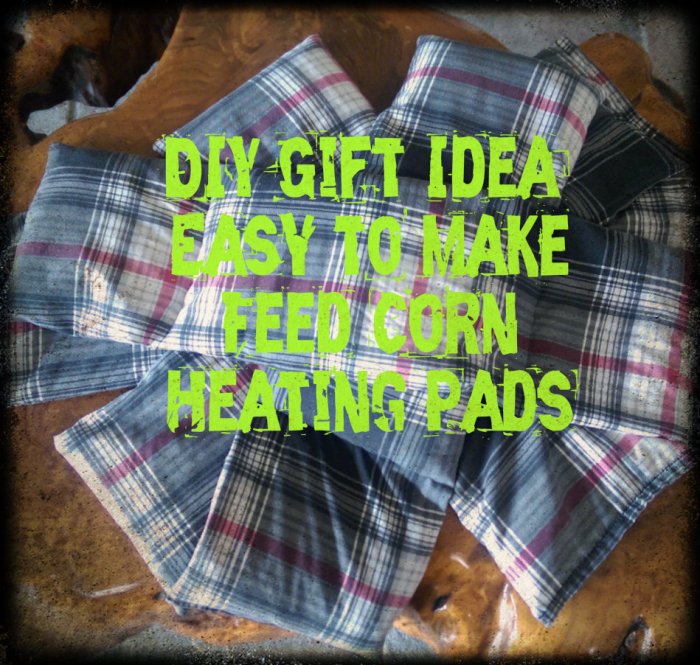
It’s that time of year again!  Eeeek!  The Holidays!  Thanksgiving…Christmas…New Year’s…I love it all!  Right now I should be packing for our trip to Utah, but I just have to share what I have been working on (instead of packing!).  Making microwavable feed corn heating pads!

Last year I blogged about making rice heating pads using pillow cases.  They really are simple to make and we love using them.  After being over-heated too many times, however, the burned rice smell can get a bit nauseating,  so I decided to try something different: Feed corn.

Feed Corn

My friend Patrice told me about feed corn heating “bags” years ago and how they don’t smell like rice does and how they hold the heat longer than rice.  I decided to give corn a whirl.

Just so you know, feed corn is dirt cheap.  I paid $12 for a 50 lb. bag.  For the fabric, I found a really nice heavy full size flat sheet with a plaid pattern that is a dream to sew on.  I love plaid because the lines make it easier to cut and sew straight lines.  I like to start out with a piece of fabric that is about 25 inches by 14 inches, but really, you can make these any size and shape.

WP_20151124_005

With this size, I add 2 scant cups of corn to each of the outside edges and 2 1/2 cups to the larger center section.  Again you can go to my tutorial to see how to make these.  Once you get the hang of it, you could probably rival Santa’s elves in gift making!

WP_20151124_010

Oh, another fabric idea:  My son had outgrown his Grinch pajama bottoms, so I just cut off the legs, straightened out the seams to form rectangles and made microwavable heating pads out of them, as well.

WP_20151124_013

As a side note, these take a bit longer to heat up than the rice ones do.  I would start with 2 1/2 minutes, but I like how it feels after 3 minutes.  For heaven’s sakes, don’t overheat them and fry yourselves!  Or anyone else!

WP_20151124_011

 If you are stumped about what to get for anyone this Holiday season, I guarantee that these microwavable feed corn heating pads will be a hit.  Moms, dads, grandparents, teachers, siblings, friends, children of all ages will love them.   They are great for aches and pains, for warming cold tooties and pre-warming a bed on a cold winter night.  Trust me on this one…these heating pads are a popular commodity in our home.

*********Linking up to these awesome parties*********


Super Saturday Craft Day

SuperSaturday2015

One of my favorite things to do this time of year is to help organize a “Super Saturday” at my church.  Super Saturday is a day where the women from church and their friends, family, neighbors…can come together and craft.  This event is always in November so we can make holiday decorations as well as inexpensive gifts for Christmas giving.  I just thought that I would share what we are doing this year:

This Snowman/Scarecrow craft was requested by someone who had seen a similar craft online using planks.   As you can see, this craft is reversible, making it possible to have it out from October through January.  Love that!  I will do a tutorial on this soon.  Promise!  ***UPDATE: Here is the tutorial***

WP_20151104_009 WP_20151104_010

This 2 minute craft  is great for display as well as for holding a plate of holiday goodies.  It is as simple as removing the backing from the vinyl sticker that I cut with my Roland Dr. Stika machine, placing the sticker and rubbing it to smooth it out, then removing the masking layer.  Easy peasy!  I love how simplistic it looks.

WP_20151104_011

I found some little wood boxes that I thought would make perfect little chalkboards.  Before Super Saturday, I will paint the boxes white.  That day we will add a vinyl frame to use as a stencil.  After painting with chalkboard paint and letting it dry (we always use hair dryers at Super Saturday to speed up the drying process!), we will remove the frame vinyl to expose the white below.  I’m also going to do a quick demo about how to easily “write” on chalkboards.  I love that this little guy can stay up year round.  I love, love, love chalkboards and the fact that “art” can change in a matter of seconds.

WP_20151104_012

We are also going to do a demo of how to make a 5 minute pillow cover.  Soooo easy!  Here is a great video tutorial to show you how it’s done and here is one of the many pillows that I have made this way:

WP_20151104_013

Lastly, here is a craft that I patterned off of one that my friend found online and loved.  I made sure to use an image that is copyright free of the LDS Salt Lake Temple spires.  We will decoupage that as well as the saying, “Families are Forever”.  This idea can be used in a thousand different ways, using different pics (pics of children and grandchildren, family home…) and sayings.  I drilled tiny holes in each corner of the word wood so I could easily insert little brads for added detail.  I also drilled a couple of larger holes on the top for the ribbon to go in and, BAM! it’s a fabulous item to hang in your own home or to give as a gift.

WP_20151104_014

I’m so excited for this Super Saturday event…I can hardly wait!  It is so much fun to turn on the Christmas tunes and work and laugh and craft with friends.

Do you participate in a similar crafting event?   If you are not aware of a similar event around you, why don’t YOU get one started?  Grab your friends and family and get crafting!  You just might end up with some pretty cool stuff and warm memories as a result.


********* Linking up to these awesome parties!*********

Welcome to 31 Days

Easy Floppy Bow (Using a Blouse Sleeve)

Remember this pillow that I made using a blouse that I recently bought at a thrift store?

IMAG00055 (2)

Well, I promised that I would show you how I made the floppy bow.  Remember?  I hate to break promises, so here we go.

For this bow, I used the sleeve portion of the blouse.  See here?

IMAG00076 (2)

First, cut off the cuff, like so:

blouse sleeve1

So far, so good?  See that fancy slit?  That is what helps make this easy bow so, well… easy.  You’ll see.

Now, just cut your fabric so it is slightly wider than you want your bow to be.  Basically 3 quick snips, don’t over-think it…it doesn’t have to be perfect.  Turn the fabric inside out and pin it, making sure to secure that slit well.  Then simply stitch the ends like so:

IMAG00080 1

Now here is where that little slit makes life easy.  Remove the pins and turn that baby inside out through the slit.  No need to sew it up, it is going to be hidden in the back of the bow.  You may notice that one side of the bow is a little wider than the other.  Since the fabric is so floppy, it really won’t be noticeable when you are done.  Trust me, it will be okay.

Now grab that cuff and cut it in half lengthwise

IMAG00081 (2)IMAG00082 (2)

Position this knot to form a bow and either sew to your desired tightness, or just add a touch of hot glue.  Trim the ends off then add a hair clip if wanted.  Done!

IMAG00091 (2)

IMAG00092 (2)

IMAG00054

Yep…that was pretty easy!


10 Minute Heart-Shaped Sweater Pillow

HeartPillow2

I love all of the awesome items made out of sweaters that I have been seeing all over Pinterest lately.  So, when I recently found this red, cotton cable knit sweater at a local thrift store for the right price (as many items as you can shove in a bag for $2),  I knew that I had to get it, even though it had a huge hole on the neckline:

IMAG00123

Valentine’s Day is just around the corner, so I figured that this sweater would make a perfect heart shaped pillow.  Since it has buttons down the front, I knew that it would be a super quick, super easy project.  You will see why, in a minute.

First, I made a pattern.  Needing a bigger piece of paper, I just pieced together a couple of pieces of paper.  Remember 1st grade heart-cutting lessons?  Yep, it was that simple.  Next, I pinned the heart pattern on my sweater and cut around it.

IMAG00124IMAG00126

After flipping the right sides together, I quickly pinned them and sewed completely around the heart.  This is where having buttons comes in handy.  No need to leave an opening for stuffing and then hand stitching it closed… just unbutton to stuff and re-button to close it up.

IMAG00127

Once I finished sewing, I just unbuttoned it and turned it right side out.  For stuffing, I cut open an old pillow insert and transferred handfuls of the fluffy white to my heart and buttoned it up when it was full enough.

IMAG00130

Seriously…DONE.  Easy as can be!

IMAG00137

Sweater shopping, anyone?