DIY: Update Your Old Christmas Decor

updatechristmas

Happy December!  It’s that time of year again where the red Rubbermaid boxes with green lids come out of hiding and my house explodes in Christmas décor.  I love, LOVE, L*O*V*E this time of year!

Question: Do you have Christmas décor items that you put back in the box year after year without using them in your holiday decorating?  Stuff that you LOVED way back when, but now no longer fits with your Christmas design style or colors?  I decided to update a couple of items that I haven’t used in the past few years and I couldn’t be more pleased!

First, I have this wooden holly swag that my friend gave me many years ago (thanks, Renee!).  It’s super cute, right?

Green Red Wood Holly Swag

I have decorated with it and loved it for more than a decade, but my Christmas décor colors have changed over the years and it no longer matches my style,  plus the raffia was all snarled up.  For my DIY, I removed all of the raffia then painted all of the pieces with flat black spray paint,

Black painted wood holly cutouts

then painted the round “berries” white and the leaves a light greige color.   I did this to both sides to make the finished project look good from all angles.  After the paint dried I grabbed an old spoon and scraped the edges to reveal the black paint beneath for a distressed look.

distressing paint with a spoon handle

Using the spoon handle to distress the paint edges was way faster than sandpaper would have been.  If you notice how I was holding the spoon, it felt similar to peeling potatoes.  I just love the little center vein that was routered down the middle of each leaf.   That, coupled with the distressing, gives these holly leaves nice dimension.

Once all of the pieces were distressed, I grabbed some light blue ribbon and inserted it in the holes.  I added the 3 round “berries” to 3 of the leaves with the ribbon and laid it out on my counter in the approximate way that I wanted it to hang…
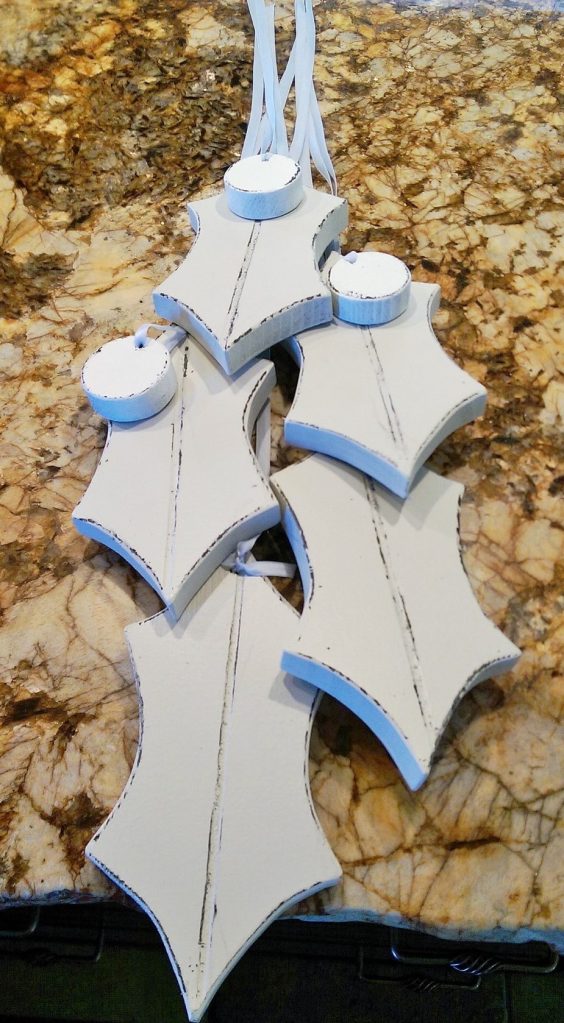
wood holly swag

…and then I tied a knot at the top.  So, here is the finished swag:

Just in case you are interested in making a set of your own, here is a pattern for the holly leaves and round berries.  This would make an awesome neighbor gift, right?

My other project was an item that I painted sometime in the 90’s which was in sore need of a makeover in order to come out of the Rubbermaid this year:
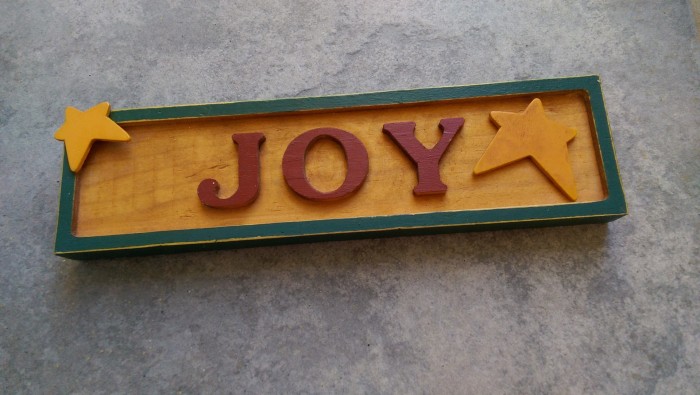
Green red wood JOY sign

Again, it wasn’t horrible, just didn’t fit my current décor.  This little “JOY” sign got the same treatment as my holly swag and I kind of love it now:
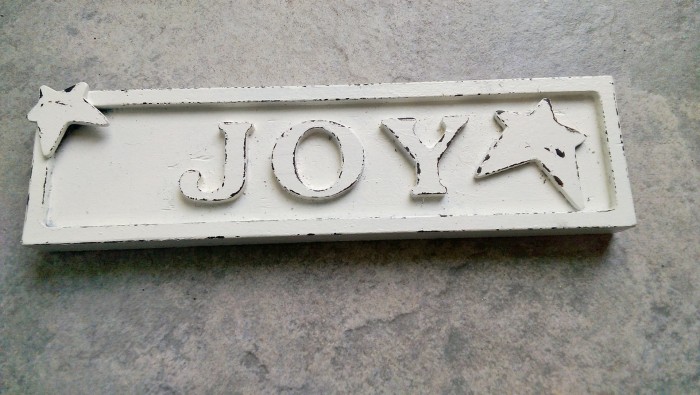
wp_20161202_002-1

I half thought that I would paint the stars with silver nail polish.  Who knows, maybe next year.  I am really liking the subdued whites this year, so for now, it’s just how I want it.

And, here is the final resting place of each for Christmas 2016:
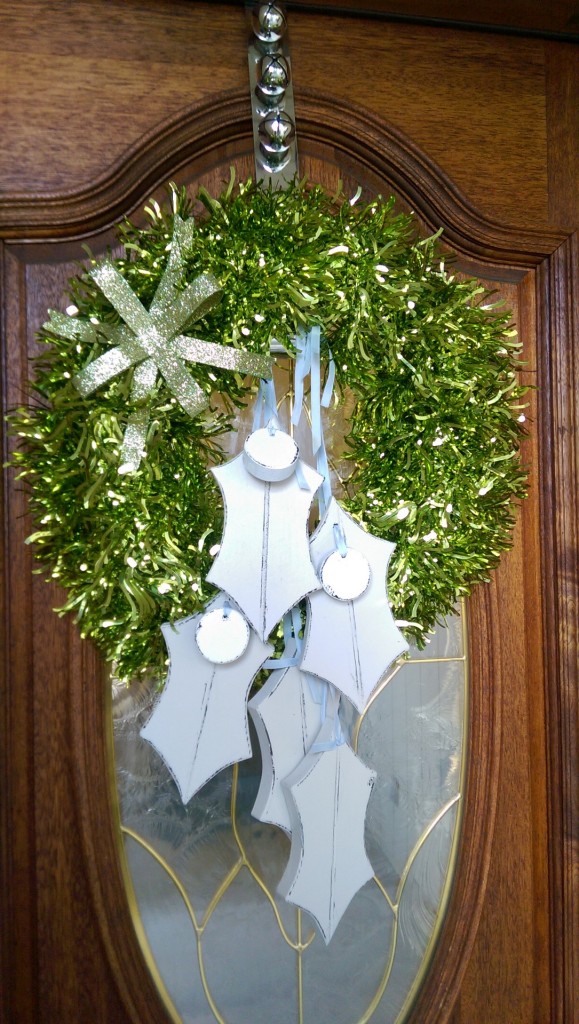
green wreath holly swag

I’m liking the new looks…for now.  Who knows, I may change it back to bright colors in another decade.

So, do you like the before: colorful versions, or the after: distressed shades of white?  What Christmas color scheme are you liking right now?


*********Linking up to these awesome parties*********


Snowman/Scarecrow Craft

scarecrow-snowman

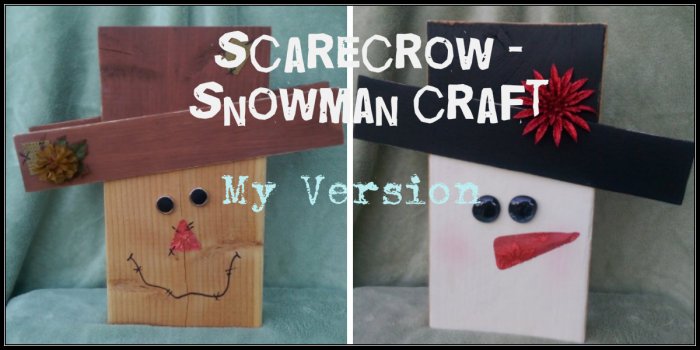
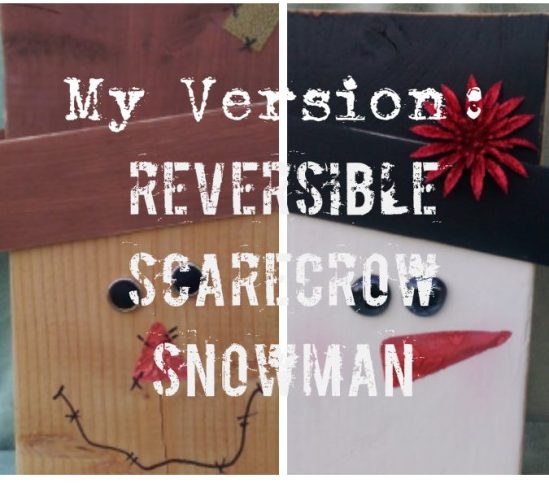
Scarecrow/Snowman Craft: My Version

Lookie, lookie!  I am finally posting my version of a craft that I’m sure most of you have seen out there in the crafting/Pinterest/blog world:  A dual purpose, two-side craft with a scarecrow face on one side and a snowman face on the other.  I designed this craft for our Super Saturday craft day event in 2015 and promised to included a tutorial way back then.  Yep…I forgot to do that, so now I’m keeping that promise.  All of the other versions of this craft that I have seen are done with pallet boards or bead board, but I wanted a simpler-to-make version.   If you go to Pinterest and search “Scarecrow Snowman Reversible”, you will see oodles of versions of this craft.  But, here is how I did mine:

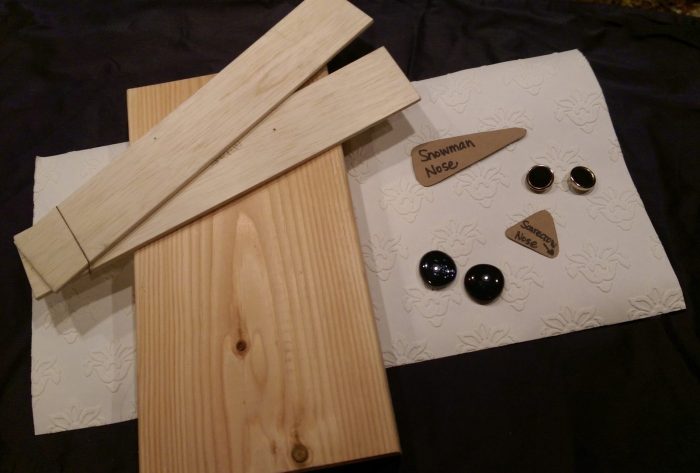
Supplies:

Supplies for Scarecrow Snowman

2 x 8 Lumber-  13 1/2 inches

Wood trim- 13 1/2 inches (can be flat or decorative trim)

White, black, brown and orange craft paint

Textured paper for noses (mine is wallpaper)

Q-Tip (to add dimension to the carrot nose)

Two large flat marbles (Dollar Tree)

Two large buttons

Misc. embellishments for decorating

Black Sharpie

Noses Pattern

Powdered blush (raid your makeup drawer!)

Glue gun

Ready?  OK!

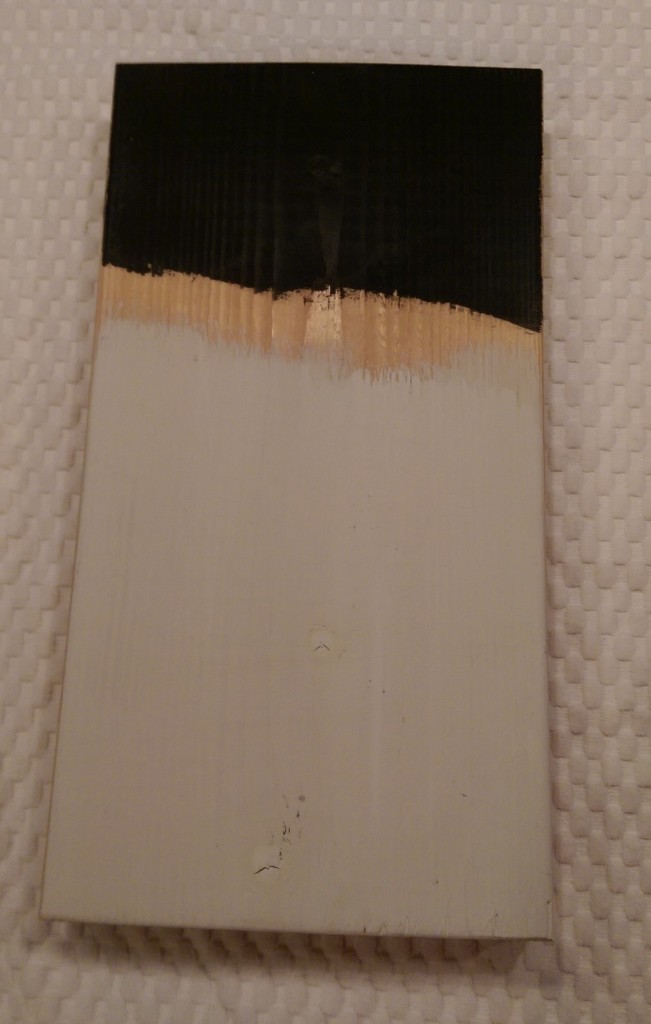
First, figure out where you want your wood trim hat brim angle to be.  I just placed it where I wanted it, traced down each side of the trim with a pencil, then roughly painted white on the bottom and black on the top.  Don’t worry about painting the sides of the wood…just the top only, since this craft is reversible.

Snowman Craft rough painting

The board is sturdy enough to stand, so you can paint the scarecrow side, as well.  Matching the angle from the snowman side, roughly paint the top only of the opposite side brown.

While you have black or brown paint on your brush, paint both sides of your trim pieces, one side black and one side brown.  To be clear, when you are looking at the snowman side, you will be able to slightly see the back of the rim from the scarecrow side so you want to see black paint, and vise versa, so each trim piece has one side painted black and one side painted brown.  A hair dryer comes in handy to help speed up drying time !

Painted wood trim hat brims

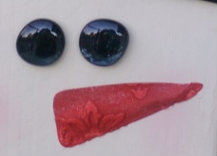
Next , create those snowman eyes.  I just dipped my finger tip in black paint and dabbed a fairly thick coat of paint on the back side of each flat marble.  I think these “eyes” look so reflective and dreamy!  Don’t you agree?

snowman-eyes-and-nose

While the paint is drying, cut out and paint (if not already orange) the textured paper noses.  Click on this blue Noses Pattern link to print out the pattern that I created, or make your own shapes.

Time to assemble:

Use hot glue to secure both hat brims.  I also added a small flat head screw to ensure that brim will never fall off.  You can hide that with embellishments.

The faces are where you can get creative.  Play around with the “eyes” and “noses” to see how you want to place them.  On my scarecrow, I placed one button eye slightly lower then the other for a playful look.  For my snowman, I place the eyes fairly close together.

I added “stitch marks” with a Sharpie for my scarecrow nose.  To add dimension to the snowman’s carrot nose, I grabbed a Q-Tip  and glued it right where I wanted the nose placed, then hot glued the carrot shape on top of it, securing all of the edges.

The scarecrow got a large Sharpie-drawn smile with “stitch marks”.  The snowman didn’t get a mouth, but I used my finger to rub a bit of blush on his cheeks.

Personalize:

Give these two some personality by adding silk or glittery flowers, patches of fabric, raffia, ribbon…whatever your heart desires.  To distress, or not to distress- that is the question.  You get to choose whether or not to take sandpaper to the edges.

Now, here is the best part…

You can pull this cute craft out for your holiday decorating in September as you decorate for fall, using the Scarecrow side.  After Thanksgiving, flip it around to display the Snowman side and let him stay there all through January.  I love that!

All in all, this is a super-simple, super-cute craft that gives double your pleasure.  They make super cute gifts!  I should know…I gave mine away last year.  I’m off to make another one, (well, two) right this very minute.  Why don’t you go do the same?

scarecrowsnowmantitle


*********Linking up to these awesome parties*********


I was featured!

Sarah Celebrates


Super Saturday Crafts 2016

Super Saturday 2016

It’s almost Super Saturday again!

Super Saturday is my favorite crafting event and it is coming up in just 2 short weeks.  Last year I posted what crafts we did for our local Super Saturday and I figured that I would do the same this year.  Uggh.  I just realized that in that post I had promised a tutorial for the Scarecrow/Snowman craft that I made and I totally did not do that!  Shame on me! I will do that very soon.  This time I really mean it!  Promise!

***UPDATE: Here is the tutorial***

To decide on which crafts to make, I consulted my two Pinterest Super Saturday boards: Super Saturday Craft Day Ideas and my group board, Super SUPER SATURDAY Craft Ideas.  You should check these boards (my other boards too!) out for some awesome, awesome crafting ideas.  (I will link below to show the original crafts that I copied for this Super Saturday activity)

Now, on to this year’s Super Saturday crafts:

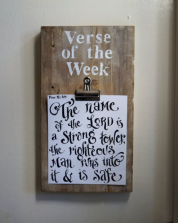
This first craft is what I will call a Ponderize Board.  The thought is that you take scripture verses or other quotes that you want to incorporate into your life and you print it up in cool fonts and post it on this board where everyone can see it often.  It can just be a nice thought to ponder or you can try to memorize, hence the name, Ponderize.  The great part is that you can easily change your chosen verse or quote, maybe change it out every week or month.  Or, keep it up forever.

wp_20161023_001

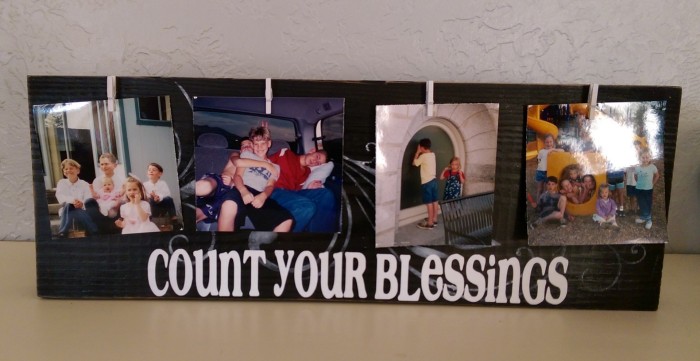
Next craft is a cute Picture Display Board.  I cut the rounded long edges off of 2 x 6 lumber so it can easily sit on a shelf, countertop, table, etc. and not fall over.  Tiny clothespins are hot glued in place to hold the pics.  The lettering is vinyl, (Café Rojo font) and I just used a stencil to add a little detail.

wp_20161023_003-1

wp_20161023_004-1

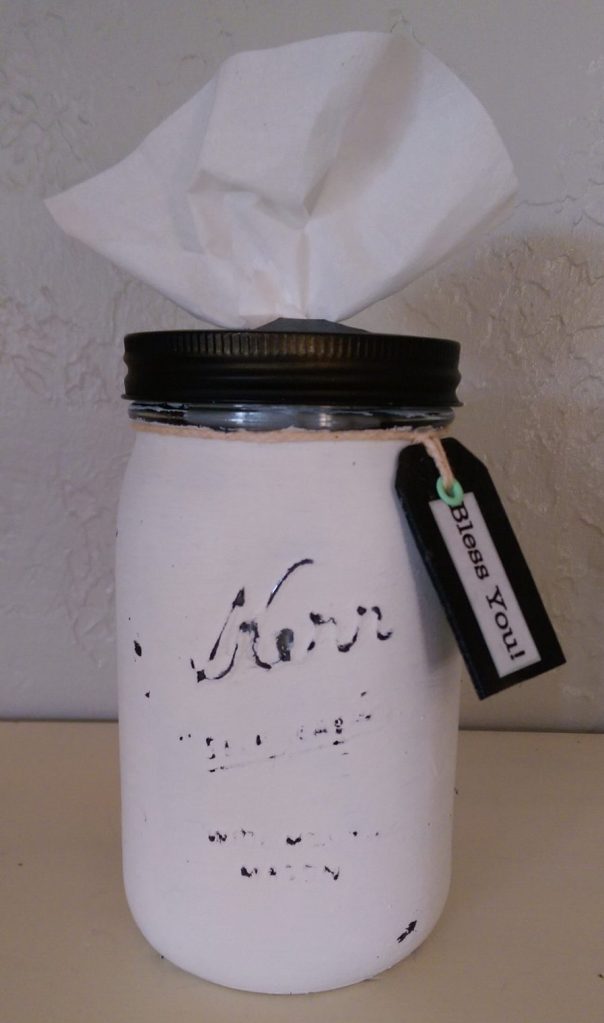
This Quart Jar Kleenex Dispenser turned out so cute!   Let’s face it, Kleenex boxes- no matter how stylish the print is- are really not that attractive.  To get this look, I first painted the jar with a dark color, then added a heavy coat of white chalk paint and sanded a bit to get the distressed look and to highlight the raised lettering.  You can click the “DIY Mason Jar Tissue Holder” link below for the tutorial on how to get the dispenser to work correctly.  This decorative jar is a really fun way to keep Kleenex’s handy:

wp_20161023_005

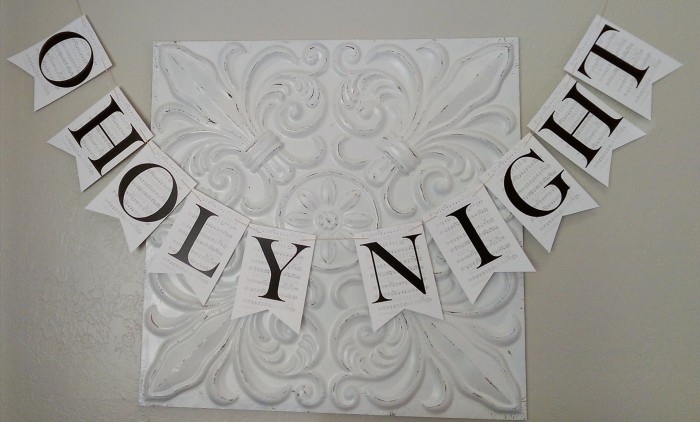
We will also be offering this O Holy Night Banner.  I was hoping to be able to download the banner letters directly from the site that I got the idea from, but the link wasn’t working.  I created my own version and had my local print shop print it up on cardstock.  If you want to print up your own set, here is the link for my version of the O Holy Night banner.  The top and sides of each page just need to be trimmed off (I removed the song title), the bottom cut into this banner-like shape and string added. Easy peasy!

wp_20161023_006-2

I’m sure that these Microwaveable Neck Warmers will be a Super Saturday hit.  They make fabulous gifts!  Look here for my tutorial.

DIY Corn Microwavable Neck Warmers

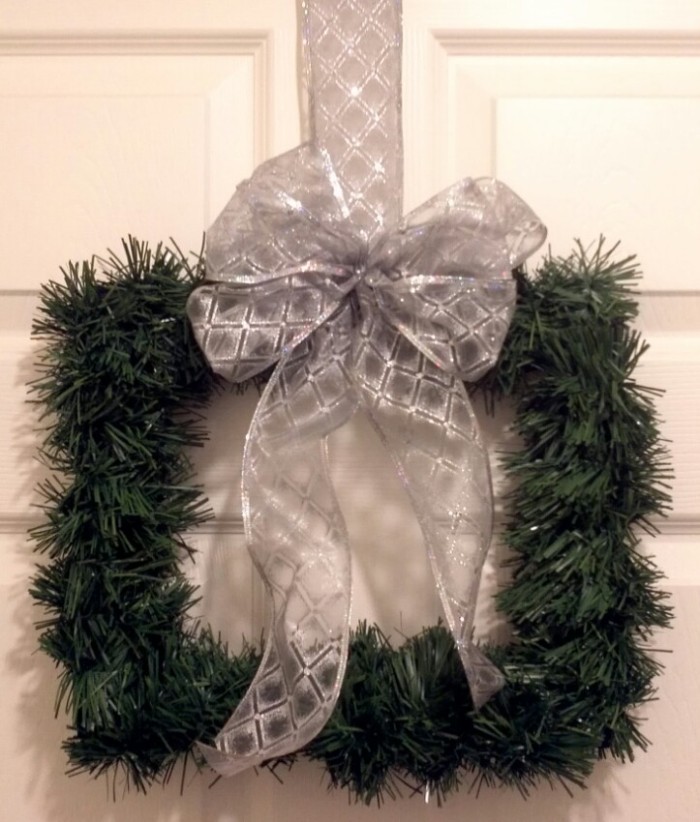
Lastly, during Super Saturday, we are going to do a demonstration to show just how easy it is to make a Square Wreath.  (Here is the tutorial.)

IMG_20141209_174922

Here are the images that inspired some of our Super Saturday craft choices:

Kudos to these awesome crafters!

Verse of the Week

Count Your Blessings Board

DIY Mason Jar Tissue Holder

O Holy Night Banner

Yep, Super Saturday is going to be awesome!

And, there you have it!  Our 2016 Super Saturday crafts.  What do you think?

Do you participate in a get-ready-for-the-holidays crafting event?  I would love to see what you are making!  Please send pics!  Maybe we will do them for Super Saturday 2017!


*********Linking up to these awesome parties*********


I was featured!

Fearlessly Creative Mammas


Christmas Home Tour 2015

I guess that I may as well jump on the blogging bandwagon and post some pics of my holiday home.  They say that a picture is worth a thousand words, so I will mostly let the pictures do the talking.

My Front Porch:

Christmas front porch santa foil wreath

Front Entry and Living Room

Pool Table Room/Library:

Kitchen and Dining Rooms:

Family Room:


Well, that about sums it up.   Thanks so much for stopping by!  I would love to offer you a nice hot cup of cocoa, but, well…you know.  You will have to really stop by my home for that to happen.  Until then, Merry Christmas to you and your family!

Easy Recycled Gift Tags


Recycled gift tags

It’s time for Christmas gift buying, gift wrapping and gift tagging.  Don’t you just love Christmas time?   To me, wrapping presents is fun and pretty relaxing, but I’ll admit that one of my least favorite parts of wrapping is tagging my wrapped gifts.  Am I the only one?  I always make sure to buy gift tags at the after-Christmas sales so I have plenty on hand, but the things make me crazy.  The plain ones are often, well…boring and the beautiful foiled ones always seem to repel ink.   Seriously, someone should test those things out before they sell them as gift tags.  It seems that if I can find a pen that actually writes on them, the ink always smears when I try to stick it on the package.   Urrgggh.

This year, I decided to make some more permanent tags.  I went as far as my recycling bin to find my main supplies-  these empty thin cardboard boxes:

Empty food cartons for gift tags

First thing that I did was to cut simple tag shapes, pairing two for each tag.  I made sure that the plain side faced out as I cut them, because really, who really wants a picture of a tri tip sandwich on their gift tag.

recycled cardboard gift tags

The first couple of tags that I made had a layer of flannel sandwiched between them:

As you can see, I used a tiny loop of tape to hold each side of the fabric/cardboard in place, making sure to line the cardboard up well.  Easy.  Next, I took it to my sewing machine and used a long, straight stitch around the whole thing.  I made sure to start at the center-top of the tag and overlapped a few stitches to secure the thread, knowing that the ribbon would hide the cut threads.  Once the sewing was complete, I trimmed the fabric to the actual shape of the tag.  For added effect, I frayed the flannel edges of one of my tags, and the other tag I snipped lots of tiny cuts along the whole fabric edge to create my own fringe.

After doing a couple this way, I got lazy and just ended up gluing the two pieces of cardboard together, skipping the flannel.  I think that I prefer this simpler look, actually, and it makes tag making so much easier and faster.  Once the tag layers were secured, I used my hole punch at the top.

Of course I could have hand-written the names on these, but instead I went to my computer and found some fun, bold fonts which I printed in large sizes and glued on my tags.  I used white paper, but colored or lightly patterned paper would be fun, too.   Glitter, stickers, and other embellishments would spiff these up even more.  Really, the sky’s the limit on what you could do with these.   You can have all of your tags exactly the same, with only the names different, or you can color code for each child/recipient, or you can make each tag totally different.

Gift tags made from recycled carton cardboard

You might think that, with the rush and fun and craziness of Christmas morning unwrapping that these tags will just get tossed in with the other trash.  Maybe…maybe not.  These gift tags are actually very study and feel substantial in your hands.  I don’t think that they will easily get mixed up with tossed gift wrap and bows.  I’m going to tell my children to save them so I can use them next year…and the year after that…and the year after that, etc., etc. .

What started out as trash will be avoiding the trashcan for years to come.  That’s the plan.  Now, I just need to invade my recycling bin again to make a couple dozen more tags.

So, do you have any empty cereal, crackers, or other thin cardboard boxes in your trash right now?  I think it’s time to rescue them!


*********Linking up to these awesome parties*********