Super Saturday Craft Day

SuperSaturday2015

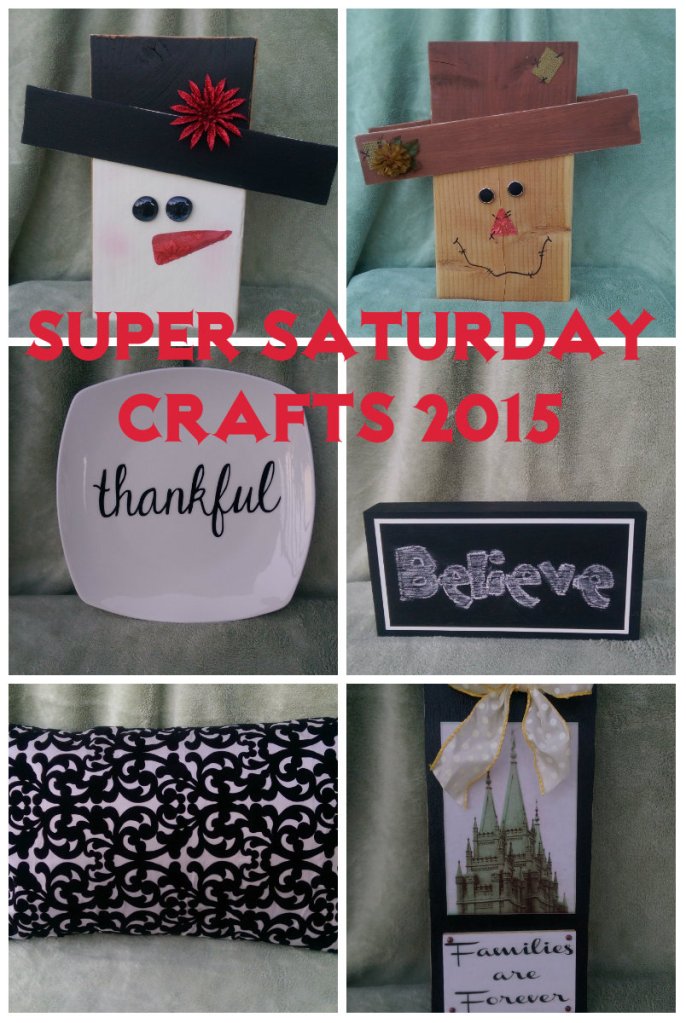
One of my favorite things to do this time of year is to help organize a “Super Saturday” at my church.  Super Saturday is a day where the women from church and their friends, family, neighbors…can come together and craft.  This event is always in November so we can make holiday decorations as well as inexpensive gifts for Christmas giving.  I just thought that I would share what we are doing this year:

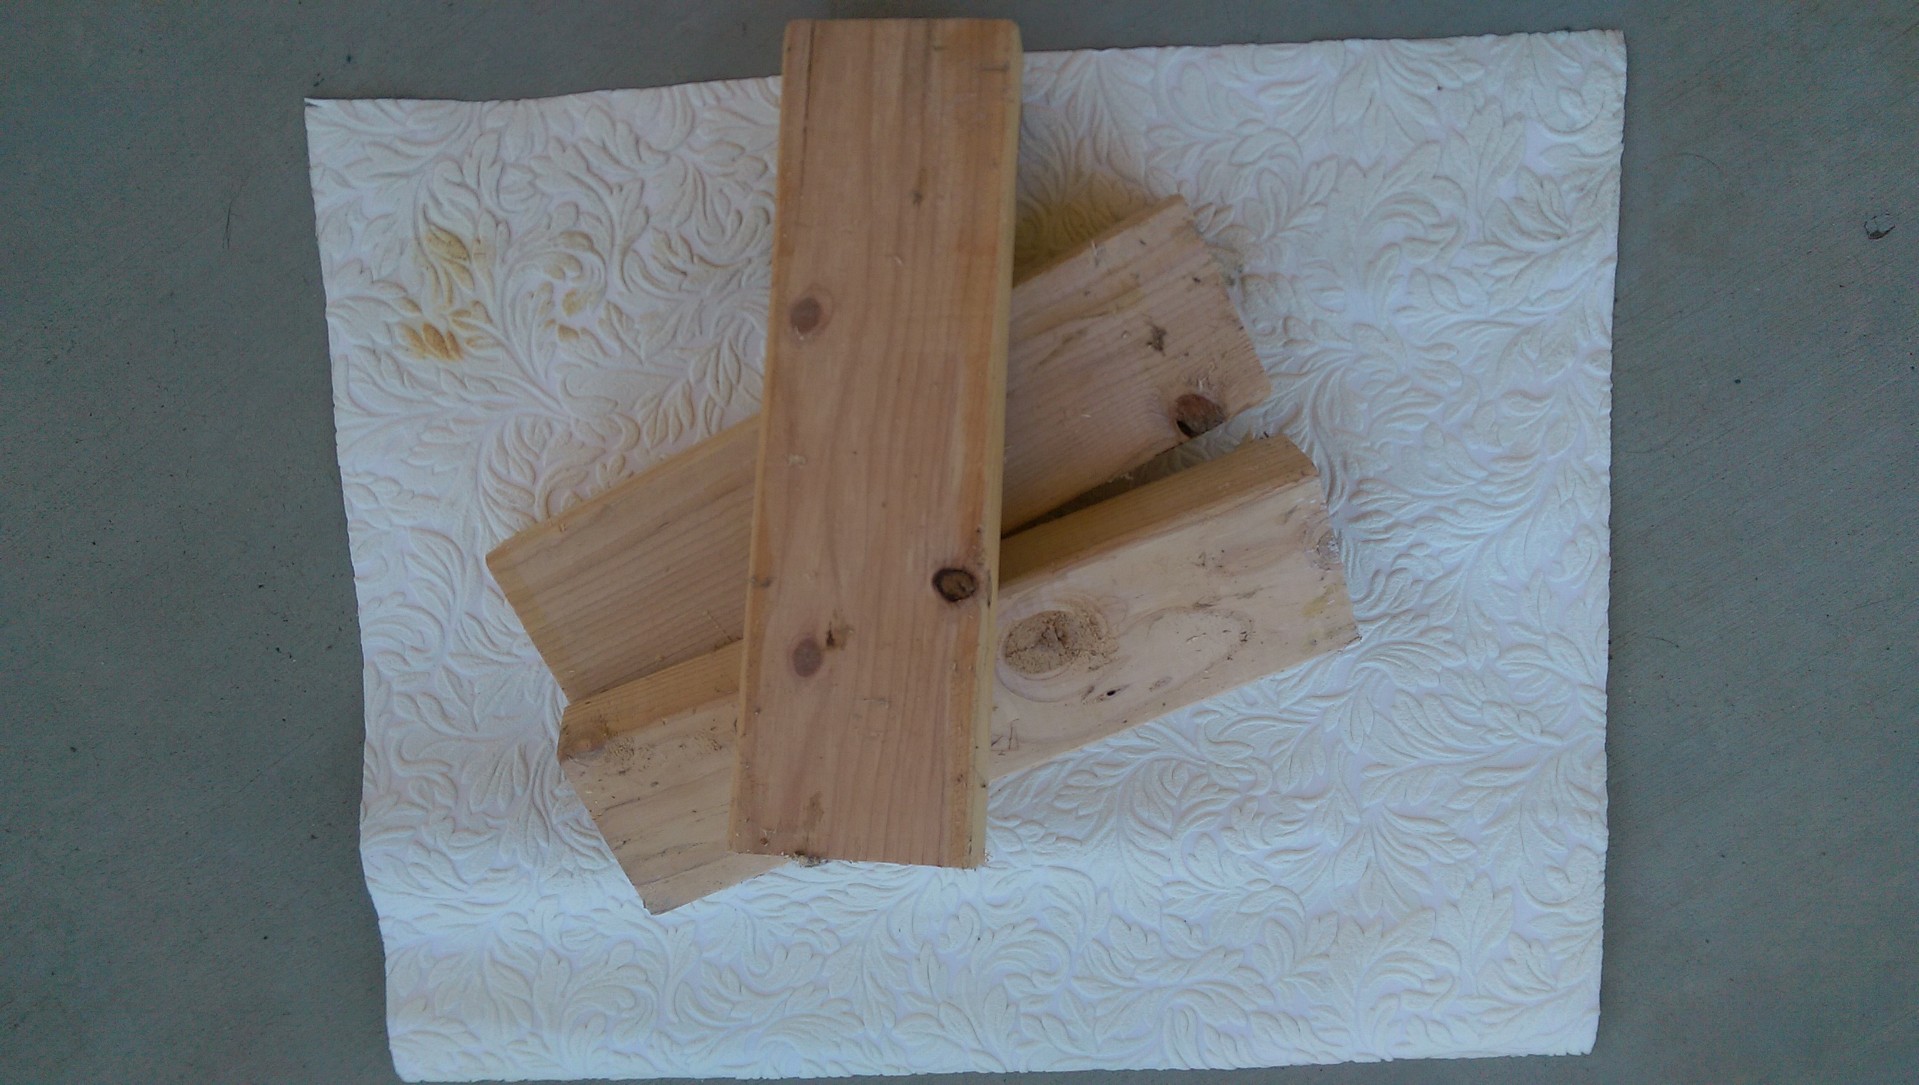
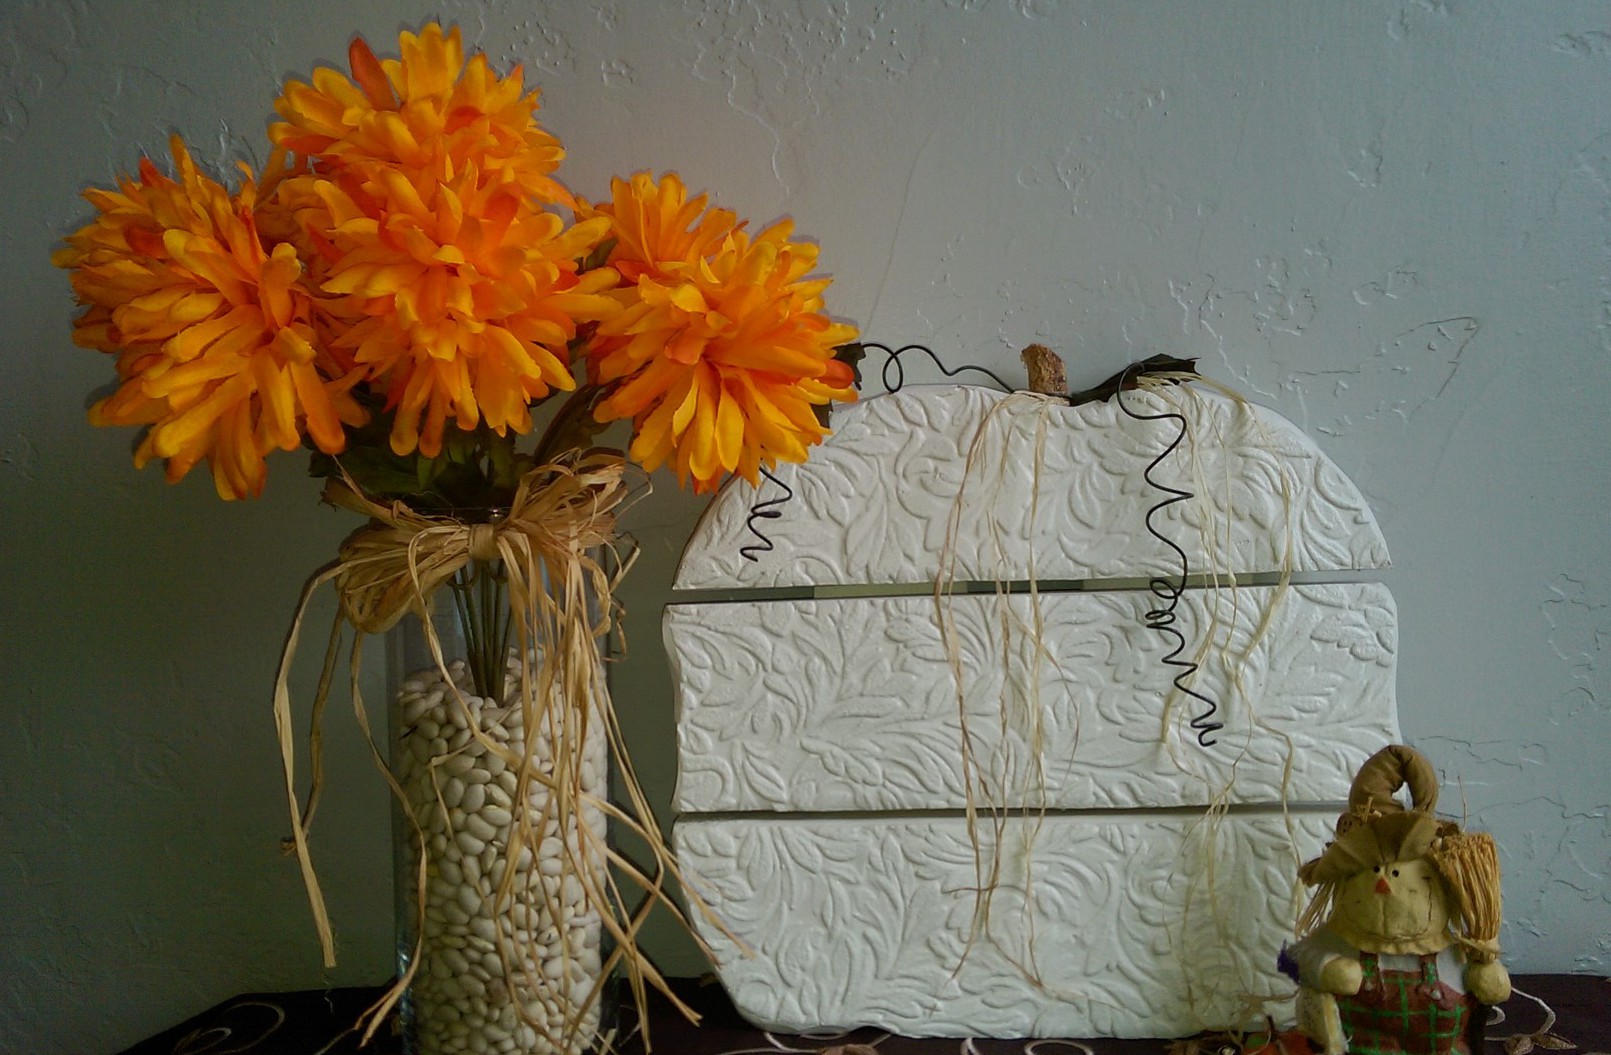
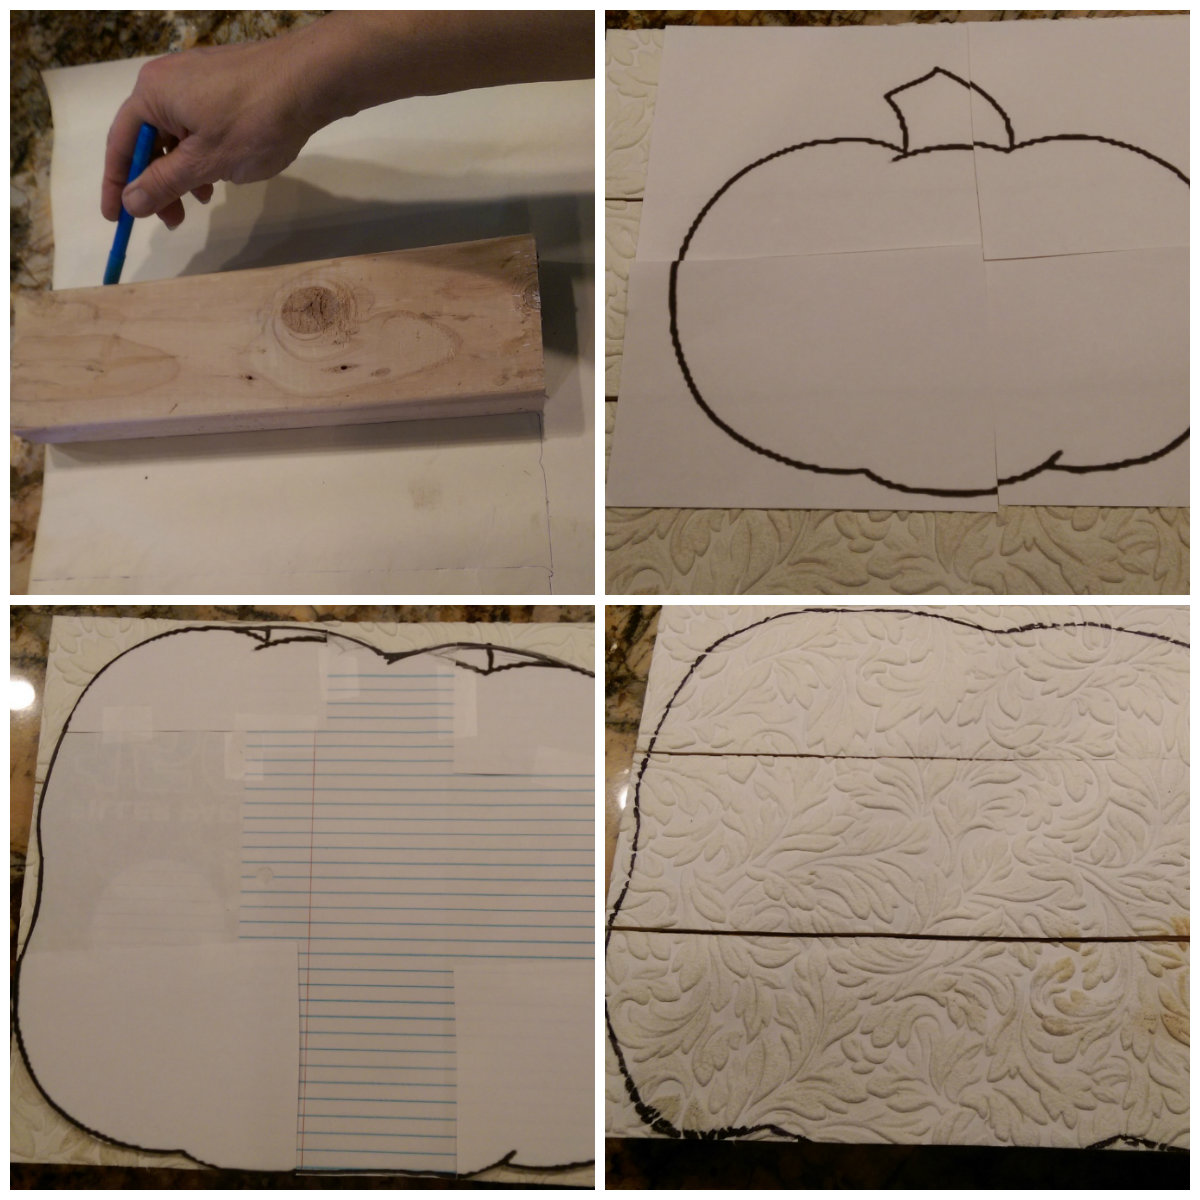
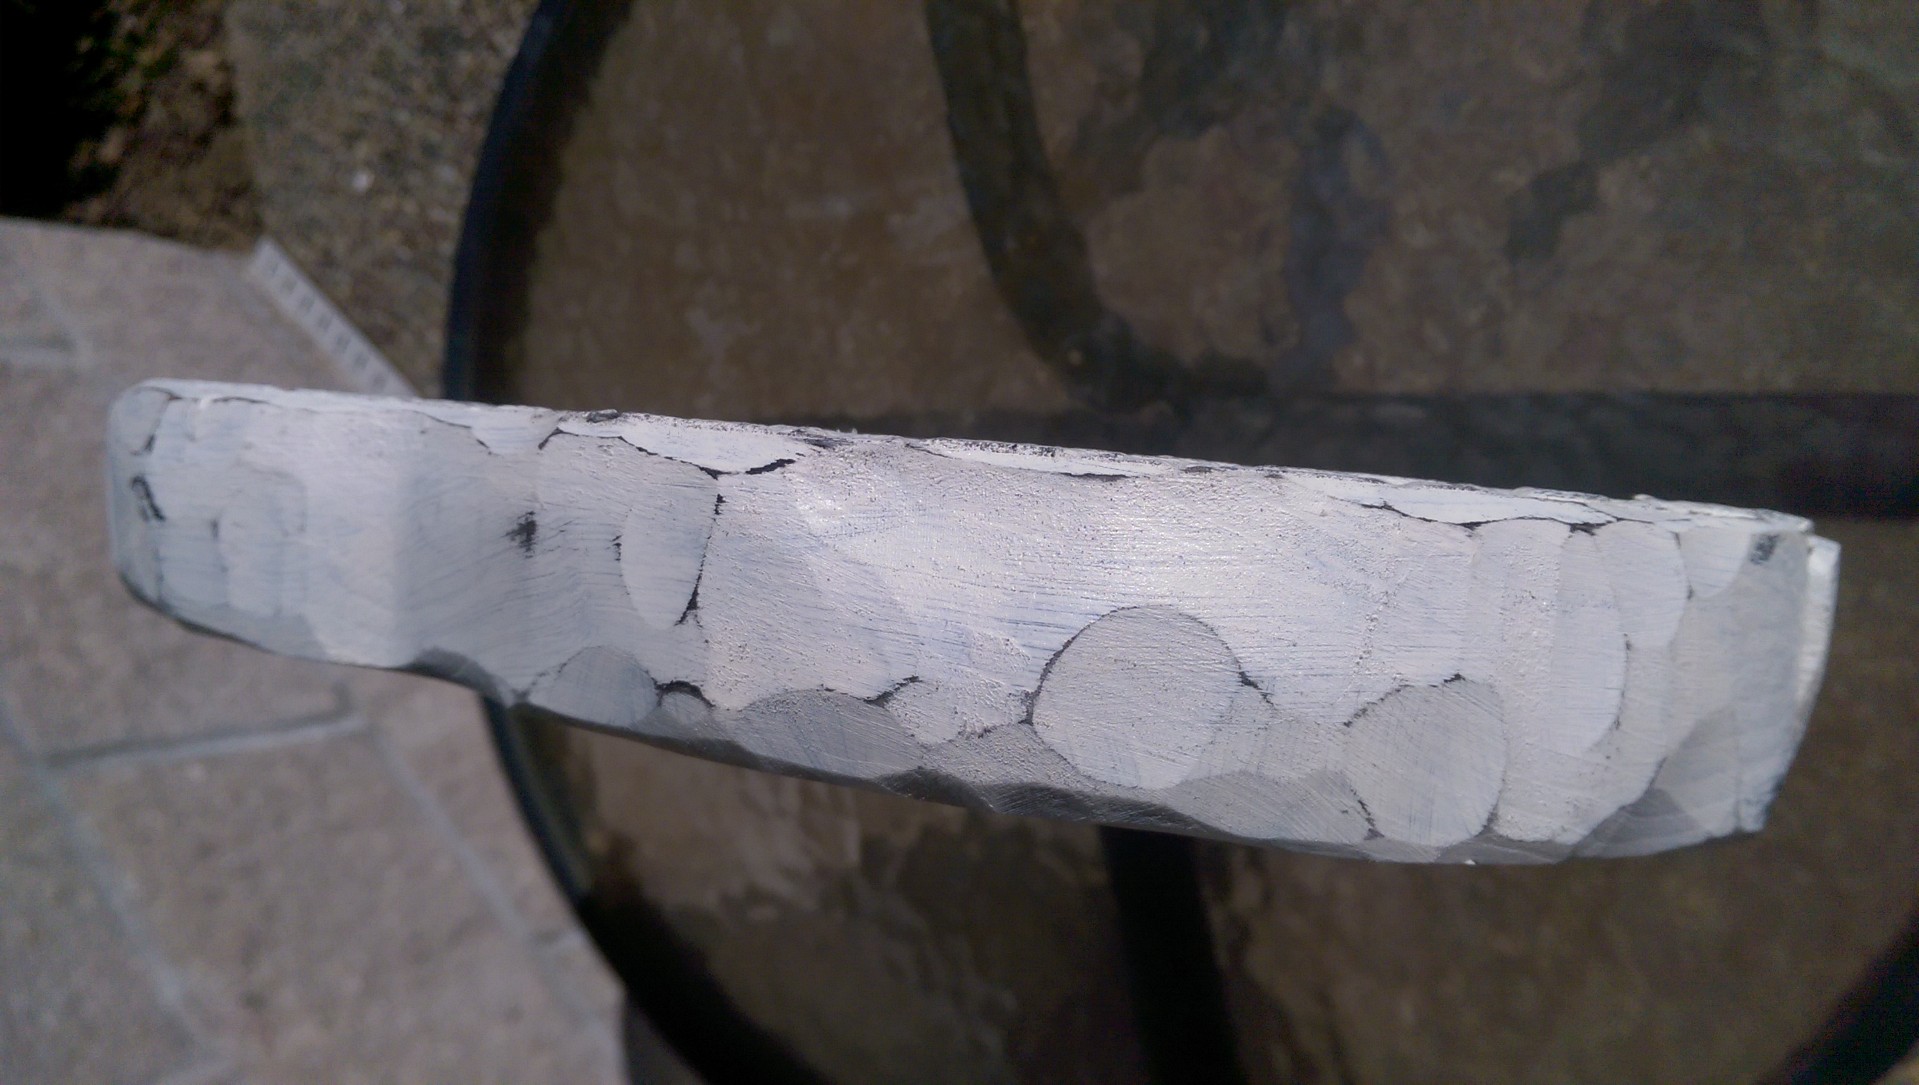
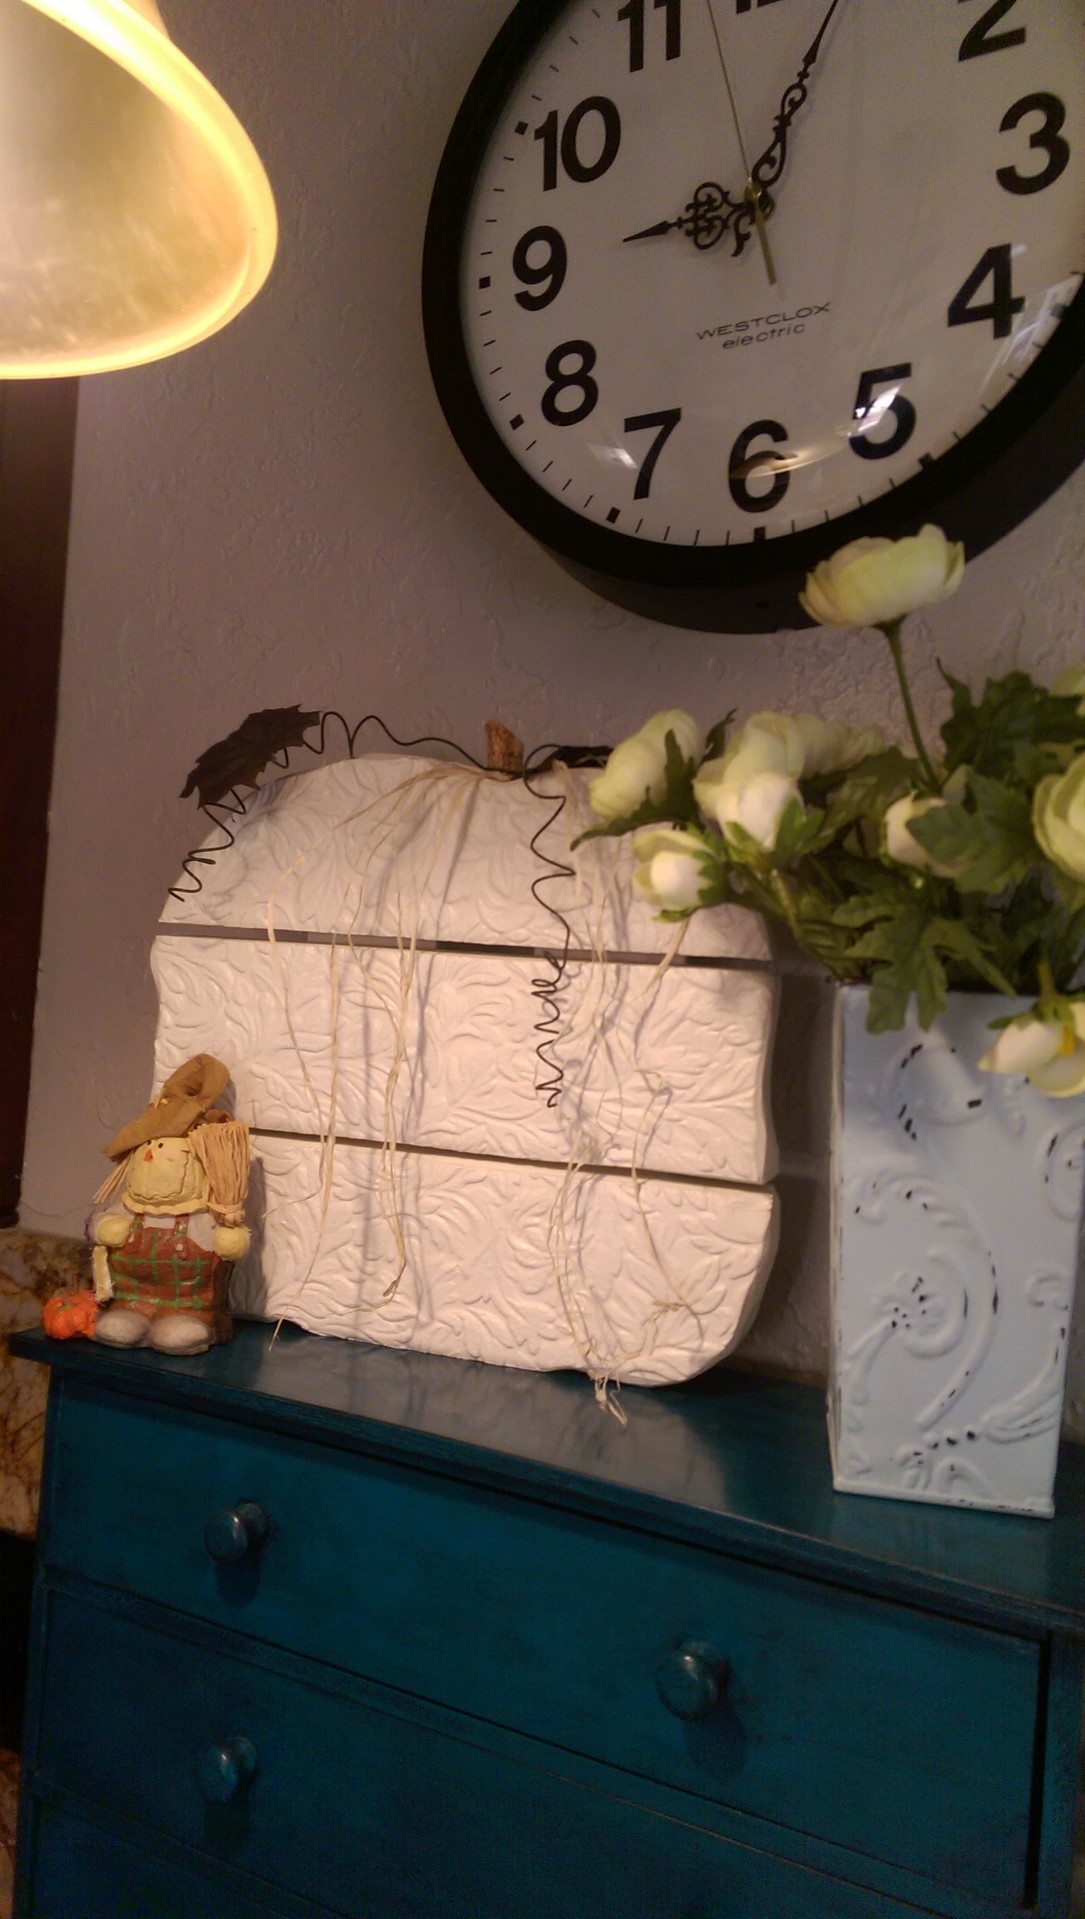
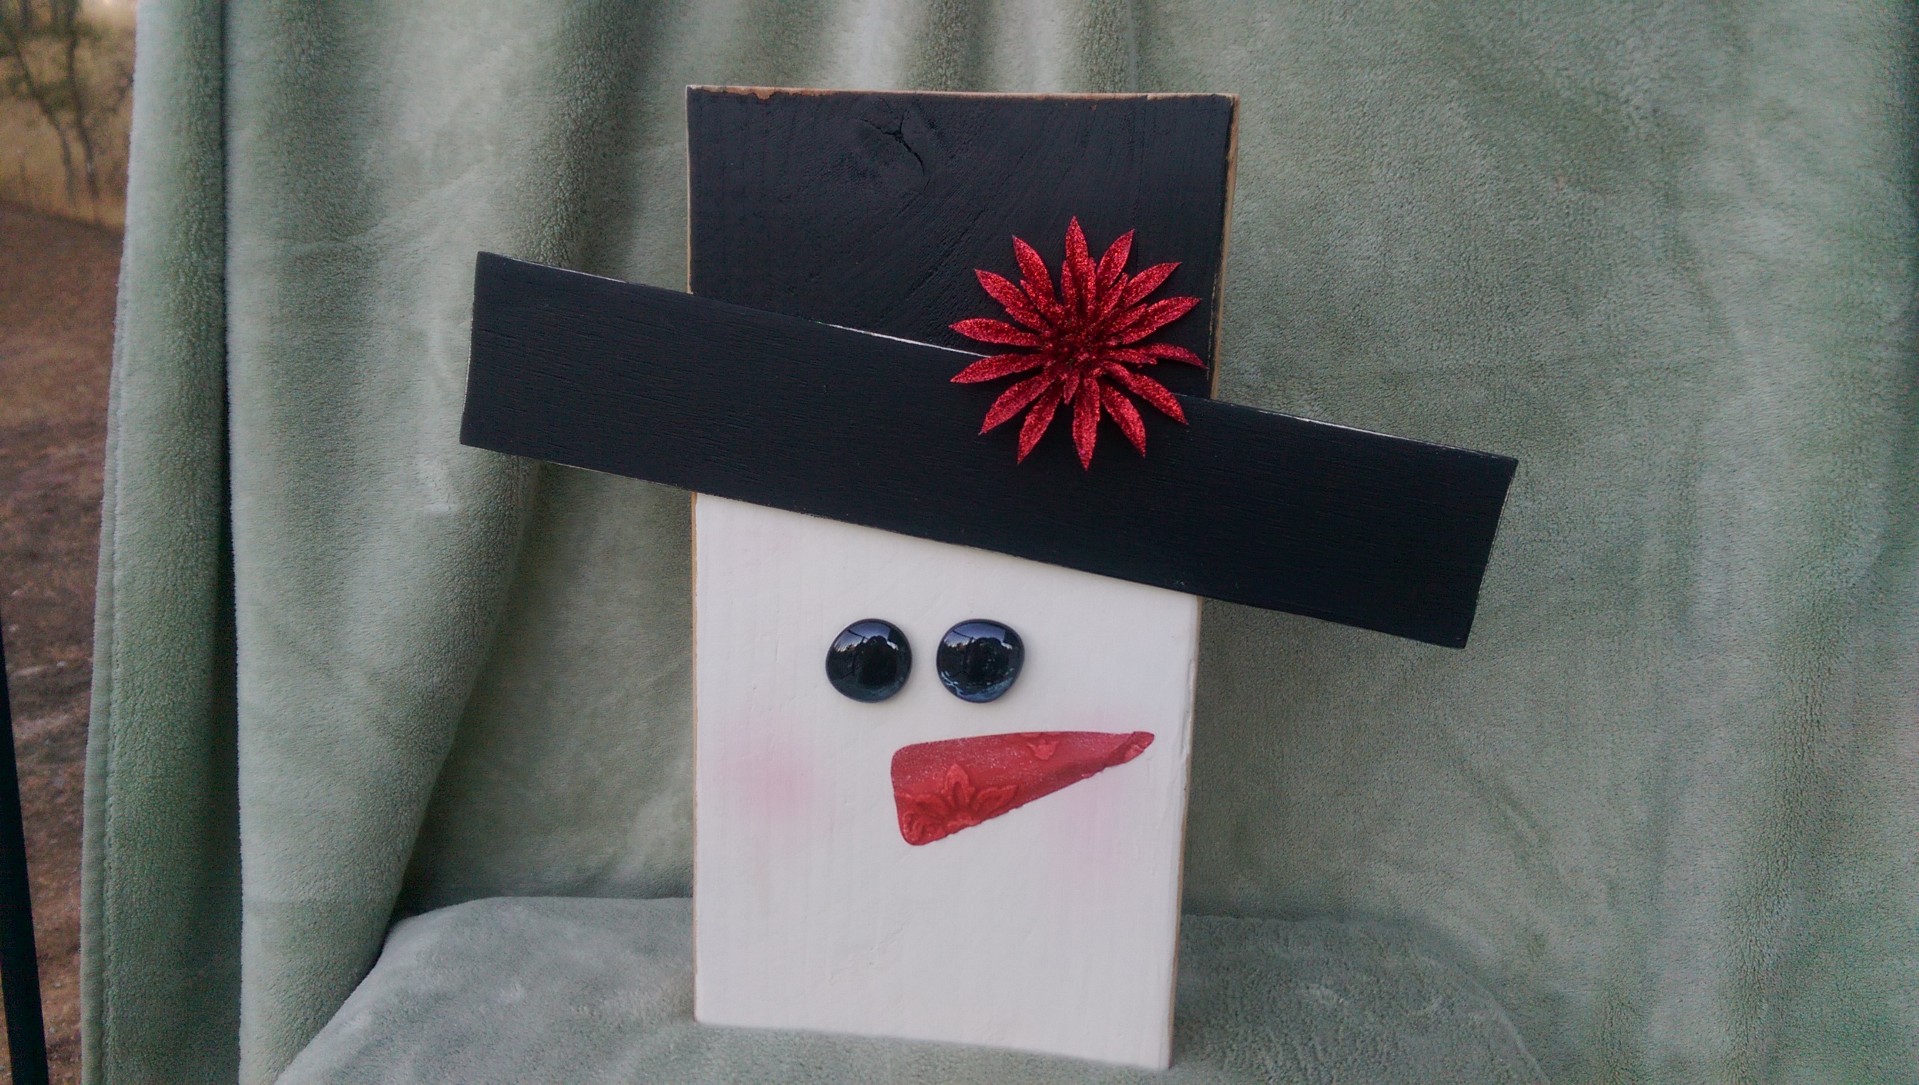
This Snowman/Scarecrow craft was requested by someone who had seen a similar craft online using planks.   As you can see, this craft is reversible, making it possible to have it out from October through January.  Love that!  I will do a tutorial on this soon.  Promise!  ***UPDATE: Here is the tutorial***

WP_20151104_009 WP_20151104_010

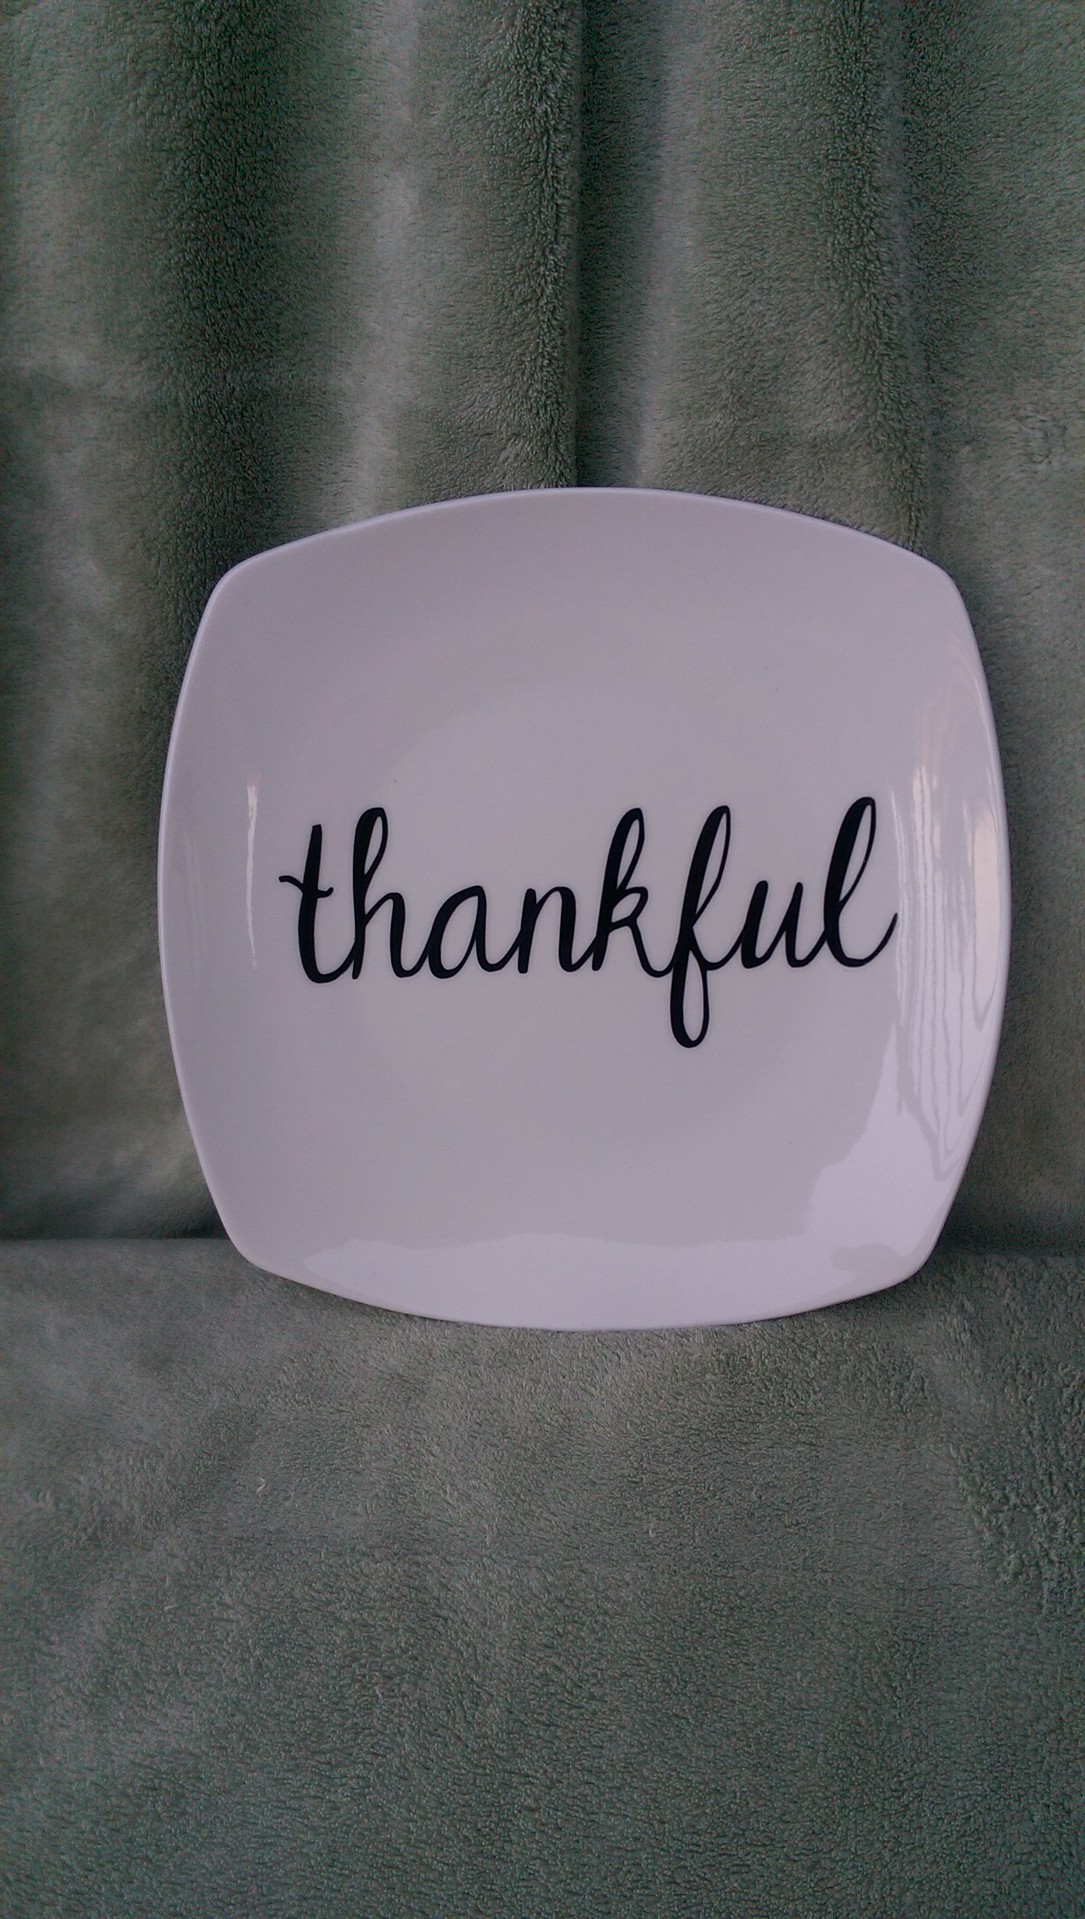
This 2 minute craft  is great for display as well as for holding a plate of holiday goodies.  It is as simple as removing the backing from the vinyl sticker that I cut with my Roland Dr. Stika machine, placing the sticker and rubbing it to smooth it out, then removing the masking layer.  Easy peasy!  I love how simplistic it looks.

WP_20151104_011

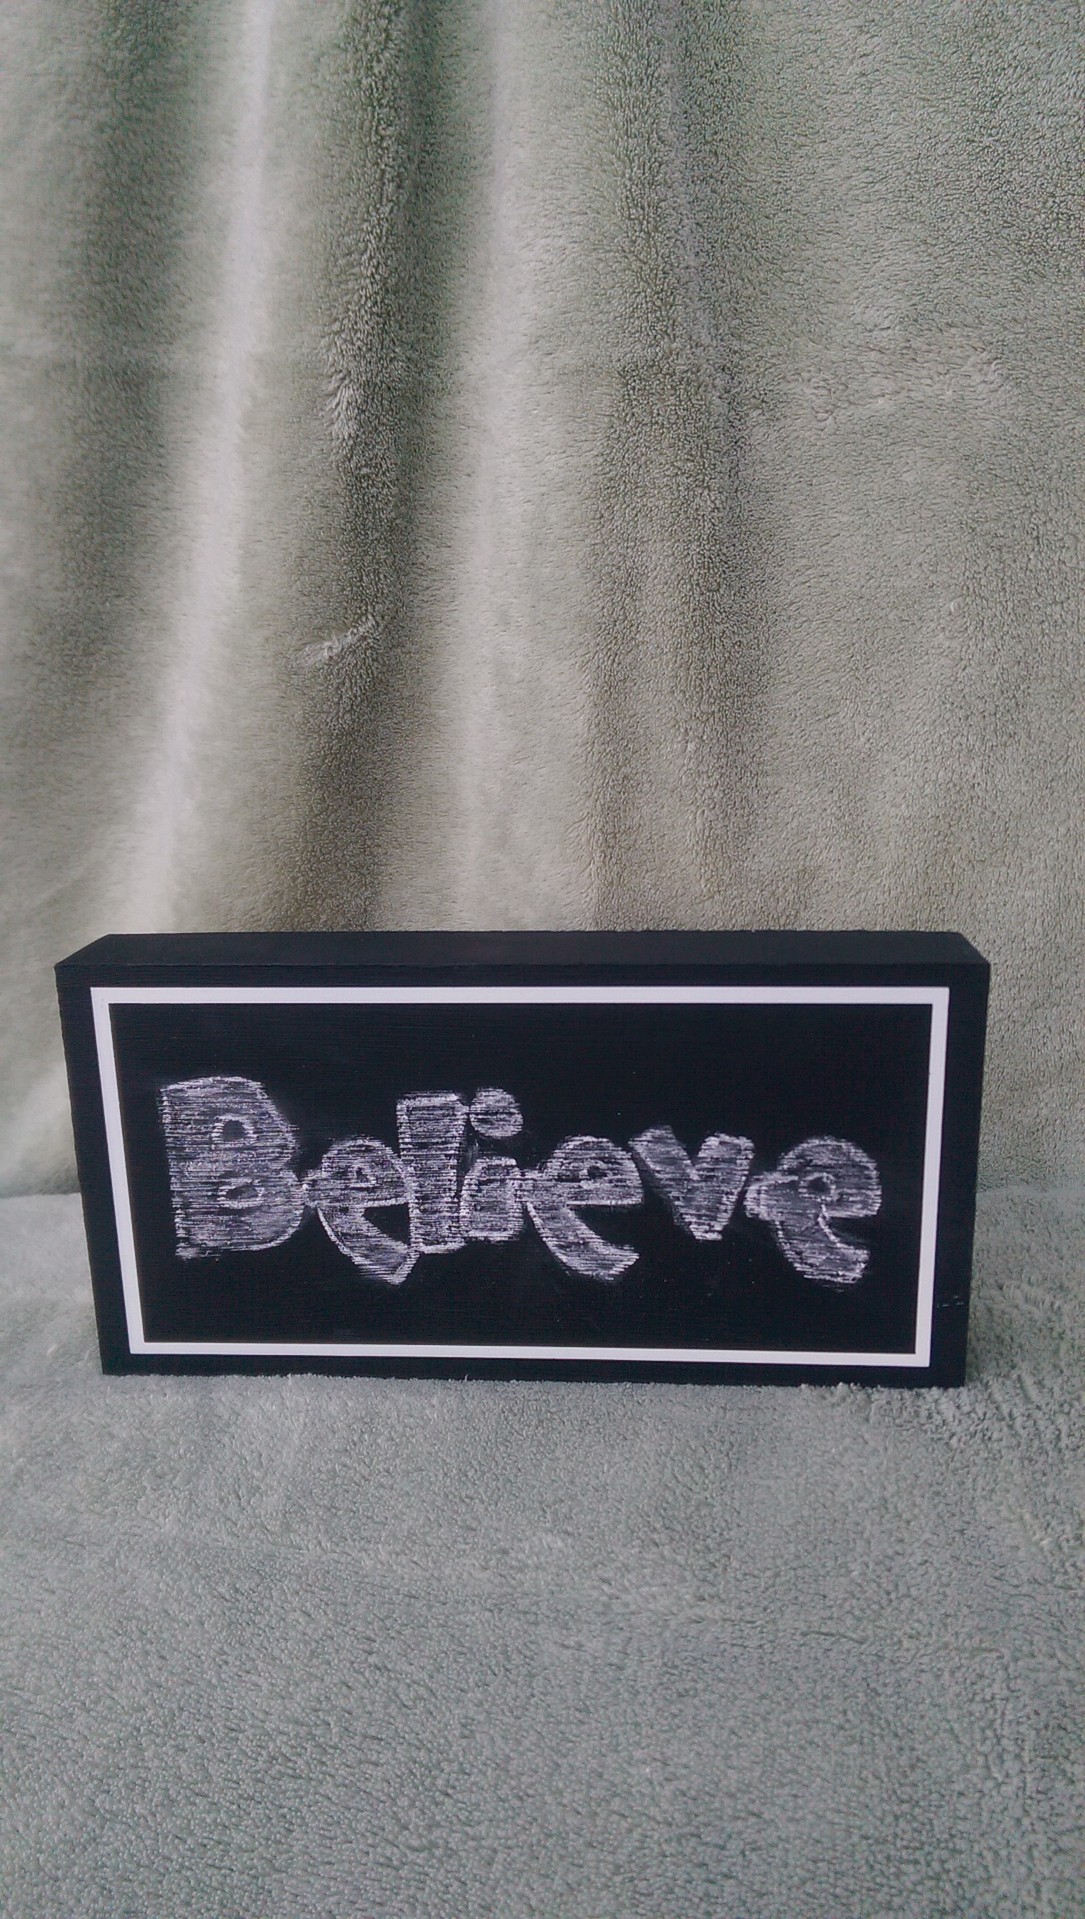
I found some little wood boxes that I thought would make perfect little chalkboards.  Before Super Saturday, I will paint the boxes white.  That day we will add a vinyl frame to use as a stencil.  After painting with chalkboard paint and letting it dry (we always use hair dryers at Super Saturday to speed up the drying process!), we will remove the frame vinyl to expose the white below.  I’m also going to do a quick demo about how to easily “write” on chalkboards.  I love that this little guy can stay up year round.  I love, love, love chalkboards and the fact that “art” can change in a matter of seconds.

WP_20151104_012

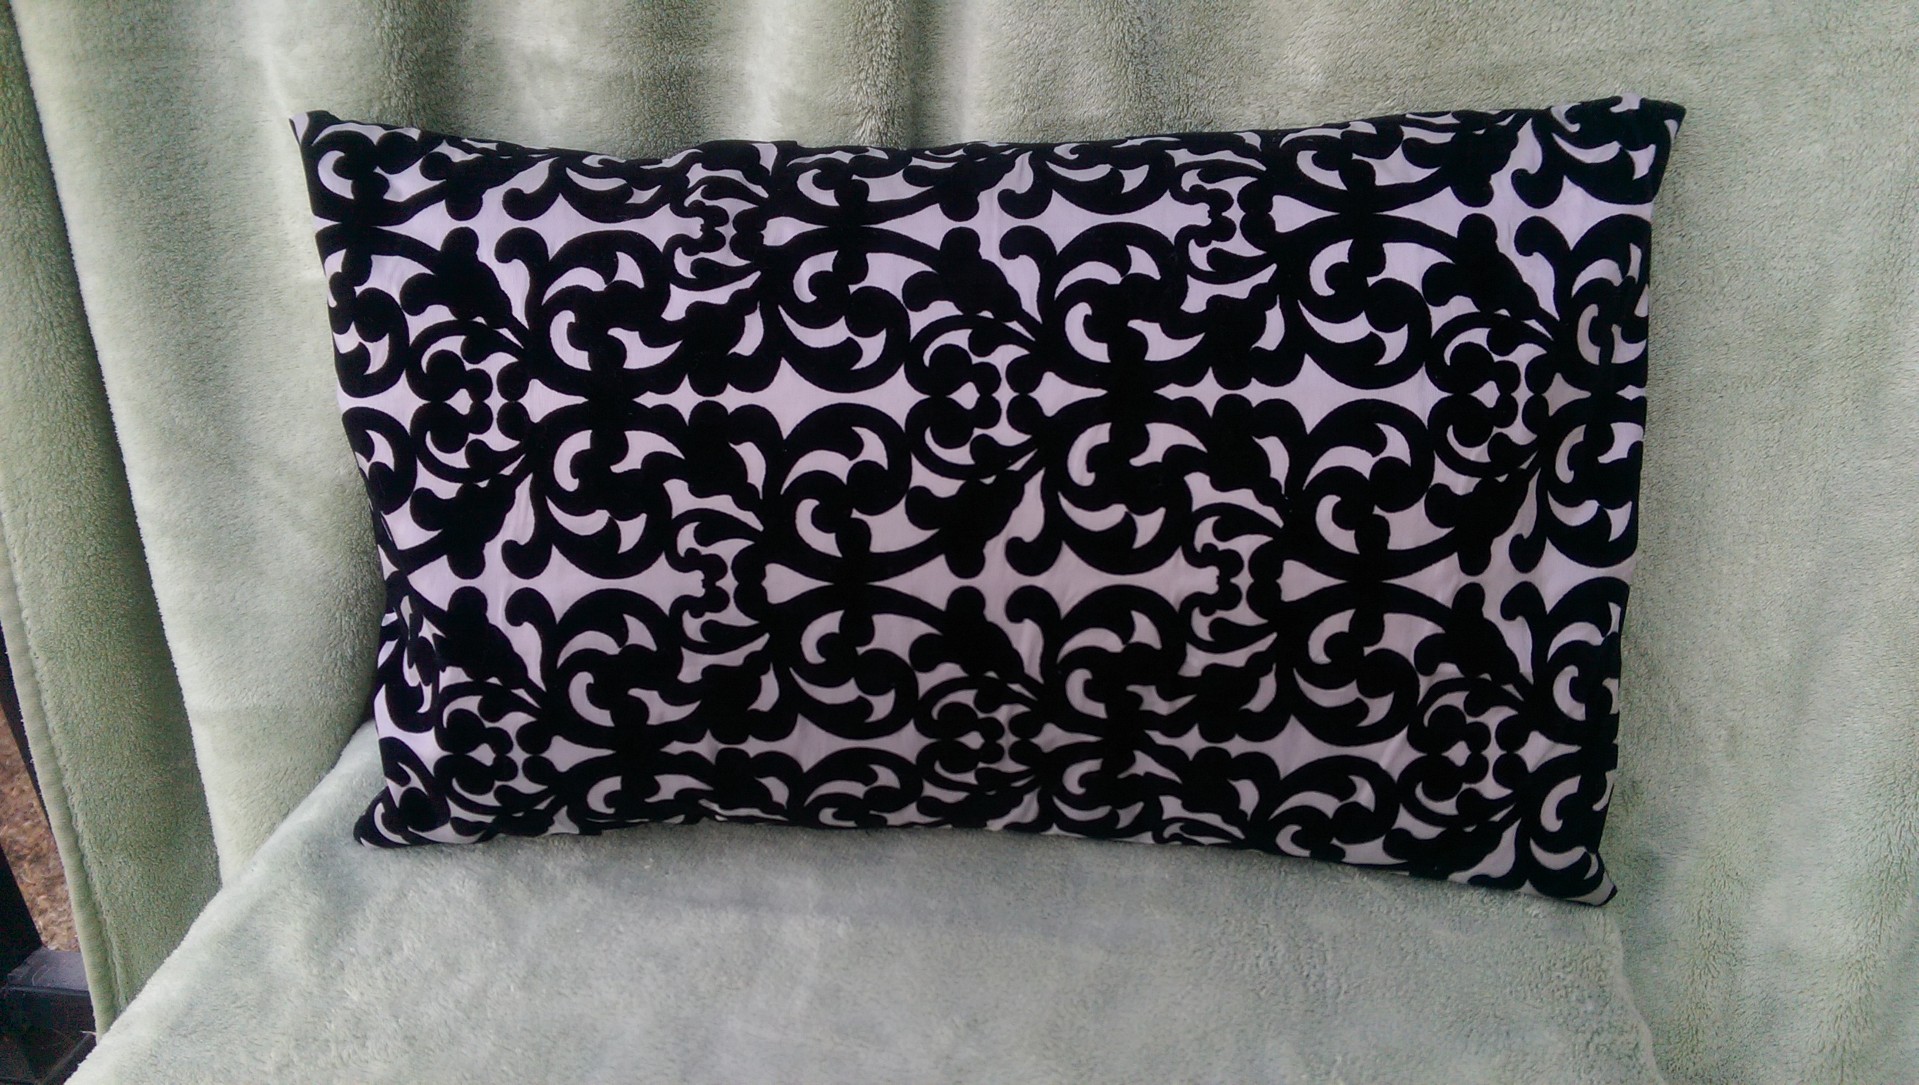
We are also going to do a demo of how to make a 5 minute pillow cover.  Soooo easy!  Here is a great video tutorial to show you how it’s done and here is one of the many pillows that I have made this way:

WP_20151104_013

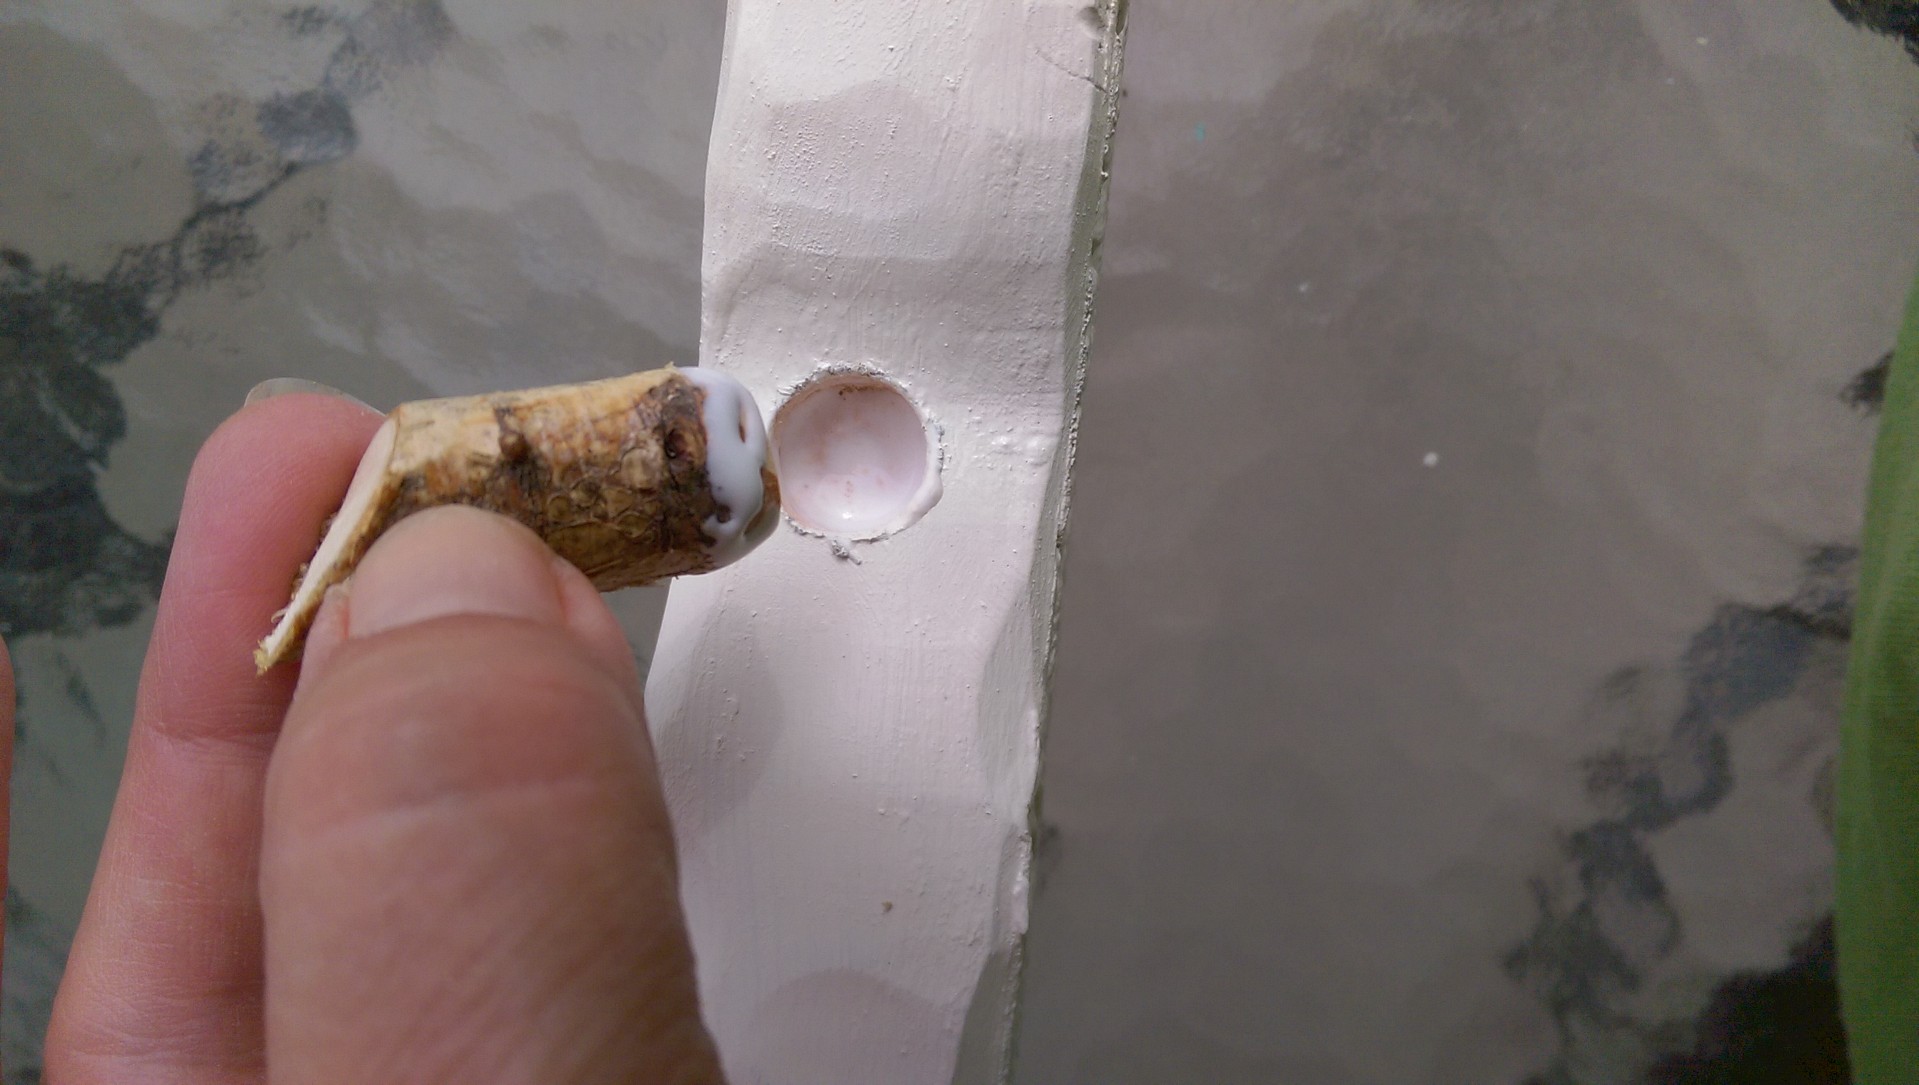
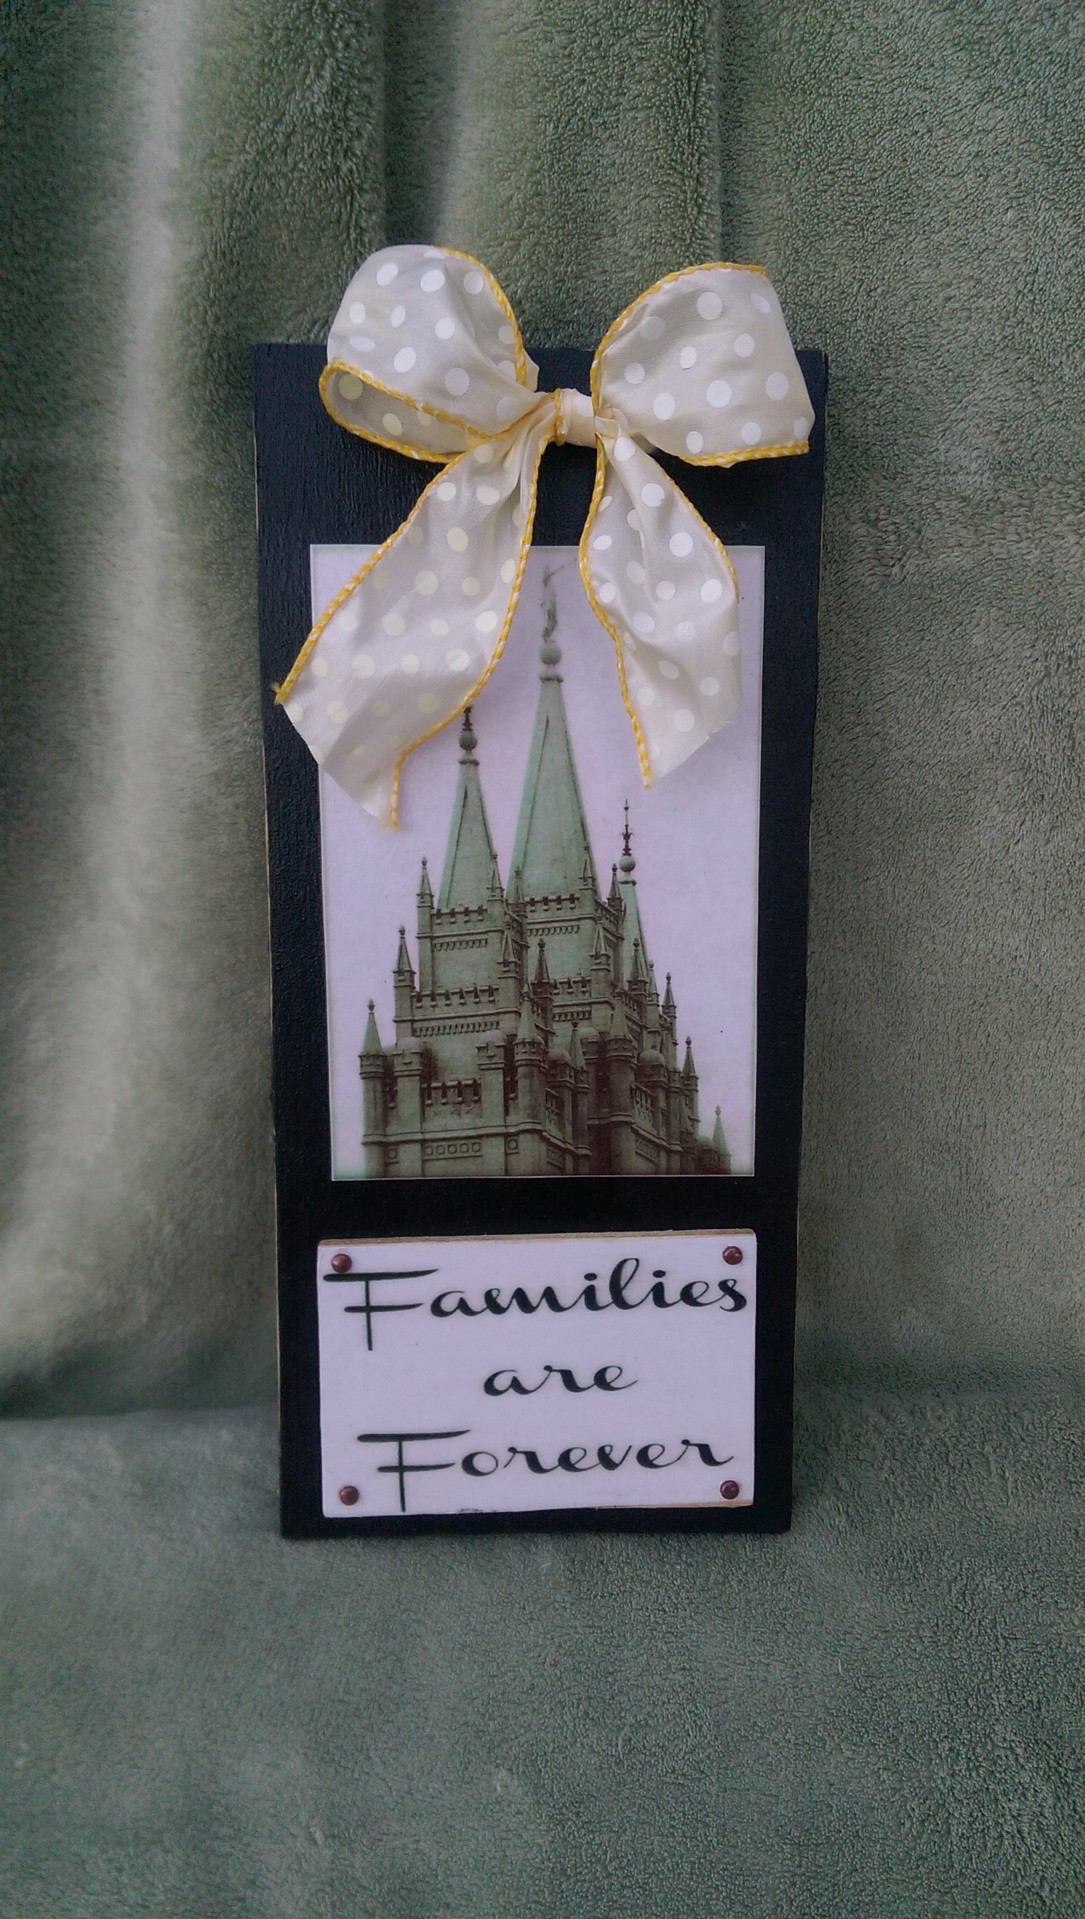
Lastly, here is a craft that I patterned off of one that my friend found online and loved.  I made sure to use an image that is copyright free of the LDS Salt Lake Temple spires.  We will decoupage that as well as the saying, “Families are Forever”.  This idea can be used in a thousand different ways, using different pics (pics of children and grandchildren, family home…) and sayings.  I drilled tiny holes in each corner of the word wood so I could easily insert little brads for added detail.  I also drilled a couple of larger holes on the top for the ribbon to go in and, BAM! it’s a fabulous item to hang in your own home or to give as a gift.

WP_20151104_014

I’m so excited for this Super Saturday event…I can hardly wait!  It is so much fun to turn on the Christmas tunes and work and laugh and craft with friends.

Do you participate in a similar crafting event?   If you are not aware of a similar event around you, why don’t YOU get one started?  Grab your friends and family and get crafting!  You just might end up with some pretty cool stuff and warm memories as a result.


********* Linking up to these awesome parties!*********

Welcome to 31 Days

Textured Wooden Pumpkin

Textured Wooden Pumpkin2

Fall is in the air…isn’t that exciting?  Around here, that means that we are no longer having triple digit temperatures.  Woo hoo!  With daytime highs of less than 85 degrees and night time lows in the 50’s, I’m in the mood for everything Autumn.  The other day I got the hankering to just make something new to add to my Fall decorating.  I gave myself a challenge.  Do you ever do that?  My challenge was that I would use materials that I already own and create something I’ve never seen before.  Here is what I decided to work with:

WP_20150923_010

Some stained old textured wallpaper and 3 scrap pieces of 2×4 left over from a garage shelving project.  Are you inspired?  I was.  Wanna see what I made?

WP_20151027_001

Turned out okay, don’t you think?  I happen to love it!  Would you like to see how I made it?  Alright.  Here we go:

Textured Wood Pumpkin collage

First step, I cut out the textured wallpaper.  I wanted a continuous pattern so I traced around the 2×4’s, stacked vertically, on the back side of the wallpaper.  After cutting out the wallpaper, I glued a strip down on each of the 2×4’s using regular white glue.  Easy.  To make sure that it didn’t bubble, I stacked them up and weighed them down with books.  As the glue dried I made up a pattern.  Kind of.  I’m not an artist so I went to the computer and found a basic pumpkin template.  I printed it out then cut the image in 4 pieces so I could stretch it out to make a larger size.  After taping it down to a large sheet of (pieced together) paper, I drew in my own lines.  Next step, I cut out the paper template and then transferred the pumpkin shape to my textured wallpaper 2×4’s, again making sure that the pattern was continuous.

After cutting the individual pieces out, I sanded random dents in the edges to make them more rounded and textured. See?

WP_20150929_007

I wanted the pumpkins to look nice and finished and not thrown together so I made sure to “caulk” the edges with spackling.

WP_20150930_001

See how much better the spackled part looks?

I chose to paint my pumpkin a nice white, but orange, black, aqua or teal would be equally nice.  I had originally painted mine black with the intention of sanding the edges to allow the black to show through, but ended up liking the white, un-distressed look.

My stalk is a cut piece of a branch from a tree in my yard.  If wishes were fishes, I would have made it longer, but by the time that I decided that, the darn thing was too attached to remove.

WP_20150930_003

Once the paint dried, I assembled the pieces:

A few twist of baling wire forms the tendrils.  I also added some silk leaves and some natural raffia…

And, there you have it… a finished pumpkin.

WP_20151002_003

I’m kind of liking my new pumpkin.  What do you think?

WP_20151027_005

********* Linking up to these awesome parties!*********

———This post was FEATURED!!!———–

Live Randomly SimplePieced Pastimes

http://www.cozylittlehouse.com/2015/11/tweak-it-tuesday-166.html

Welcome to 31 Days

Funky Junk Interiors: DIY Salvage Junk Projects

Intelligent Domestications  101 + Pumpkin Decorating Ideas:

Updated Metal Star

Once upon earlier this morning, I had a metal star that looked like this:

IMAG00759

I bought this 28 inch metal star at a garage sale about 5 years ago for $1.  Loved the price, but I wasn’t crazy about the finish.  Still, I slapped it up on my wall and forgot all about it.   It was up high enough that the unfortunate color and scraped-off paint didn’t really look too bad against the beige wall it was hanging on.  As you may or may not know, I’m going gray in my house.  The metal star came down so the gray paint could go up.

I will give you a preview of what this star looks like now:

IMAG00777

Kind of looks like something that you would see in the aisles of Hobby Lobby, doesn’t it?   Do you wanna know how I got this look?  So easy!  First I spray painted the whole thing black and once that dried, I sprayed on 2 coats of a nice shade of aqua:

I tell you, spray paint these days dries so fast.  Of course, the reason that I painted the star black in the first place is because I wanted to be able to distress it and have black showing through the aqua.  You already knew that, right?

To distress projects that I paint with water-based paints, I usually rub the areas that I want exposed with a damp rag or scrubbing sponge, but water really didn’t have the same effect with spray paint.  I ended up going with pure acetate nail polish remover.  I messed around using the scrubbing sponge…

IMAG00764

…but ended up liking the look achieved by using Q-tips and cotton balls the best.  As the acetone hits the paint, it tends to smear the black beneath into the top coat so I messed around with that a bit :

Here’s some practical advice:  be smart and wear gloves.  Trust me on this one.

IMAG00770

After re-spraying the portions that I over-distressed (which was way easier than I thought it would be) I favored using the Q-tips.  Be prepared to use a lot of Q-tips to avoid a smeary look.  Really, it is so super easy.

IMAG00773

Perched on the same screw that it originally hung from, my updated star really shines.  Never to be ignored or forgotten again.  I must say that I L*O*V*E the finished project.

Updated Metal Star

What do you think?


********* Linking up to these awesome parties!*********


DIY: “Special Times” Perpetual Calendar

SpecialTimes

Have you seen those family birthday calendars out there in the internet world?  They are a cool way to keep track of the birthdays in your family, for sure.  Most of the ones that I have seen are a long wooden sign that says, “Birthdays” or “Family” or “Family Birthdays” or something along those lines.  Across the bottom of the sign they list each of the twelve months or an initial to represent each month.  Then, under each month there are squares, hearts, circles all chained together; each one has a name and a number to represent a family member’s birthday.  Have you seen them?  Do you have any idea what I am talking about?  If not, Google or Bing “Family Birthday Calendar” right now.  You will be bombarded with all kinds of versions of what I just described.  See?   I would show you some pictures, but I don’t want to break any copyright laws.  End up in prison, or worse.

Well, a while back I had some requests from some ladies at church to make one of these birthday calendars for an upcoming “Super Saturday” craft making day.  I looked and looked and hemmed and hawed as I tried to find the perfect calendar to copy.  At the back of my mind were questions like, “What about small families?” and “What if no one has a birthday in Feb., or July, or September…the whole thing will look out-of-whack” and “What if a new child or grandbaby is born?  People will constantly be seeking me out to cut out more hearts or squares or circles.”.  I also got thinking about the anniversaries and other holidays that we look forward that aren’t birthdays.   This is what I came up with instead:

IMAG00320

Basically I painted a purchased wood plaque, painted it black and cut out white vinyl on my Roland Dr. Stika cutter.  The black with white lettering kind of gives a chalkboard-y look, don’t you think?

The hook is just a cup hook that I spray painted black.

IMAG00330

When doing this in bulk, just stick the screw ends into some cardboard to make them stand up and spray away.  Then screw it in your painted board.  Easy enough!

For my tags, I just hand traced and cut them out with scissors, but you can use any shape that you want…rectangles…hearts…circles…whatever.  Make sure that there is a hole to slip over the hook.  For a clean look, only use one shape and have enough for each birthday, anniversary, holiday that you want to remember to celebrate.  In fact, have extras for newbies that join the family.  I handwrote on my tags and added border details, but when I made one of these perpetual calendars for my parents (who have 10 kids plus their spouses and grandchildren…), I typed, printed and then hand cut out each tag.  Made it look more professional.

So, the way that these calendars work is that you put all of the tags in chronological order with the next special day’s tag on top and place the stack on the hook.  When the special day on the top is over, pull the pile off of the hook, put the top tag on the bottom of the pile and put them all back on the hook.  That way you can see at a glance when the next celebration is.  Cool, right?  (If two or more people share a special day, put both events on one tag.)

As I have mentioned before, I am losing the beige and going gray in my home and I decided to lighten my calendar up.  First I mixed up a gray-blue shade of paint and painted a couple of coats over the black.  While the paint was still tacky I distressed a bit to reveal the black layer below.  I like to use a damp paper towel and/or my thumbnail to gently rub and  scrape away bits of paint.

Just for fun, I added a stenciled detail:

I cut out some new vinyl using the LimaBean font, slapped it on and replaced the cup screw.  I think that I like it.

So, which look do you like better?

Next celebration?  Mother’s Day!  Have a happy one!


********* Linking up to these awesome parties!*********

Are You a Painting Scaredy-Cat?

PaintingScaredyCat

I know a lot of people who are almost deathly afraid of painting.  Are you?  Does the sight of a paintbrush bring fear to your heart?  Make your pulse quicken?  Maybe some psychologically see the word “PAIN” hidden in the word “PAINt” and make the assumption that it is just too hard to do.  For those of you who are fearful, read on.  For those who just think painting is a big pain in the patootie, read on, as well.  My goal is to empower one and all with the knowledge that painting, although a lot of work, is such a rewarding skill to have.  And…it is easy!  Trust me on this.

Years ago my hubby and I were given the opportunity to rent an Eichler home in the California Bay area (think pricey!) for a very low comparable rent because our friend who owned it just wanted someone in there that he could trust to take care of it.  Since we were getting such cheap rent, our friend asked us to repaint a long wall in the living room/dining room.  We lived there for 8 months and I hated the way that that wall looked.  In my opinion, it ruined the whole house.  One Saturday, my hubby and I finally decided to tackle the wall project and you know what?  It took us less than an hour of working time to paint the darn thing.  Two coats of paint.  Transformed the place!  Made me wonder why we put it off.  Guess we were just scaredy-cats!

I’m sure that we have all heard that the fastest and cheapest way to transform a room is with paint and that is so true!  Last week I painted my master bath and I can’t even believe the difference it made.

The whole place feels happier to me.  I almost hear angels singing every time that I walk in there!  All that as a result of a few hours of work.  Totally worth it!

I am in the midst of painting my family room and thought that I would share some pointers that make painting so easy.  As with anything else, you have got to have the right tools and this is a tool that I love:

I got mine at Lowes for about $27.  Not much more than it would cost to buy a roller brush with an extension plus a roller tray.  Best part is you don’t NEED a roller tray.  Genius!  Basically you just suck up the paint into the stick handle with the included siphon.  Absolutely no mess.  I decided to see just how much I could paint in one minute.  You know how much I like to time myself, right?  Look how much I painted in 60 seconds:

IMAG00310

It may be hard to gauge by a picture, but I was impressed.   All that in one, non-rushing, normal paced moment.

This is how much one handle-full of paint covered…almost one whole wall!

IMAG00311

The instructions say that it will take most of the first handle-full of paint to saturate the roller.  From here on out, one handle-full would probably even cover much more area than this.  By the way, when I say, “handle-full” I am referring to the amount of paint that the handle can hold.  It literally takes about 5 seconds to siphon up a handle-full.  And no messy pouring from the bucket.  I LOVE this tool.

That said, what about the edges and trim?  You can put your scaredy-cat painting claws away because I have another tool that makes this job, dare I say, EASY.  Yep, I said it.

IMAG00314

When I painted my master bathroom I didn’t use this tool.  Stupid me!  I spent so much time perfectly placing painters tape to protect my molding and trim.  I have smartened up in my family room painting project.  This edging tool saves me so…much…time.   Seriously, you will want to kiss this tool when you see how much work it saves you.   Basically, this little gadget holds a small painting pad and it has a couple of little wheels on one edge to help the tool glide along the molding.   You can buy them wherever you buy your paint supplies.  At less than $5, it is even cheaper than buying painter’s tape!

Oh, and here is a subject that needs its own paragraph:  don’t buy cheapo paint.  Just don’t!  That is what I used to do and always planned to paint at least two times.  When you buy good paint you can get by with just one coat of paint.  Maybe a little touchup here and there.  TONS of time is saved by buying good paint.  You really don’t save any money buying cheapo paint either because you have to buy twice as much.  It’ll probably cost you more.  So, repeat after me, “No cheapo paint”. “No cheapo paint”.  Got it?  Good.

Other painting tips?  Have a large brush for the corners (where two walls meet up).  Honestly, I think that a large dollar store brush works fine for this (and I don’t feel bad about just tossing it instead of washing it afterwards…we are in a drought here).

Also keep a container of spackle close by to fill nail holes, etc.

IMAG00315

So, has all this calmed your painting fears?  Does the thought of painting seem less painful?  I hope so!   All said, it does take time to paint a room, a door, a piece of furniture, but believe me, that time is time well spent.  When you sit back and realize what a difference a bit of time and some paint make you will realize it was all worth it.  Take courage, my friend!


********* Linking up to these awesome parties!*********