“Welcome Fall” Porch

How often do you decorate your front porch?  I am embarrassed to admit that, as of last week I still had Easter eggs in my porch’s floral arrangement.  Sad, since it is early October.  And, yes, those really are Christmas trees flanking my front door, but they have been standing as sentinels right there ever since we moved in 3 1/2 years ago.  Again…sad.


IMG_20141002_093610

Well, I got out all of my Fall décor and threw some on the porch

. Ho-hum Autumn DecorIMG_20141002_104700


Talk about boring!  It looked like Michael’s craft store threw up Halloween and it landed up on my porch.  Don’t get me wrong…I love Michael’s, (LOVE Michael’s!), but this display had nothing interesting, different, or creative.  Time for an update.  I grabbed a branch from a tree that had fallen down on our property, put it in an iron urn, and hung some pumpkin shaped-bells and metal leaves (that I spray painted turquois) on the branches.  That gave the display some height.  I also spray painted the tall set of pumpkins with chrome and hand painted the single pumpkin a gray-blue chalk paint and then brushed on a super thin coat of Minwax Ebony stain on each.  I like how the stain gives an aged, finished look.  Although I can do it either way, I decided to display the non-Jack-O’Lantern sides.

What else, what else?  Oh, yeah.  The chalkboard that is hanging on the door,  that I gave a tutorial for here.   I had promised that I would explain how I did the chalk writing:   I used a cool font called Blueberry, typed what I wanted to say,  and printed it out.  If you want to copy it, click here:  WelcomeFallChalkboard.  After I printed it out, I ran the long edge of a piece of chalk on the back side of my printed copy- only where the lettering was.  I then positioned the paper, right side up (chalked side down) on my chalkboard.  Using the rounded edge of a paintbrush (a stylus, pen or Sharpie with the lid on would work, just as well), I carefully traced around each letter. After removing the printed paper, I used the faint chalked transfer lines as my guide.  Easy.  The whole process took about 2 minutes.  Just think of the possibilities of making cool chalkboard art.

IMG_20141007_174953IMG_20141007_175816

So, here is my porch, 2nd time around:

IMG_20141008_112045

Nothing over the top or fancy, but like I said before, my goal was to get away from the “look at me, I’m a Fall color” colors this year and try out a totally different color palette .  Basically gray, pewter, turquois and just a touch of orange.  What do you think?  Does it still look Fall-ish?

From Dollar Tree Halloween Plaque to Awesome Chalkboard

fall-plaque

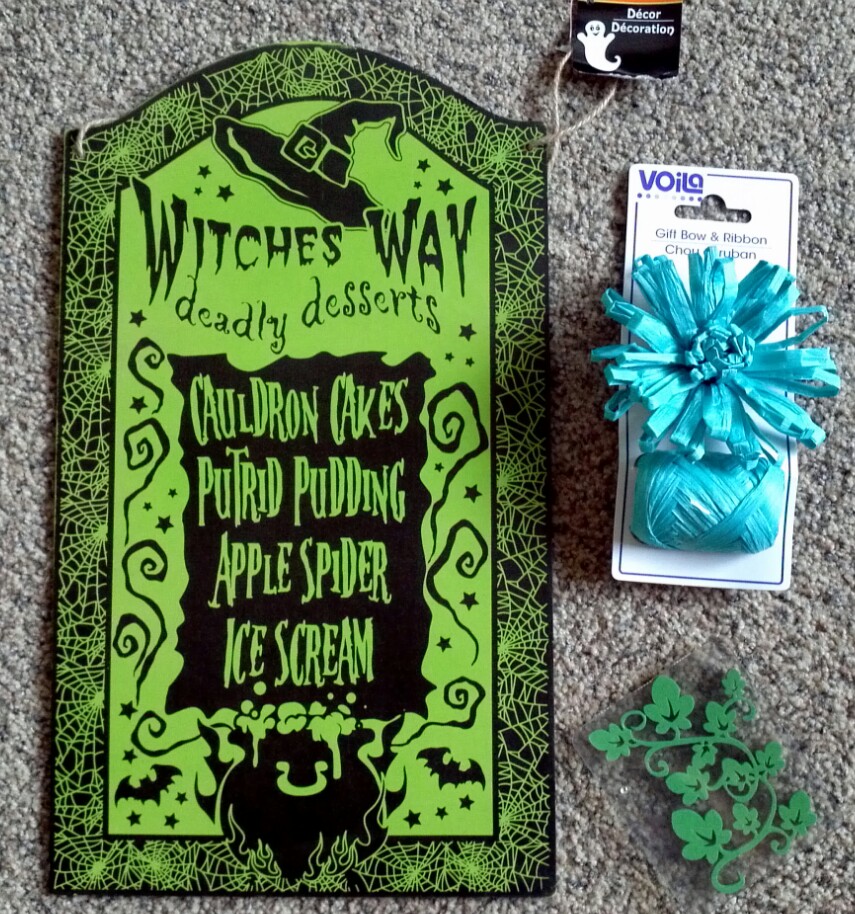
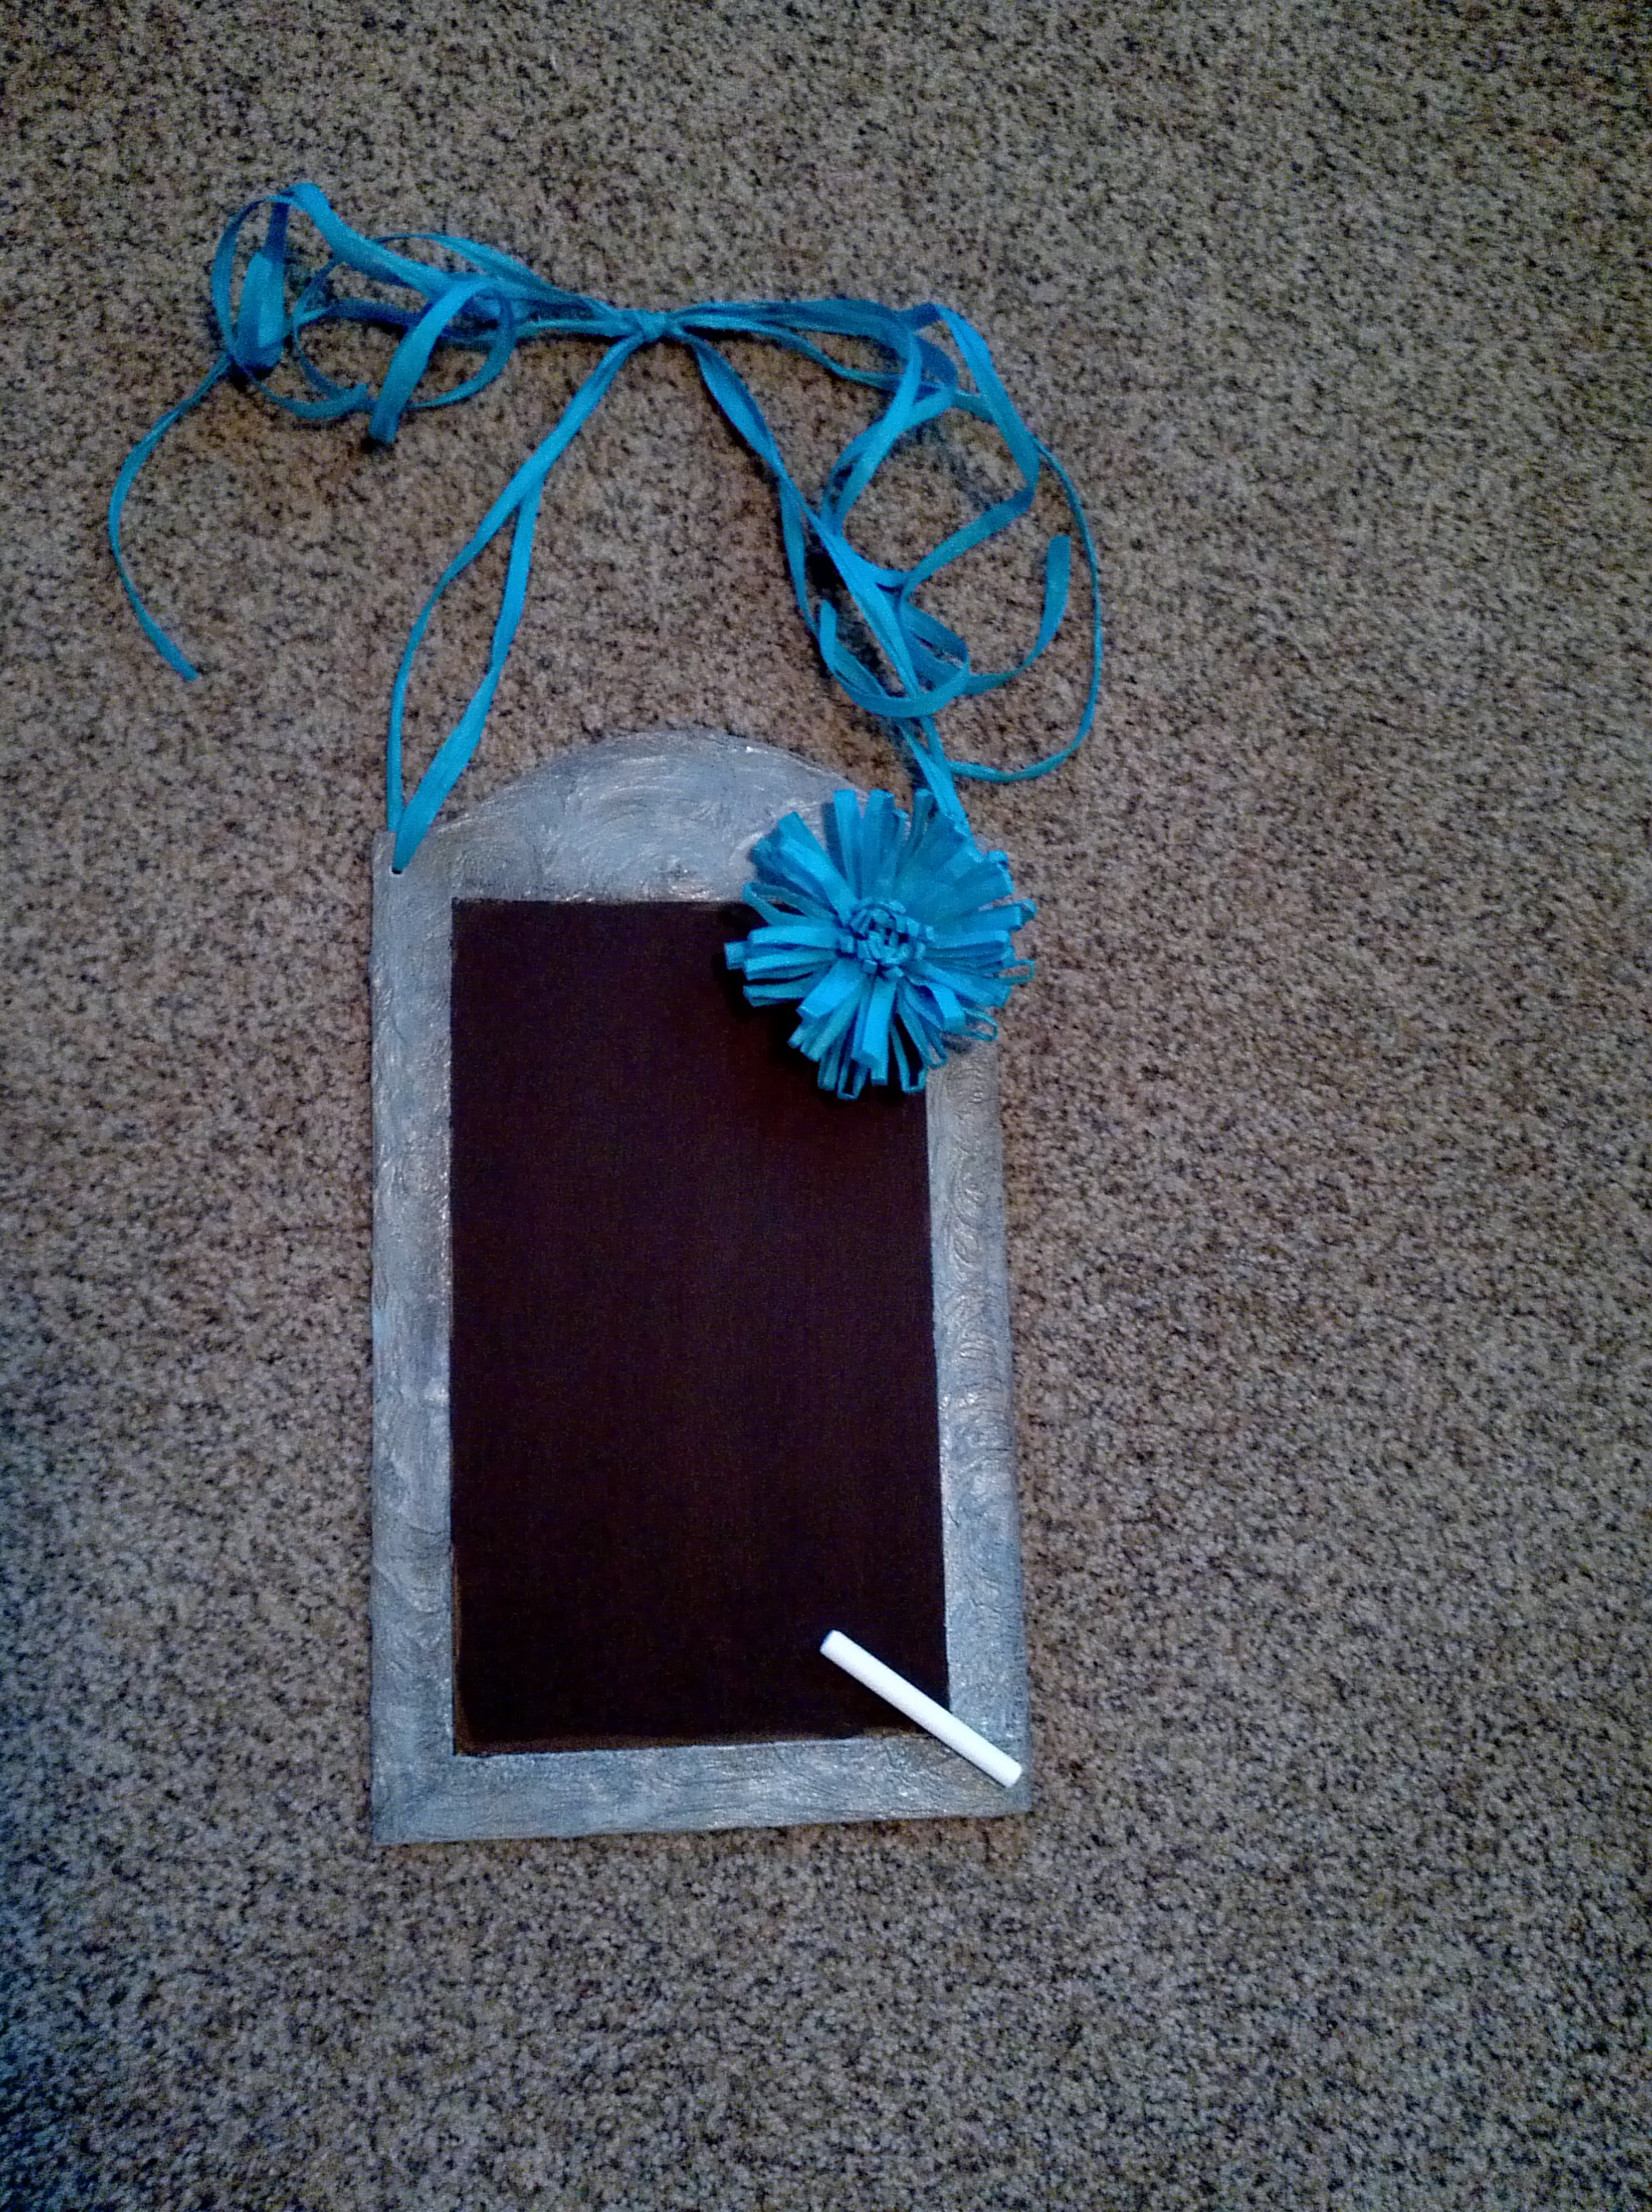
I have been working on decorating my front porch for Fall and realized that I was ready for new, new, new.  Just plain sick of the old, old, old.   I will post the before and afters tomorrow, but I wanted to give a sneak peak of a project that I did today that I am just plain excited about.  After walking around Michael’s, Target, Pier One, and a couple of thrift stores in town looking for something to hang on my door I was getting a bit frustrated.  Nothing excited me.  I had decided to get away from the “look at me, I’m a Fall color” colors this year and am going with a totally different color palette .  Basically gray, pewter, turquois and just a touch of orange.  Sound weird?  Tune in tomorrow, and see what you think.  An-y-way…last night I was in Dollar Tree and saw some MDF Halloween plaques and guess what?  I got inspired.  They have a few different  shapes to choose from and I grabbed this one:

IMG_20141007_154745

Are you thinking what I’m thinking?  As I continued to walk around Dollar Tree I found the turquois  bow/ribbon (also pictured)  in the giftwrap section.  (Oh, just ignore the ivy-looking foam stamp in the bottom corner of the above pic… I decided to nix my idea for that.  Maybe another time.)  See where I am going with this?  No?  OK, keep reading.

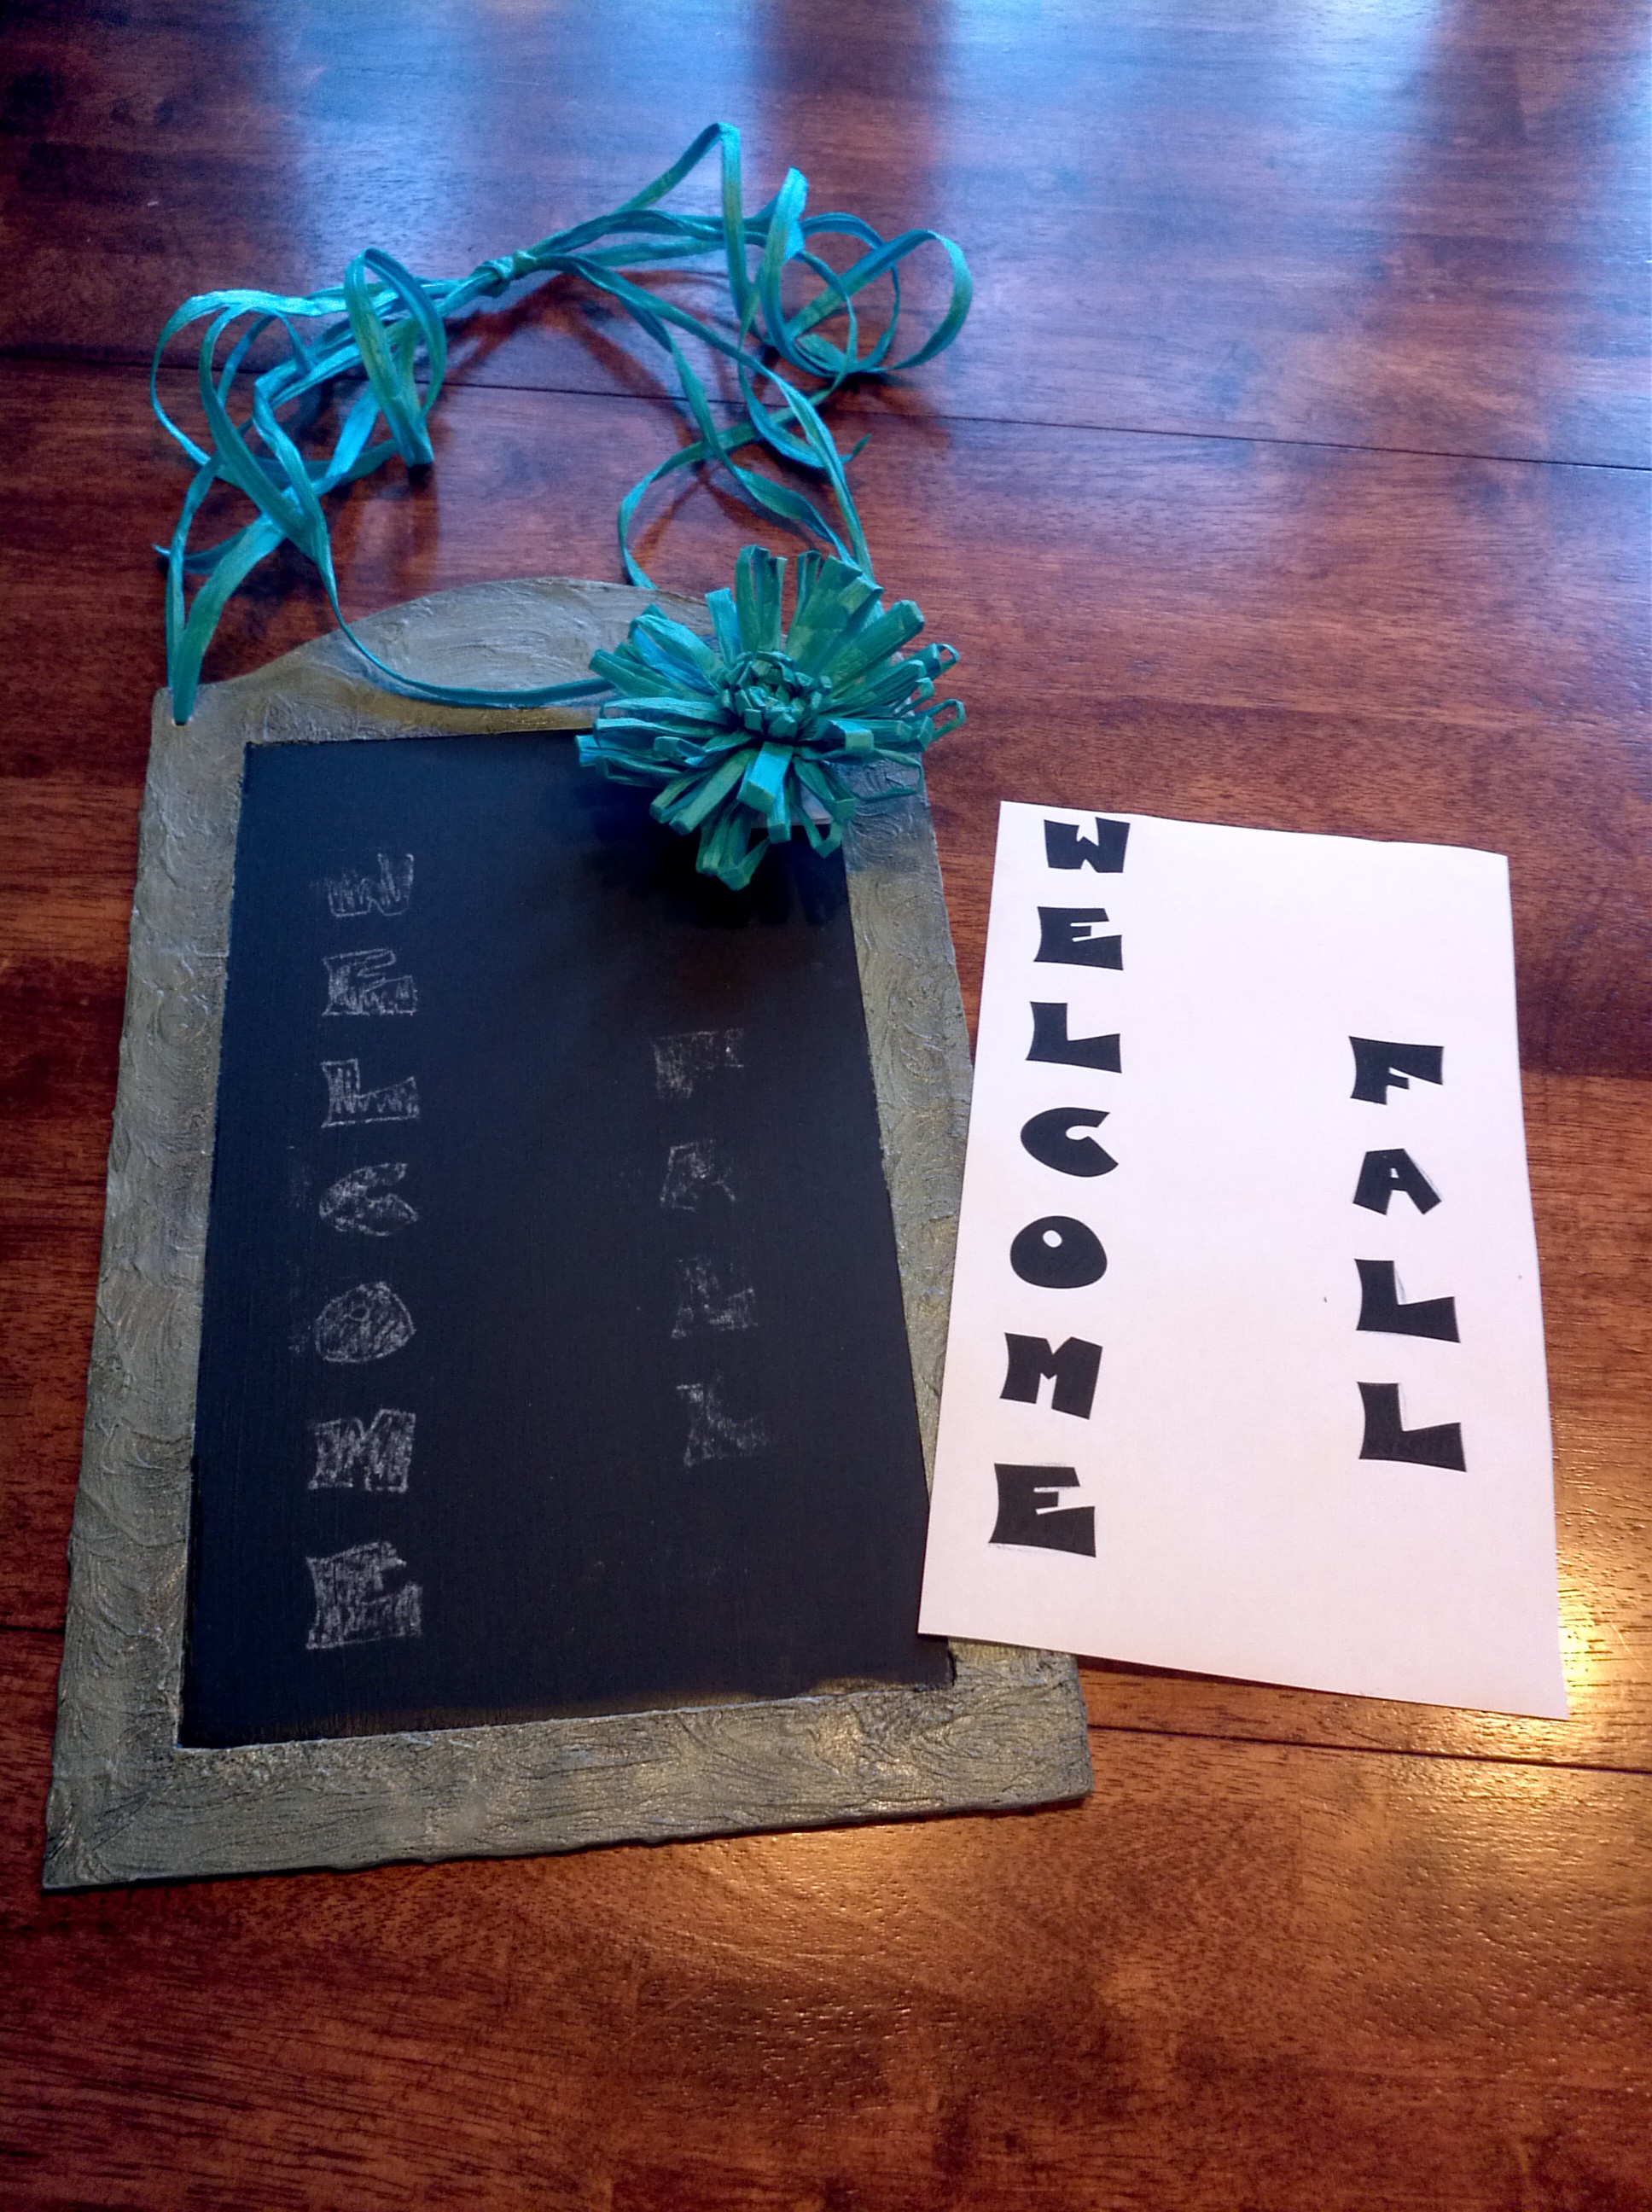
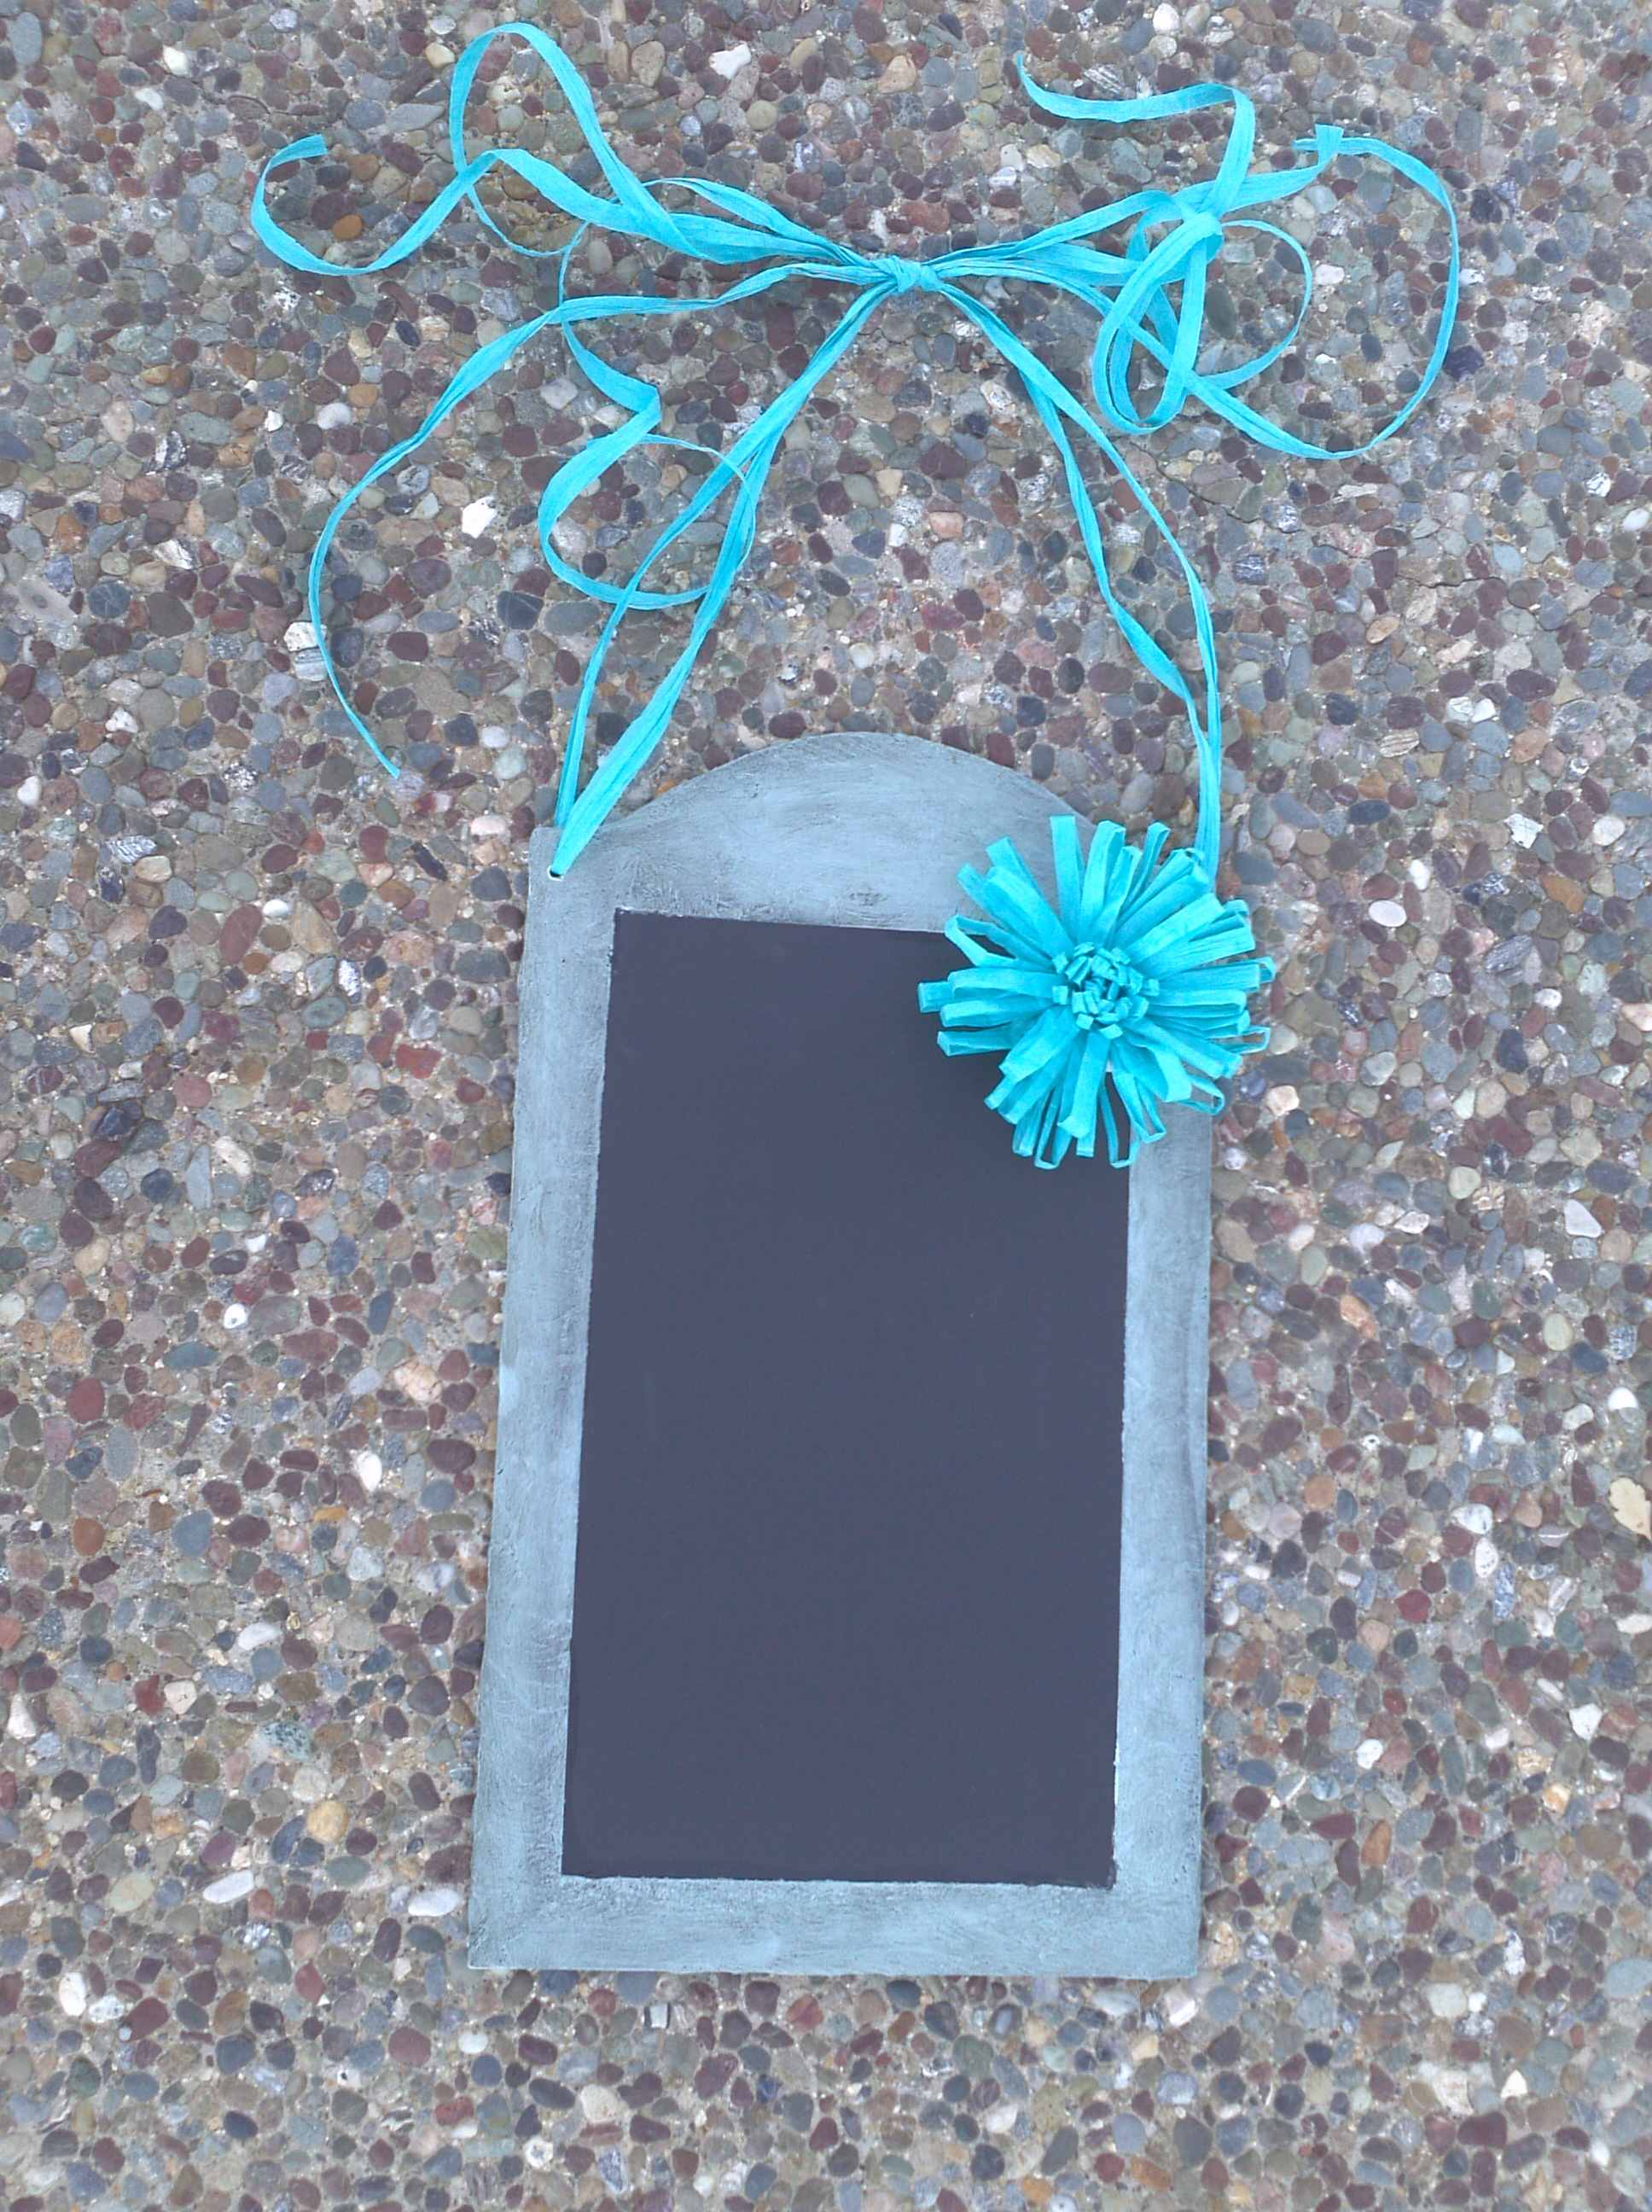
I have always loved chalkboards and figured that this would be a great shape for one and remember…just one dollar!  Wanna see it, now that it is done?

 IMG_20141007_173448IMG_20141007_173548IMG_20141007_173746


Do you want to know how I did it?  First let me tell you the supplies that you need:  Black chalkboard paint, joint compound (there is likely some in your garage right now…if not, go ask a neighbor- you don’t need that much), masking tape (painter’s tape is preferred), your choice of paint color for the “frame”, Minwax stain (optional)- I used Ebony, chalk, paintbrush, scissors and, of course, the plaque and decorative bow & ribbon.  Oh, just a suggestion; some of the Dollar Tree plaques were kind of bent, find a straight one if you can.   Got it all?  Let’s go!

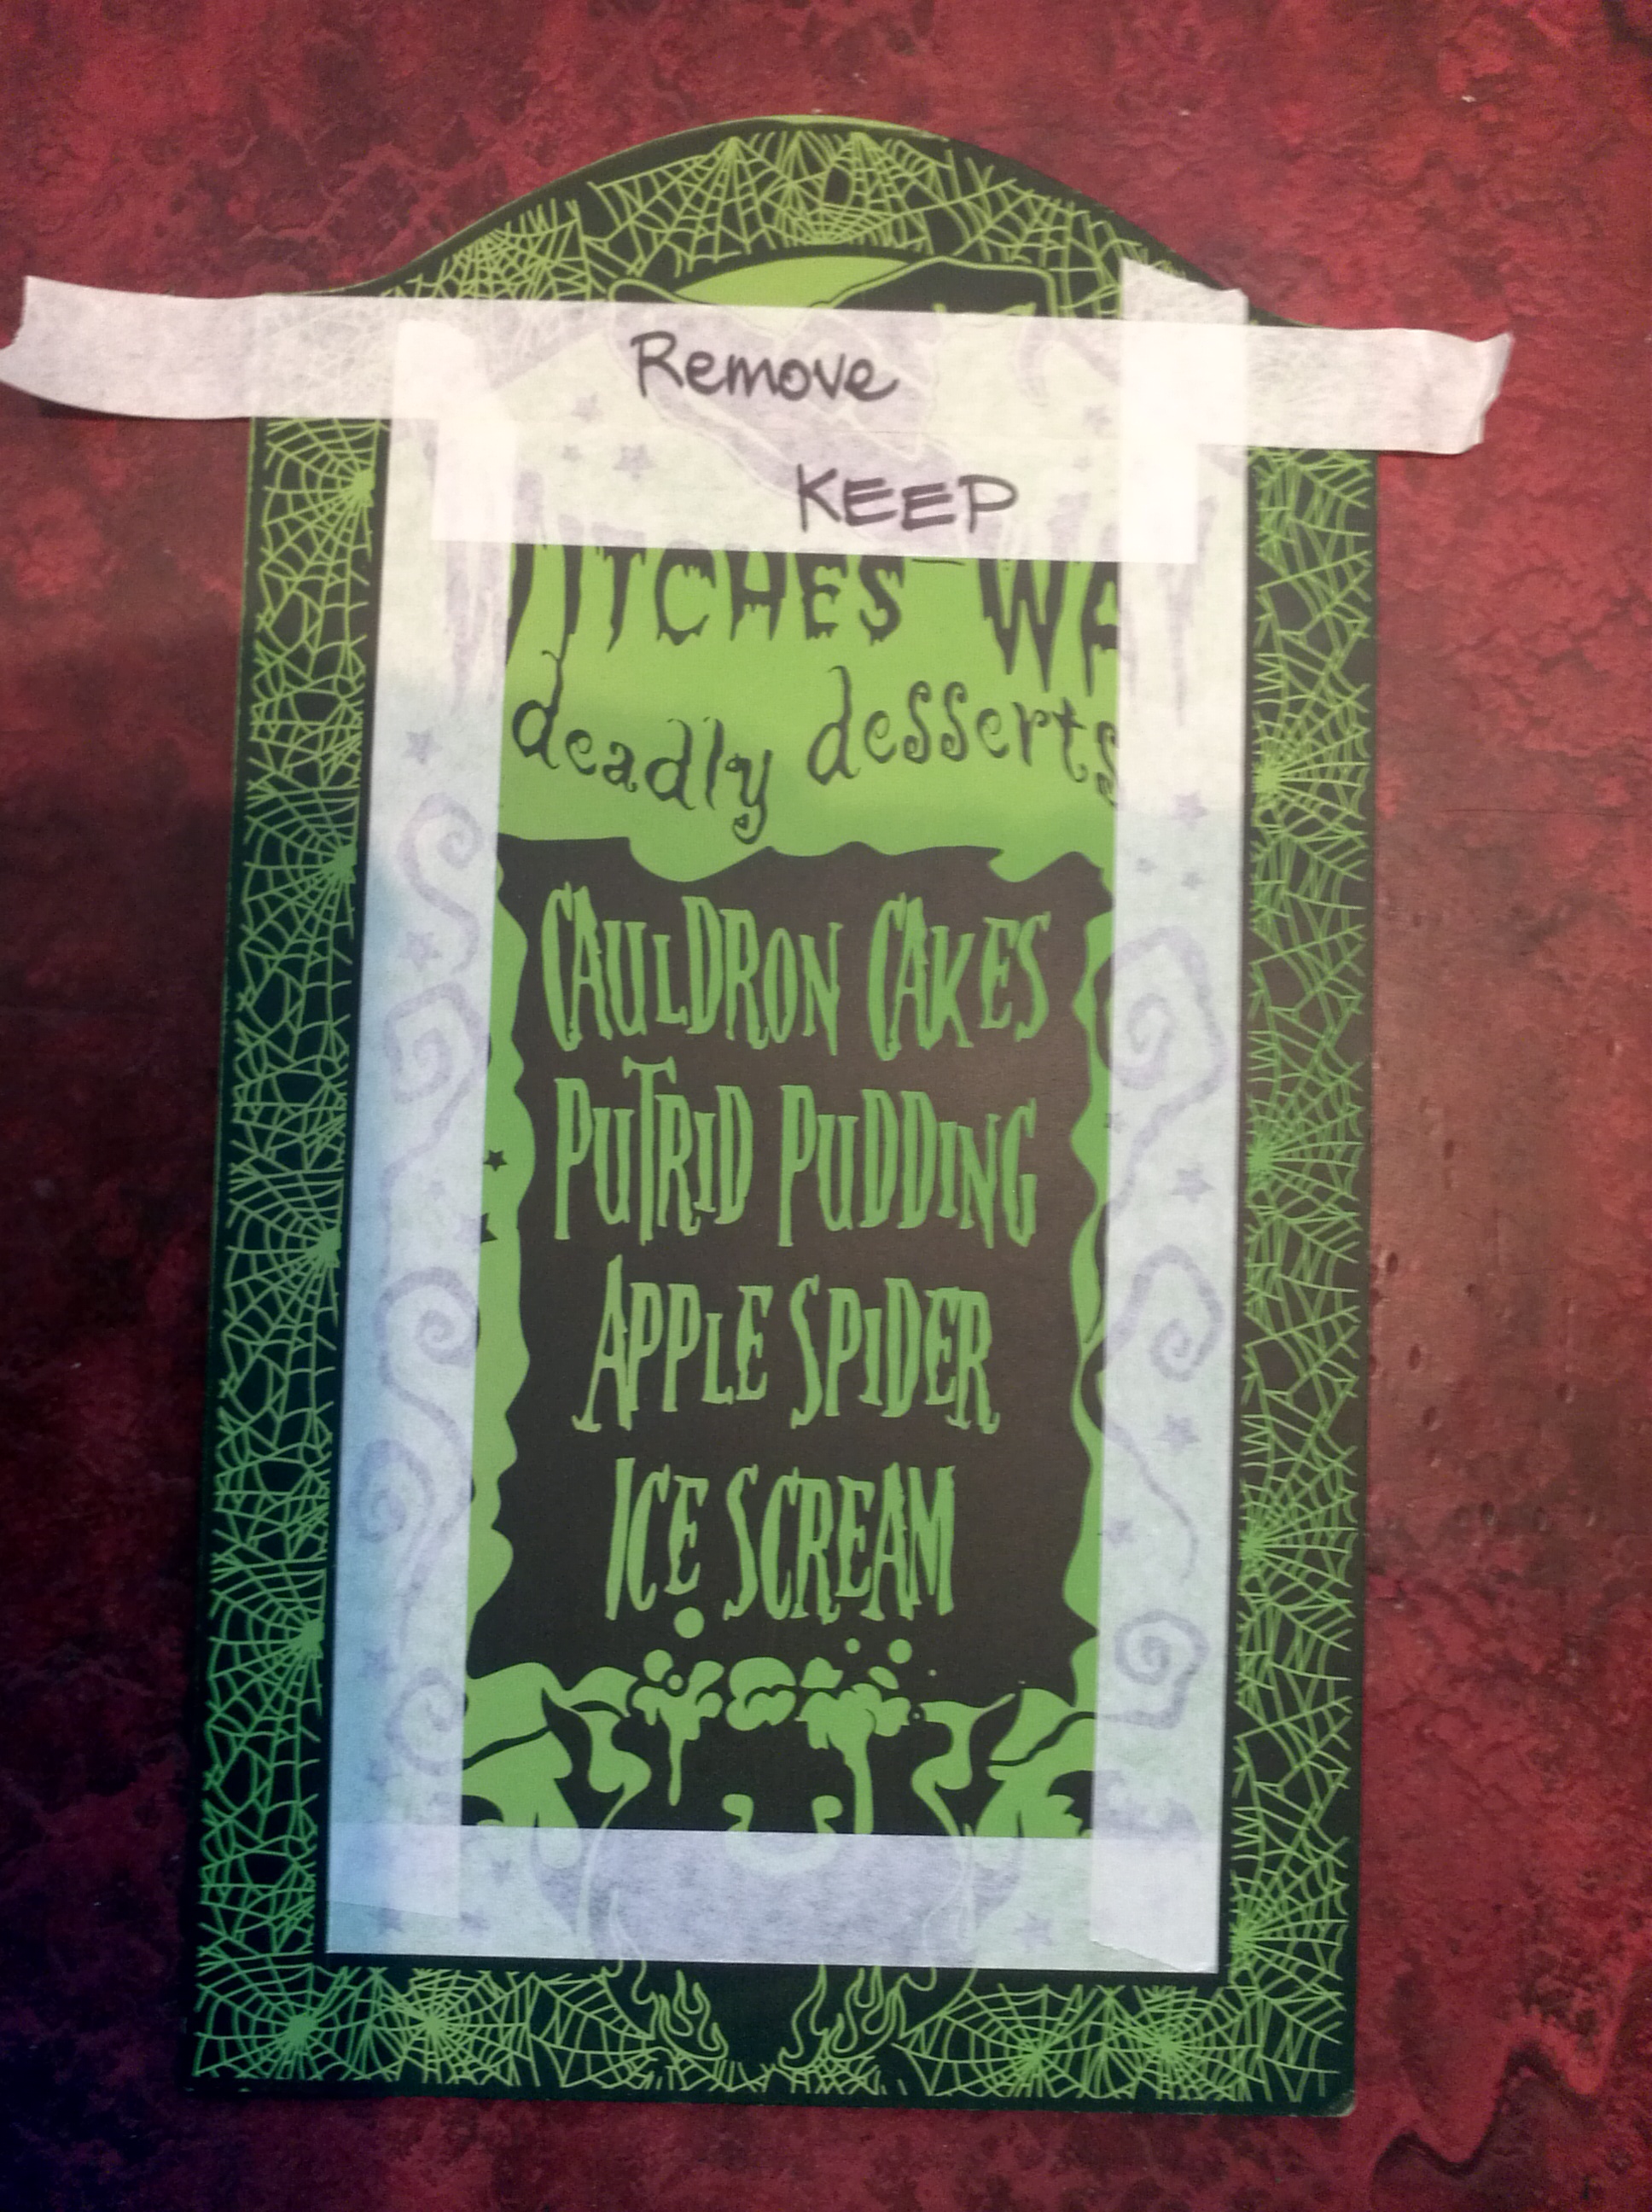
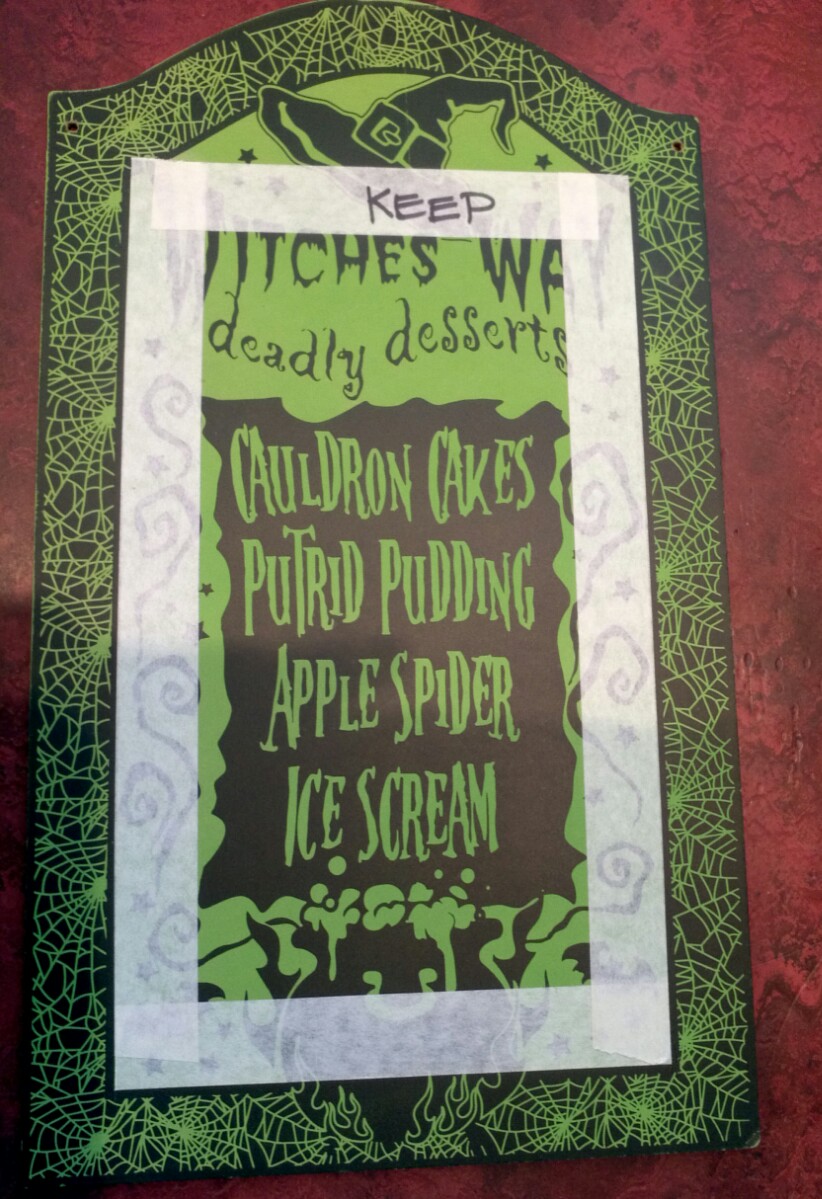
First of all, this plaque has great guide lines, making the taping off process really simple.  Use those lines and tape as shown below.  Since I didn’t want an arch on my chalkboard, I used the top edge as a reference point for leaving a frame border.  Note the tape that says “Remove” that  I put along the top. Just under that I added another piece of tape, the one that says, “Keep”.  Once that one is in place, remove the top piece of tape, as shown.

IMG_20141007_140906IMG_20141007_154641

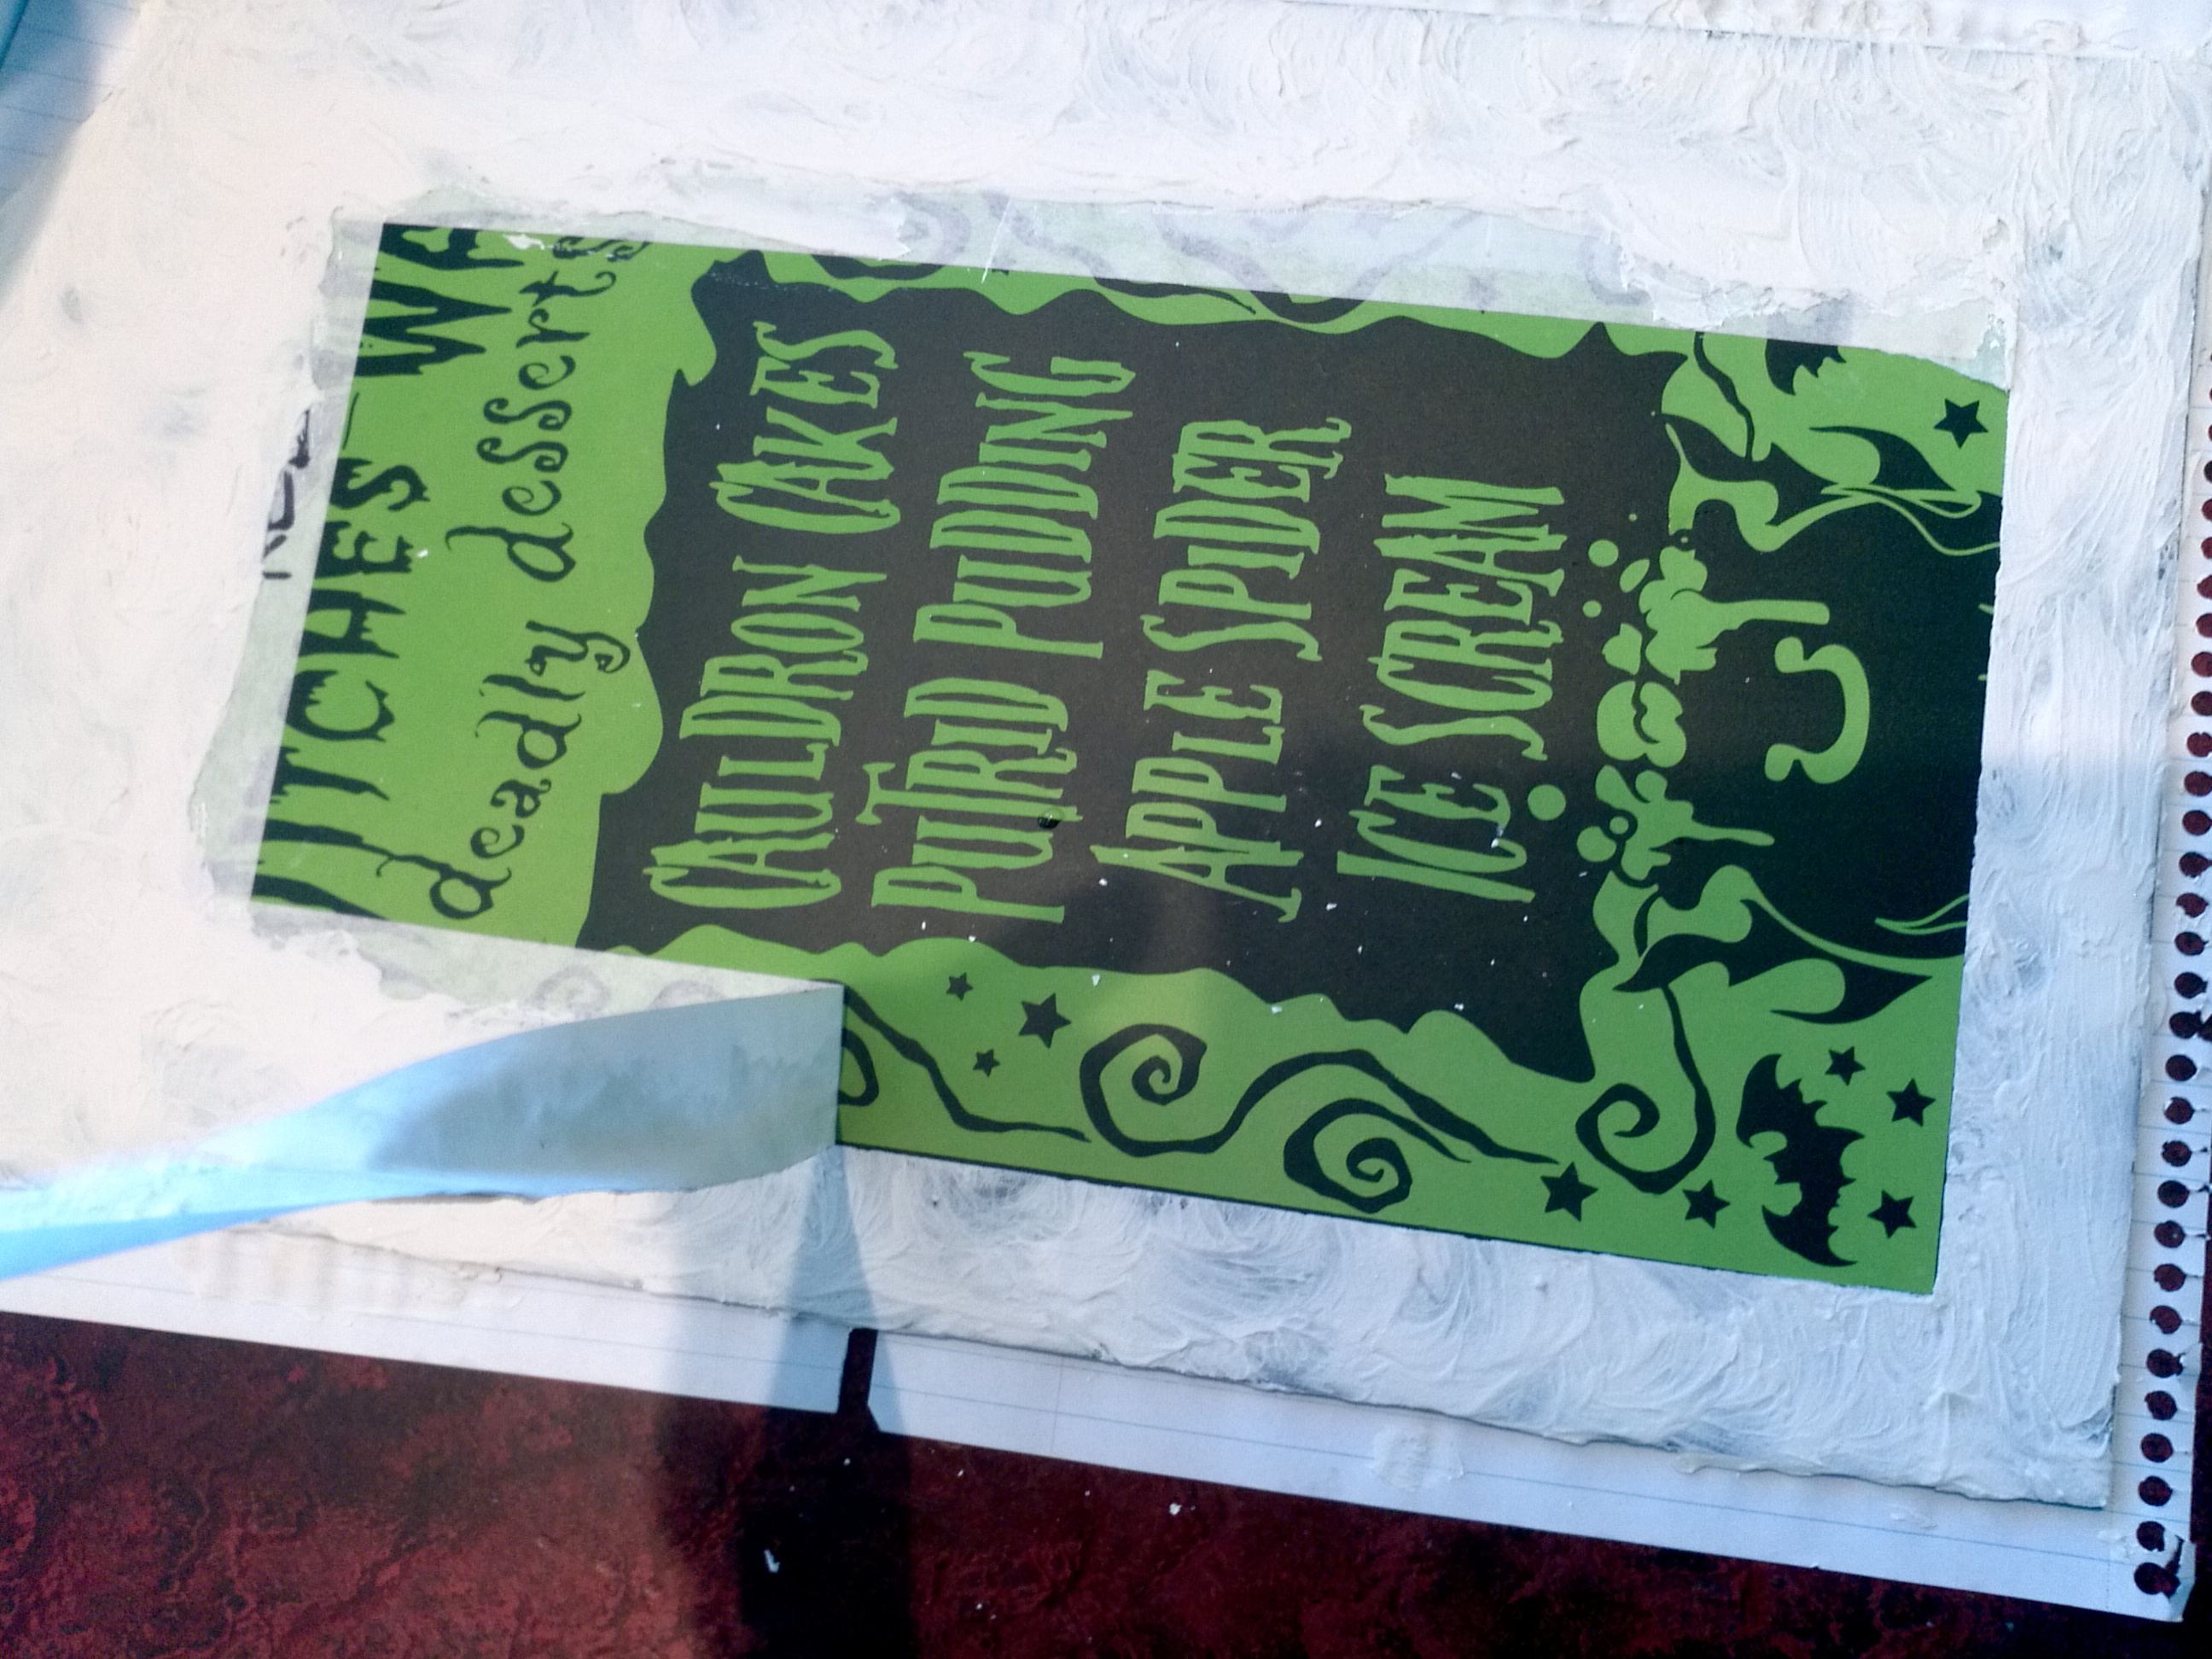
Now, for the fun part.  Spread a thin layer of joint compound outside of the tape line to form a textured frame.  I had planned that I would use the foam stamp to create texture, but decided that I am probably the only human on the planet with that exact stamp and nobody would be able to duplicate it, so I just used my fingers to form a random swirly texture.  Kind of similar to frosting a cake…except with your fingers.  Don’t worry, this stuff washes off of your hands and surfaces really easily.  Before the joint compound dries, remove the tape.   It should take less than 30 minutes to dry.  The edges will be all messy, but this is an easy fix.  Break off the larger chunks of dried joint compound and then wet your fingers to “sand” the edges smooth.  Super easy.  If you feel like the surface is too harsh looking, you can also go over that with your wet fingers.  Easy.

IMG_20141007_144006IMG_20141007_144207

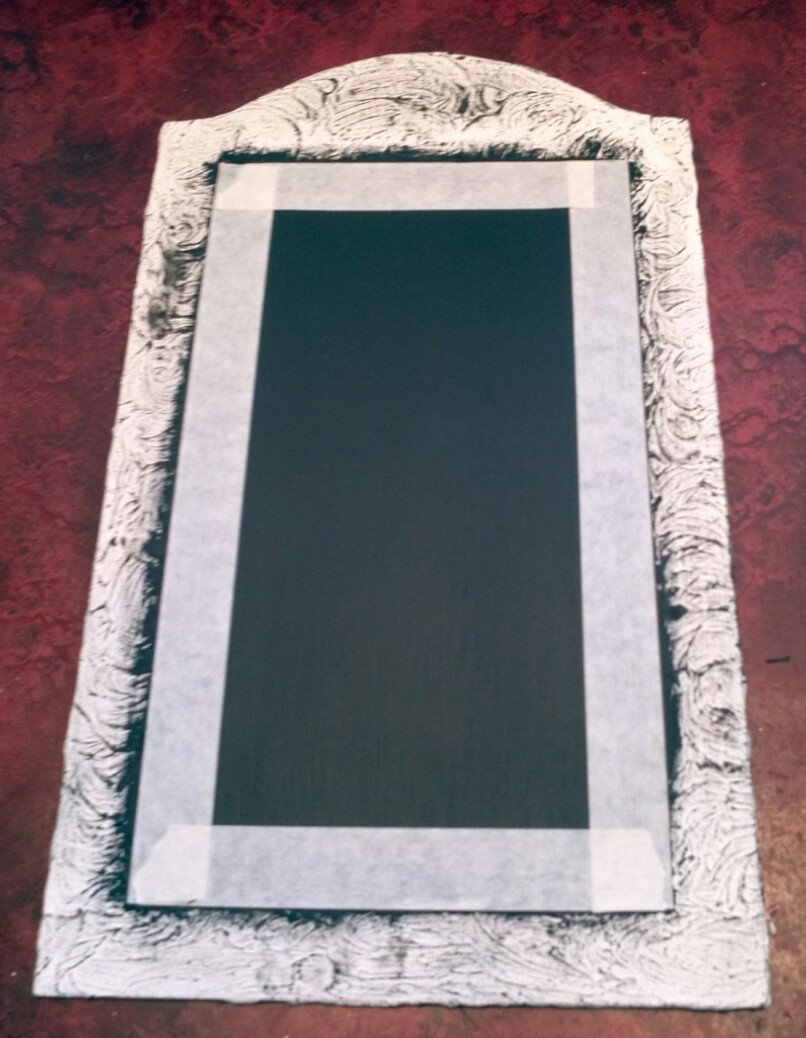
Next step, paint the center of the board with chalkboard paint.  Don’t tell anyone, but when I do small projects like this,  I use a hair dryer to speed up the drying process.  I once called a paint manufacturer to ask if it was ok to do that and the guy told me some mumbo-jumbo about the paint chemical reaction blah-blah-blah and it is not recommended.  Well, so far, so good.   The Paint Police haven’t come and taken me away yet.  I painted two coats, and with blow drying in between, it only took a total of less than 5 minutes before I was ready to paint the outside edge of the frame.  I wanted you to be able to see the texture, so I dry painted the “frame” with the chalkboard paint so it could show up in these pics.  Next step, re-tape the edge, in the same places as before,  right on top of the just painted chalkboard surface (this is why painter’s tape is preferred… the adhesive isn’t going to pull up the mostly dry chalkboard paint.  Hey, I’m impatient!).  This taping process is pretty easy since the joint compound formed a bit of a “lip”.  Now, paint your chosen framed color.  I just did one coat, but you can decide whether yours needs another or not.

IMG_20141007_152311IMG_20141007_154438IMG_20141007_154255

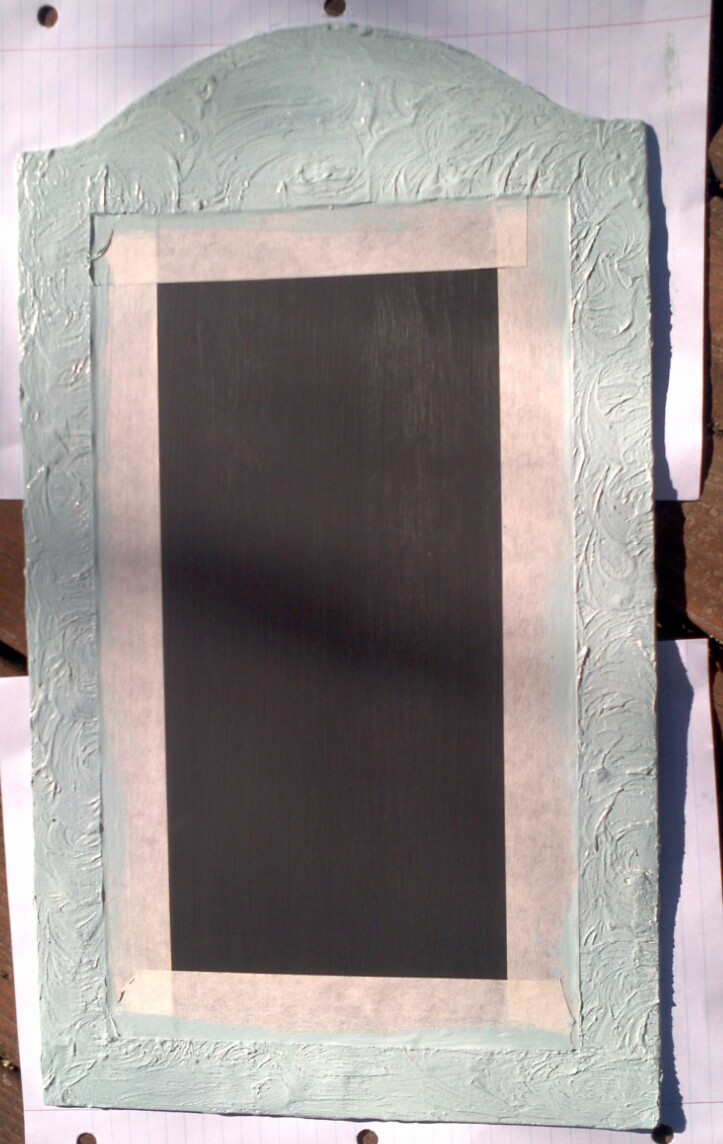
For the look that I wanted, I added a bit of Minwax Ebony stain.  I like how it changes the color and makes the textures pop out a bit more.  You can use a wadded up paper towel to sop up extra stain if it gets darker than you want it to be, then remove the tape.  After leaving it in the sun (I’m impatient, remember?) for an hour or so I was ready to finish it.   Since the joint compound covered up the original holes. I had to uncover them by poking through from the front of the frame towards the back.   Ribbon came next. I could blah- blahabout how I did it, but I know that you can figure it out.  Suffice it to say that mine is a double layer ribbon hanger with extra bits of ribbon tied in a knot at the top to make it more frilly.  Lastly, I hot glued the ribbon bow to the chalkboard to up the WOW! factor.

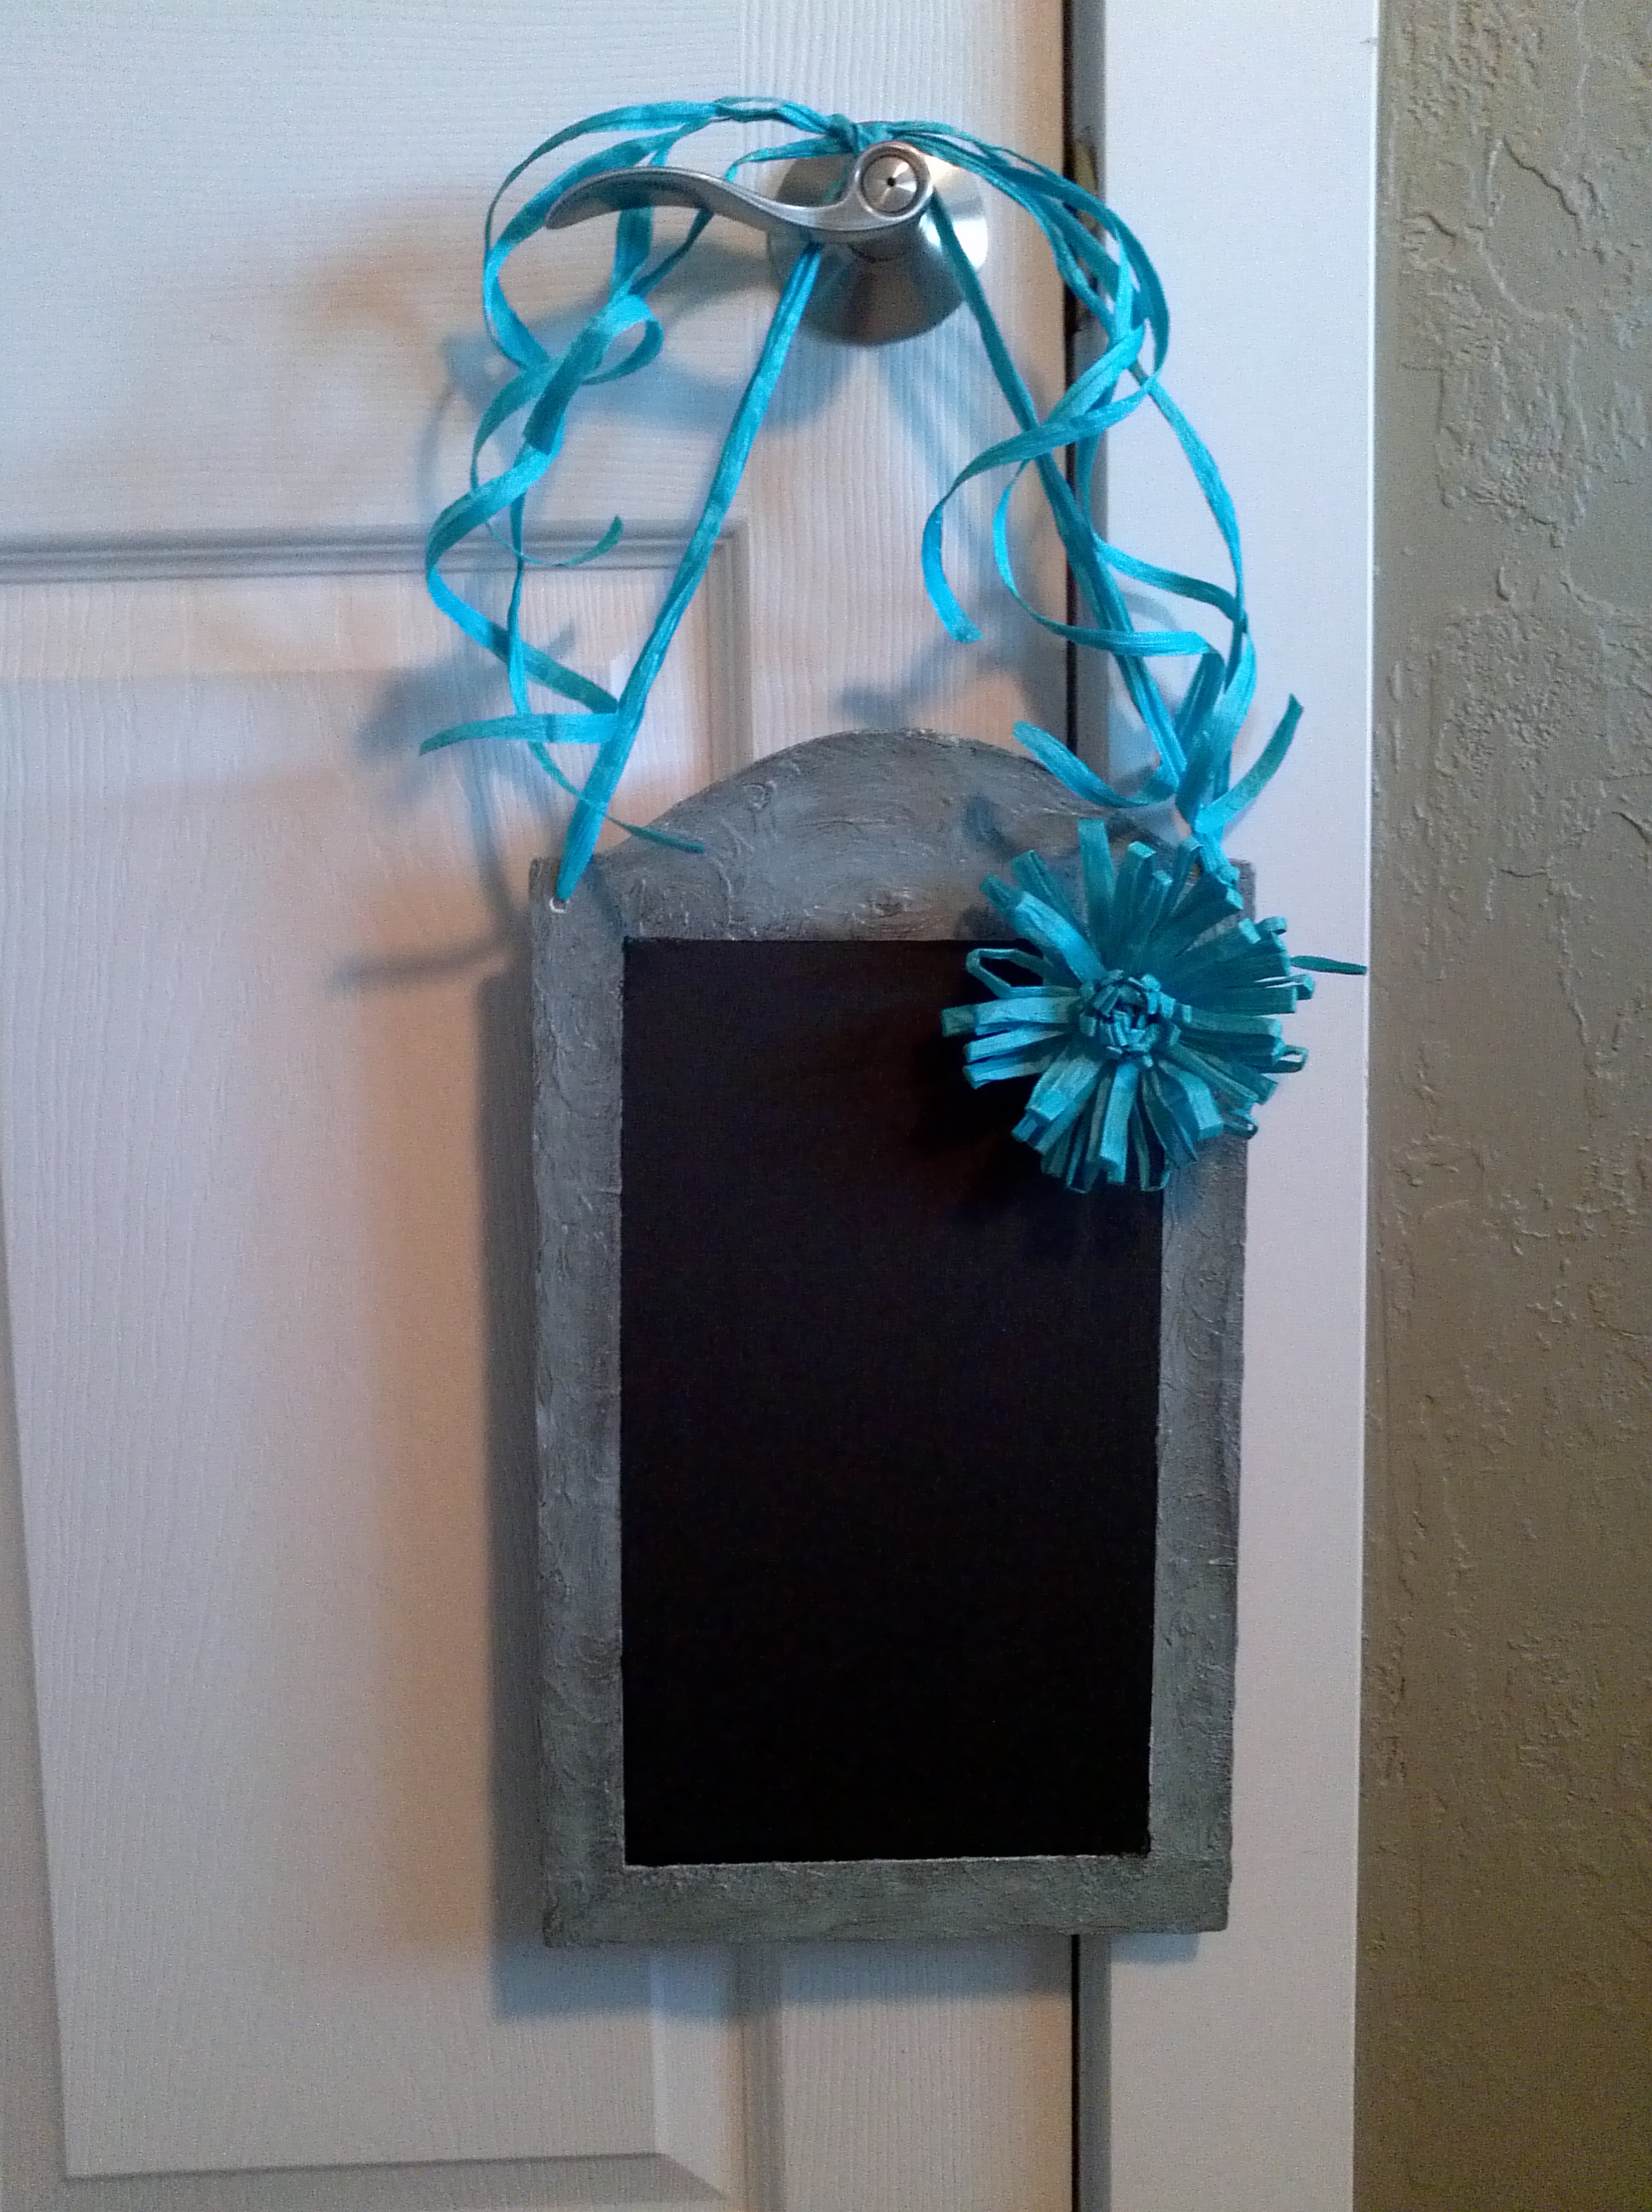
So, here it is, hanging on my door.  What do you think?  In my next post I will let you know how I did my lettering.    D’ya like it?


This wordy-wordy detailed tutorial may disguise the fact that this project is actually very simple to do.  And, let me remind you…it is a super CHEAP project!   Run down to Dollar Tree right now while they still have their Halloween plaques. Christmas is coming and these will make great gifts!   Stay tuned for the porch reveal!

The Chair… REVEALED

Thanks to those who gave feedback on my The Chair…part 2 post.  Well, after going back and forth and back and forth I finally settled on the fabric that got the most “yes”-es from my family… the black and cream swirly fabric.

IMG_20140925_152508

I swear that I have seen people recover chair seats on HGTV a thousand and three times. I have never done it before myself, but found it to be just as easy as it looks. First lay the seat cover wood side up on top of the wrong side of the fabric. Allow enough of a clearance on all sides to easily wrap the fabric around and staple it securely.

IMG_20141006_104858

Wanting to show just how easy this project was, I decided to time the entire process.  I pushed “Start” on my watch timer over a week and a half ago when I first started taking out the screws by hand with a screwdriver.  I then proceeded to wipe it down since it was a dirty, dusty mess. At that point I stopped the clock.  I have had 4.19 (4 minutes, 19 seconds) on my watch’s stopwatch for over a week now.   This wrap and staple upholstery process is super easy and super quick…if… IF… Ii-Fffff you have a decent staple gun and know exactly what type of staples it takes.  If I would have kept the stopwatch going, it would have added 45 minutes of time because I had to run-back-and-forth-to-the-shop-4-times to grab different staples, then other different staples, then I had to grab the electric stapler since the handheld kept jamming.  Yep. I got a workout, but once the stapler was ready I continued the time on the stopwatch.  Total time from first screw removal to last screw replaced?  14.39!

IMG_20141006_135529

What I’m trying to say is that if you have chairs that you would like to recover, it takes less than 15 minutes per chair.  Probably much less once you get the hang of it.  Easy peasy!  I kept the chair unpainted for now.  Now that I know how easy it is to take apart and re-assemble it, who knows…  it might end up white… or gray… or teal… hmmmm.

So, what are you waiting for?  Go grab a staple gun (with the right staples), some fabric, a chair with a cushion and a screwdriver right NOW.  In less than 15 minutes you can be patting yourself on the back like I am now!

The Chair…Part 2.

Looking at my title, it seems more like the title of some horror movie than a title for a DIY post.  Trust me, there is no reason to be scared.  You are among friends.  Remember this post where I showed you my next project, a really awesome wood chair?  I asked for help in deciding whether or not to paint it and also showed some fabric choices and some of you responded.  You have NO idea how that made me feel since my blog was only 2 days old at that time and I had only sent Facebook invites that very day.  Let me tell you, I was celebrating in my seat!  Hmmm…I digress.  An…y…way, my Mother-in-law suggested that I pair the fabrics with the chair to see what I really like.  She is so smart!  So, with out further adieu…


What do YOU think?  I have a pretty good idea now of what I like the best, but I would love YOUR input.  Which is YOUR favorite fabric?  Also, to paint, or not to paint… that is the (other) question.  Make your own decision…ask your family…run across the street and ask your neighbor (is that asking too much?)… and then, please, let me know.  Until then, my chair will look like this:

IMG_20140925_152806


Kicking It Up a Notch: A Cabinet Re-do Using Kick Plates

KickPlateCabinet2

Don’t you just LOVE this old cabinet?

IMG_20130619_162102


It’s an old redwood cabinet that is solid as a rock and weighs about as much as my car.  It stands about 7 feet tall and 5 feet wide and, since my house doesn’t have a pantry, currently serves that purpose.  This thing holds a full metric ton of stuff, I swear.  Maybe more.  Problem was, it looked beat up and had few too many holes and no real door pulls to speak of.  See?

IMG_20140924_180208

I figured out that I would have to spackle and fill until the cows came home until I happened upon a solution in my local Lowe’s hardware store:

Gatehouse 3.5-in x 15-in Aluminum Aluminum Entry Door Push Plate

Are you thinking what I was thinking?  Genius, right?  I bought 2 of these for $7.27 each and headed down to the cabinet pulls and knobs aisle and picked up some nice big, pulls.  With some basic tools like a power drill/driver, and about 30 minutes of my time, this is what I got:

IMG_20141002_094038

Oh, yeah.  Did I forget to mention that I painted the piece before installing the hardware?   The color is really similar to the original shade of gray.  I basically mixed several latex paint colors that I already had until I said, “Yep, that’s it” and slapped it on.  Seriously.  If you think that painting is hard and time consuming…you…are…wrong.  Sorry, I hope that wasn’t too harsh.  This piece took me maybe 30 minutes total painting time (not counting drying time) to paint.  It is not rocket science.  Easy-peasy, puddin’ and pie.  This is an old piece so I didn’t want it to look new.  I think the dents and cracks and area where the chunks of wood just splintered off add character.

So, whaddya think?  I must say that I love it!  It still fulfills the same purpose, but with a heck of a lot more style.

BEFORE
BEFORE
AFTER
AFTER

So, is your mind reeling with ideas of how to use Kick Plates in your home?  What about adding them to some dresser drawers?  Maybe even an actual door?  These babies come in several sizes and finishes.  What about lining up two or three of them, mounting them on the wall and making a magnet message board (just make sure the particular finish you use is magnetic),  or one per child for hanging their artwork?

Why don’t you take a trip to your local hardware store.  You never know what treasures might be found there.


********* Linking up to these awesome parties!*********

Nemcsok Farms

Also Featured at the Share It One More Time link party

share it onemorelogo_redo1