2 Minute DIY: From Tank Top to Framed Art

Framed Flag Art

Got an extra 2 minutes?  It’s time for some lightning speed DIY!

We have all heard it said that sometimes you’ve got to think outside the box.  True in so many ways, including home décor.  Case in point, this black tank top with a cool metallic gold American Flag detail:

0430131613

I added the frame in this pic as a clue to my “out of the box” idea.  Are you thinking what I’m thinking?  Of course you are, you smartie!

This tank was a child’s size that I got at my local thrift store in one of those “as much as you can shove in a bag for $5” sales.  I love those.   I can shove a LOT in a bag.  I have seen similar tank tops in my days of perusing thrift stores and garage sales.  My guess is that if you frequent these cheapo shopping venues, you are sure to run across frame-worthy art, as well.

You will notice that my frame in the above pic is black.  I just applied a couple of coats of off-white paint and scraped off bits when it was still a bit damp to reveal the black beneath.  FYI: I am not going to count that in my 2 minute (see my title) time frame.  My blog, my rules!  My thought is that you may already have a frame that you love that you don’t need to paint.  2 minutes:  Ready?  Begin!

Take apart the frame and use the glass (carefully) as your pattern to center your tshirt art.  Trace around it with a pencil, pen, whatever (a white colored pencil works great on black), then cut it out.  At this point you can just discard the glass, or keep it.  Your choice.  I tossed mine.  Now, just adhere the fabric to the cardboard back of the frame, making sure that it looks centered in the frame.  I used spray adhesive, but you can tape the edges down or in all honesty, you can just center it on the cardboard backing,

IMAG00229

…then stick it in the frame.  Voila!

IMAG00228


Makes me feel patriotic, just looking at it!  So, what are YOU going to frame as art?


**********Linking up to these awesome parties!**********

Tips&Tricks-LP-FEATURED


Witty Hoots

Thanks, to Brenna from Life After Laundry for picking this project as her favorite for Tips & Tricks week 10!  Another big “Thanks!” goes to Nemcsok Farms and Witty Hoots for picking this project/post as a Frugal Family Linky favorite!

Recycled Jeans Satchel


At this very moment, do you have any jeans in your home that really should be in the trash?  I’m talking holey, stained, terribly out of style jeans that you know will never be worn again?   I recently came across some jeans destined for landfill and I decided to check out Pinterest (of course!) to see what I could make with them instead.  Although I found some really fun projects, I didn’t see anything that screamed, “Make me!”.   Not knowing what I was going to make, I started cutting and this is what I ended up with.

Recycled Jeans Satchel

I kind of love them!  Think of it as a satchel for putting your phone, lipstick, or whatever you need, in.   Do you ever find yourself wearing an outfit that doesn’t have pockets?  Maybe a dress, skirt, yoga pants?  It’s kind of a pain.  Make one of these simple satchels and you won’t need to carry your stuff in your hands or have a full on purse when you really don’t need it.  Ready?  Set?  Go!

First step, cut off the pockets.  Easy!  Cut only the bottom layer (not the finished pocket edges) and leave a bit of fabric on the top.

IMAG00197

Flip it over and hot glue the top edge down so you can have a finished-looking front.  Back doesn’t look too bad, either.

IMAG00200

For the flowers I did an internet search for “flower template”.  Here are the two that I used: 4-petal-heart-template and Flower-Pot-Card-Template.  It is best to have at least 3 different sizes, so I had to do some re-sizing in Word.  Once you have a paper pattern, cut it, then trace it on your fabric,

IMAG00190 (2)

then cut out the fabric.  Might as well cut out two layers at a time, right?   I wanted the denim to looked a bit frayed,  so I just scraped the fabric edges with my fingernail to get that effect.

To assemble the flower, grab some thread, a needle and a button and sew the button through all of the layers…or…hot glue each layer and add the button to the top.  Then just hot glue the flower to the pocket.   Play around with positioning before gluing.

For the strap, cut out the inseam starting up one leg and once you reach the crotch, going down the other leg, then back up and down the other side.  Most, if not all jeans have double stitching for the inseam so just cut near the finished edges on each side of the stitching.  Easy-peasy!

IMAG00195

And this is what you get:

IMAG00198

At this point, determine how long you want your strap to be, cut to size, then hot glue on the back like so:

IMAG00201

Done!  Check it out!

AdobePhotoshopExpress_6fe290434b7641a3a34a626f9223caa9

AdobePhotoshopExpress_a2cc26db5d134e2997fedecf8a96e1e1

I have been asked to be in charge of crafts for a young women’s camp this summer and this is definitely one that we will  make.  My goal is to have the girls create items that are useful, not something to shove in the back of a drawer once they get home.   I think that they will like them.

AdobePhotoshopExpress_ed0549e3230d41eabc53ee7232429170

What do you think?


Linking up to these awesome parties!

Nemcsok Farms


Dreams of White and Gray

Do you love Pinterest as much as I do?  It is mind-boggling how much incredible information there is out there.  Like I said in my first blog post ever:  “I used to love decorating magazines.  I subscribed to them.  My mother-in-law gave me hers after she finished reading them.  I would look for them at thrift stores and garage sales.  To be honest, I didn’t necessarily read those magazines.  I would (very quickly) scan through them, tear out pages that I liked and then file them away in my very organized files.  Come to think of it, it was kind of a precursor to my Pinterest addiction.  Pinterest is so much easier.  And less messy.  And cheaper.  And less time consuming.  OK, maybe not less time consuming, but so much more fun.”  Yep.  I love Pinterest.

About a month or so before I found Pinterest, in the Spring of 2011, we purchased and moved into our current home.   My husband loved this house because everything inside and out, landscaping, etc. was done.  Translation for him, “Everything is just perfect.  We don’t need to do anything except upkeep!”.   Honestly, I was a tiny bit bummed because there really was nothing that needed to be fixed, updated, redone.   Well, that was my thought UNTIL Pinterest.  Once I started using Pinterest  I realized something… I absolutely LOVE gray and white interiors.  Love. Them.

Soon thereafter I created what has become my most popular board: Shades of White and Gray.   As a side note; not long after I started this board I heard about the naughty book “Fifty Shades…” (which I would never read or promote) and was a little sickened that someone might think that I was trying to copy the naughty book title.  That was not the case AT ALL.  An-y-way, I really love everything white and gray.  What about my house?   I don’t have a single white or gray room.  See?

IMAG00145

IMAG00144

IMAG00142

The previous owners did a fantastic job of adding beautiful wood trim everywhere, but painted everything beige.  Beigggge.  I once read a decorator’s opinion on beige…basically you should never paint a room the color of bad foundation.  Amen.  I am at the point where I realize that there is much to be done to this house.  I see a lot of gray and white in my crystal ball.   Until then I will dream.

Here are some homes that have made the beige to gray/white switcheroo:

http://www.whitehouseblackshutters.com/beige-to-greige-before-and-after/

http://www.allthingsthrifty.com/2013/04/room-evolution-from-beige-to-grey.html

http://thefrugalhomemaker.com/2014/07/29/entryway-before-and-after-beige-to-greige-with-behr-paint/


Seriously, take the time to check these out!  Here is one more for you to click on.  This blog article from “Our Small-Town Idaho Life” shows the amazing gray colors that this couple chose for their new home.  I want to copy(!):

http://andrewrachelashmore.blogspot.com/2012/01/paint-color-decisions.html

Well, now that I have a whole house of rooms that need to be painted, I have much, much, much to do.  Maybe not until summer, but I have plans.  You can be sure that there will plenty of Before (beige) and After (gray/white) blog posts and photos to come!  Thanks, Pinterest!


Pastel Tissue Paper Spring Sign

Has Spring sprung where you live?  It has here and I love it!  The trees all blossomed a few weeks ago and flowers are coming out and everything is SO green.

IMAG00128 (2)

The phrase, “A breath of spring” certainly comes to mind.  I wanted to make a little something today to celebrate spring.  I knew that I wanted to make a sign of some sort with a length of 1×6 pine that I had in my garage.  I originally thought that I would make an Easter sign of some sort, but Easter will be here and gone before we know it.  I wanted something that can stay out for a couple of months or so and this is what I came up with:

IMAG00125 (2)

I love this phrase.  To me, it means that where you are right now in location and life circumstances is where you are planted.  You might be thrilled with where you are planted like a sunflower planted in good soil with ample water and full sun.  Yep, it is easy to bloom well in those conditions.  Maybe right now you are planted in not so perfect circumstances.   Bloom where you are planted means that even if your part of the world right now is weed infested with poor soil and very little sun, do your best to bloom anyway.  Basically, think positive, be happy, take life as it comes and pull out those weeds if you can.  If you can’t, then you be the best bloom you can be to brighten up your little spot in the garden.

Of course I could have whipped out a can of paint as I usually do when making similar signs, but this time I decided to try something new.  Want to see what I used instead of paint?

IMAG00120 (2)

Tissue paper!  I love the mint green that came with this pastel tissue paper set that I got at little old Dollar Tree.  The steps were simple:

  1. Crumple up the tissue paper to get it all wrinkly, then semi-flatten it back out
  2. Using a regular paint brush, paint a layer of decoupage medium on the bare wood, top and sides.  Another option would be to paint a base color similar to your choice of tissue color so you don’t have to do as many layers.
  3. While the decoupage medium is still wet, lay a sheet of paper slightly larger on all sides so you can wrap it around the edges.  As you lay it down, encourage wrinkles but attach it securely.
  4. Immediately (meaning that the layer below is still wet) brush decoupage medium on top of the tissue paper layer.  Apply to all sides (except the back).  On each corner edge you will have an excess of tissue…just tear it off and lay the remaining down with the decoupage medium.  You won’t even be able to notice it.
  5. Wait until the layers are dry before adding another layer.  My bottle says to wait 15-20 minutes.  I broke all rules and used my hair dryer to speed up the process and it worked just fine.  I’m such a rebel.
  6. Add as many layers as you want.  I added 3, but if I would have painted the board first, I would have just added one, maybe two.  Maybe next time I will paint with one color and tissue with another just for fun.  Maybe white with one layer of pink tissue on top for a sheer color effect.
  7. If you get any tears, that is okay.  Just tear a piece of tissue (straight edges will show up more than torn) and decoupage right over it.
  8. If you want the back to look nice, decoupage it as well once the front has completely dried.

IMAG00123 (2)

Really, the process is super easy and adds a different look.  For added effect, rub a little stain or dark wax on to accentuate the texture.  Hmmm…maybe this Fall I will try that.

I cut out the vinyl lettering with my Roland Stika vinyl cutter, but you could easily just print this Bloom pdf out (the font is Café Rojo) on paper (maybe with a cute print) and decoupage it right on your sign, leaving some space so you can see the your wrinkled tissue border around it.  (Do a test run with this method…some printer inks smear with the decoupage medium.  If yours does, I have heard that if you spray your printed page with hair spray, it will fix the problem.)

So, there you have it.  Simple, yet profound at the same time.

IMAG00126 (2)


IMAG00124 (2)

Unfortunately the pictures don’t really show the fun texture, but I really like the effect.  Try it for yourself and let me know what you think!   Now, go BLOOM!


(This project was featured as one of 6 Spring-Inspired Projects at the Do Tell Tuesday Link Party! Thanks Lisa, Diane, Cassie and Tori!)


Giant DIY Satin Flowers

GiganticFlower

Remember this post where I showed you how to make adorable satin flowers?   Well, I love those little flowers so much because they can add cute touches to anything from hair, to clothing, to home accessories, to purses, to gift packages.  To be honest, though, they are a bit small to add a lot of WOW to a room.  You know the theory that “bigger is better”?  Well, it is if we are talking about bigger budgets, bigger backyards, bigger pieces of chocolate cake.  Bigger thighs?  Maybe not so much.  An-y-way.  I thought that I could take this idea of making satin flower up a notch and make one, well, bigger.  The process was pretty much the same except I added more layers.  Eleven, to be exact:

IMAG00152

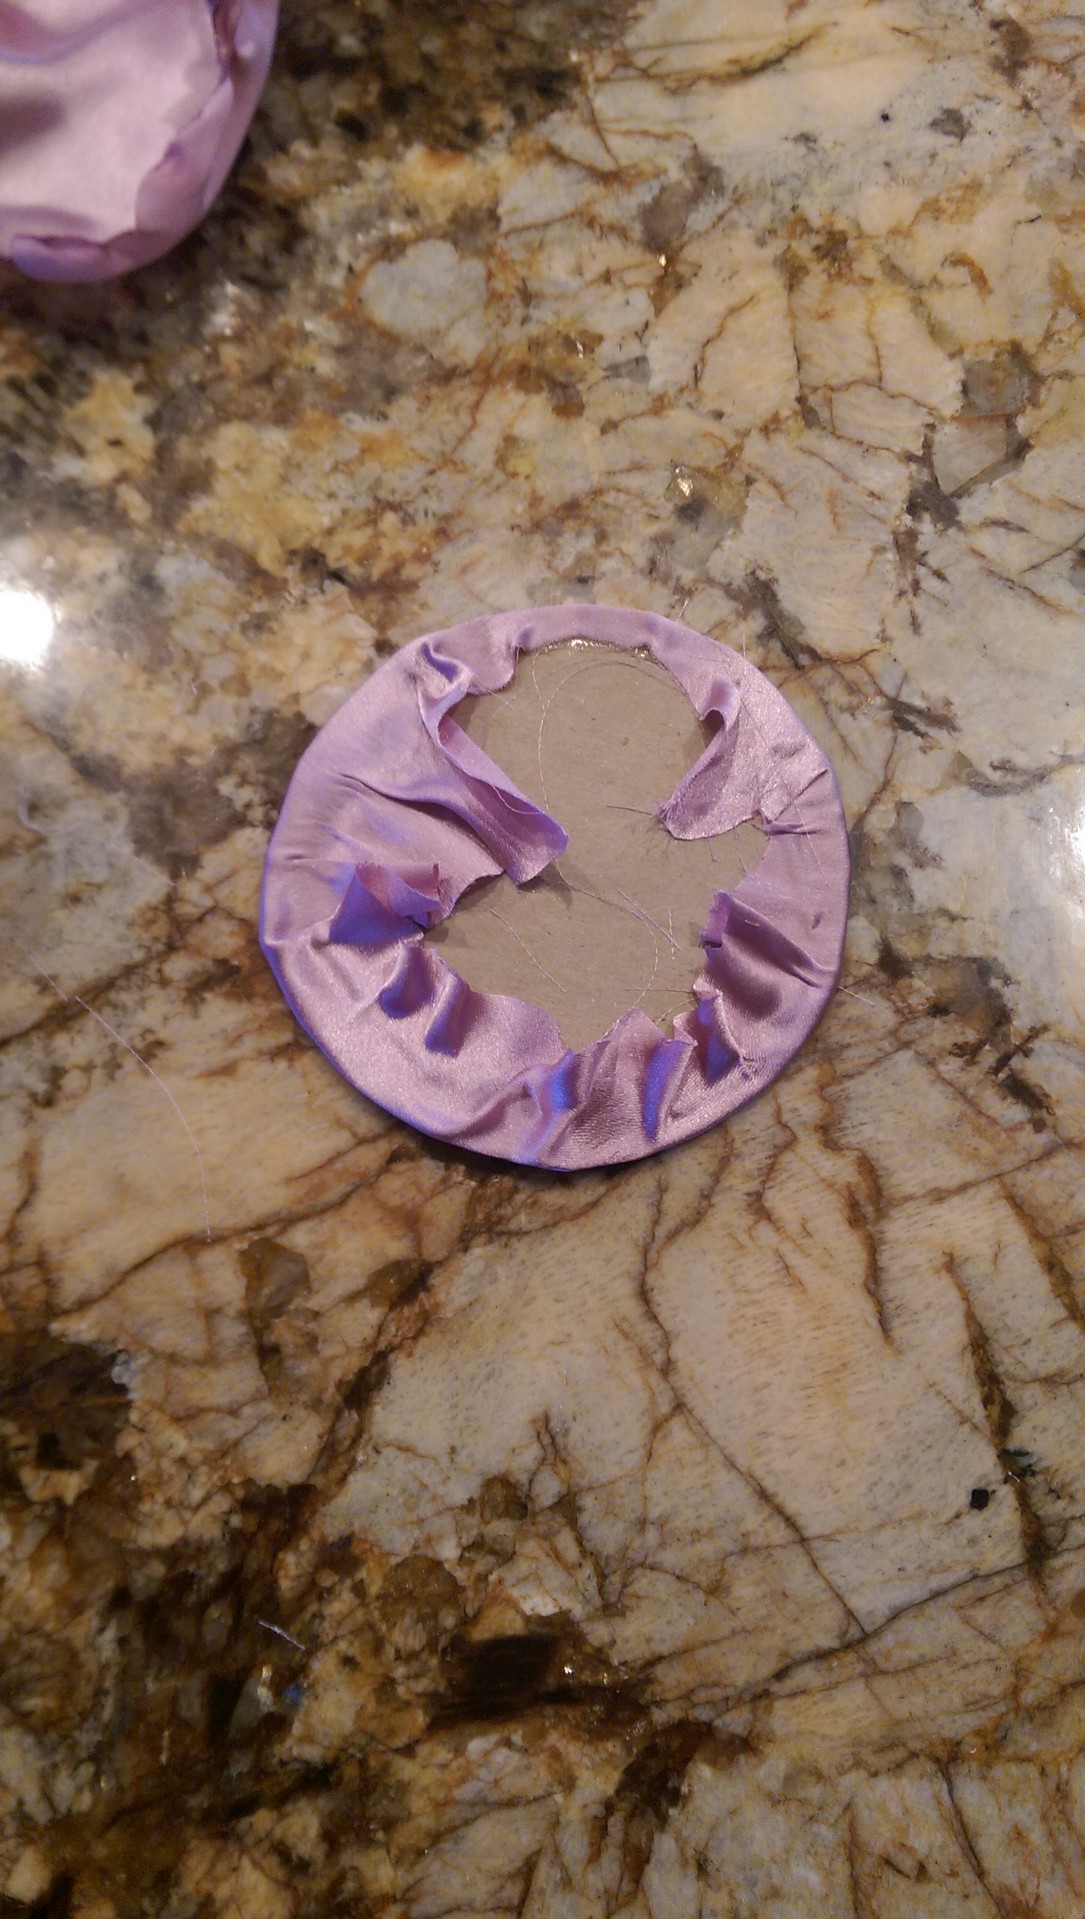
For a base, I covered a circle shaped pieced of cardboard with fabric (to keep it pretty) to add stability:

IMAG00153

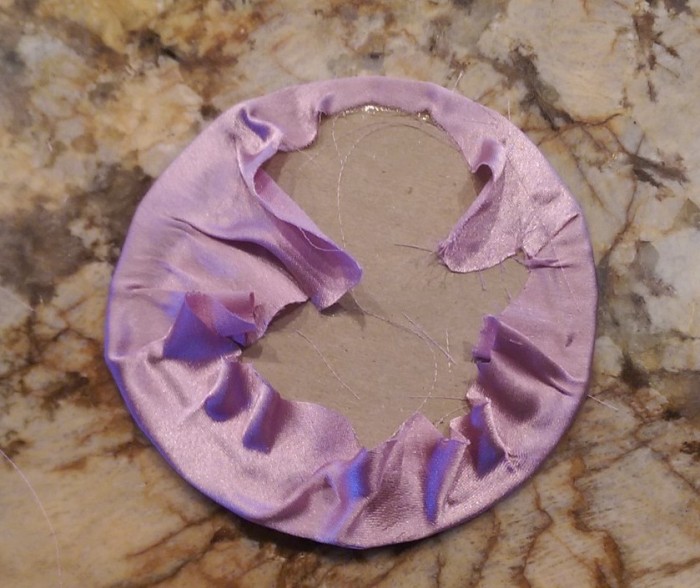
Of course I glued the flower layers to the ugly side so the bottom looks nice and finished.

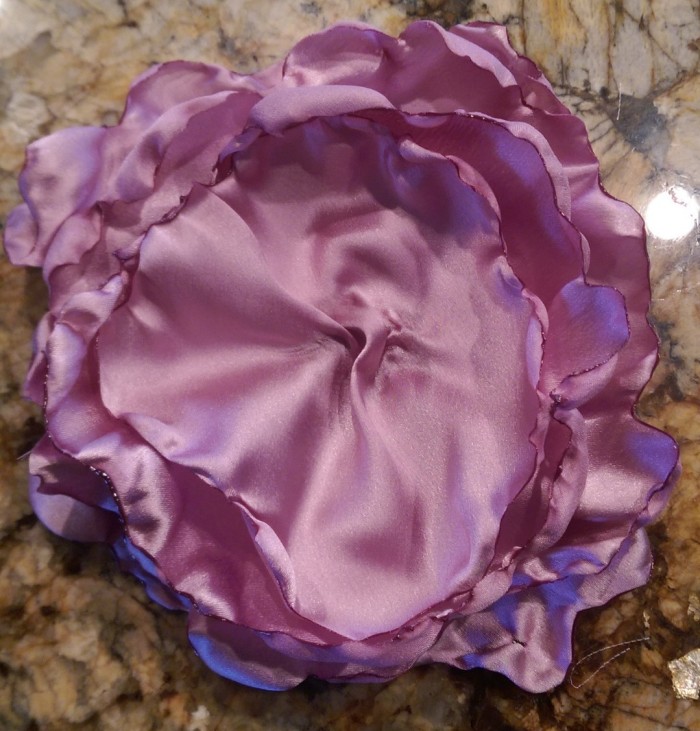
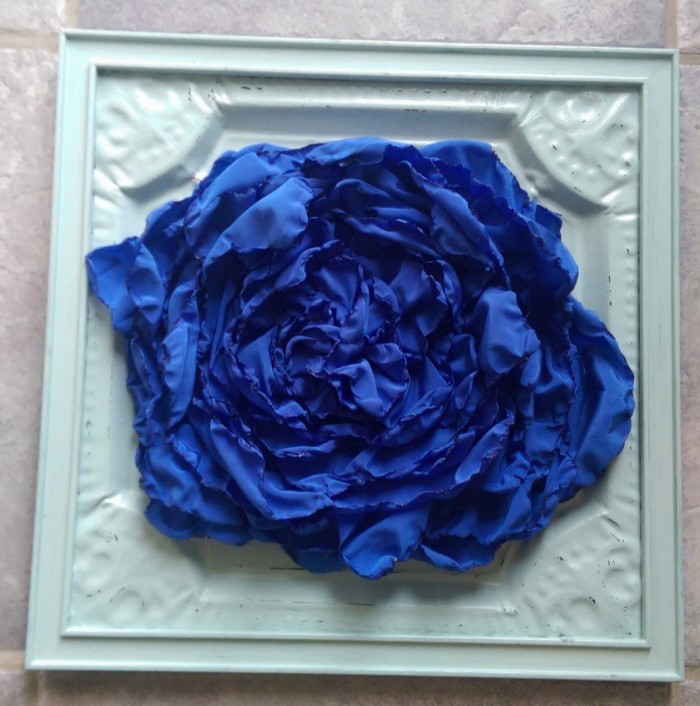
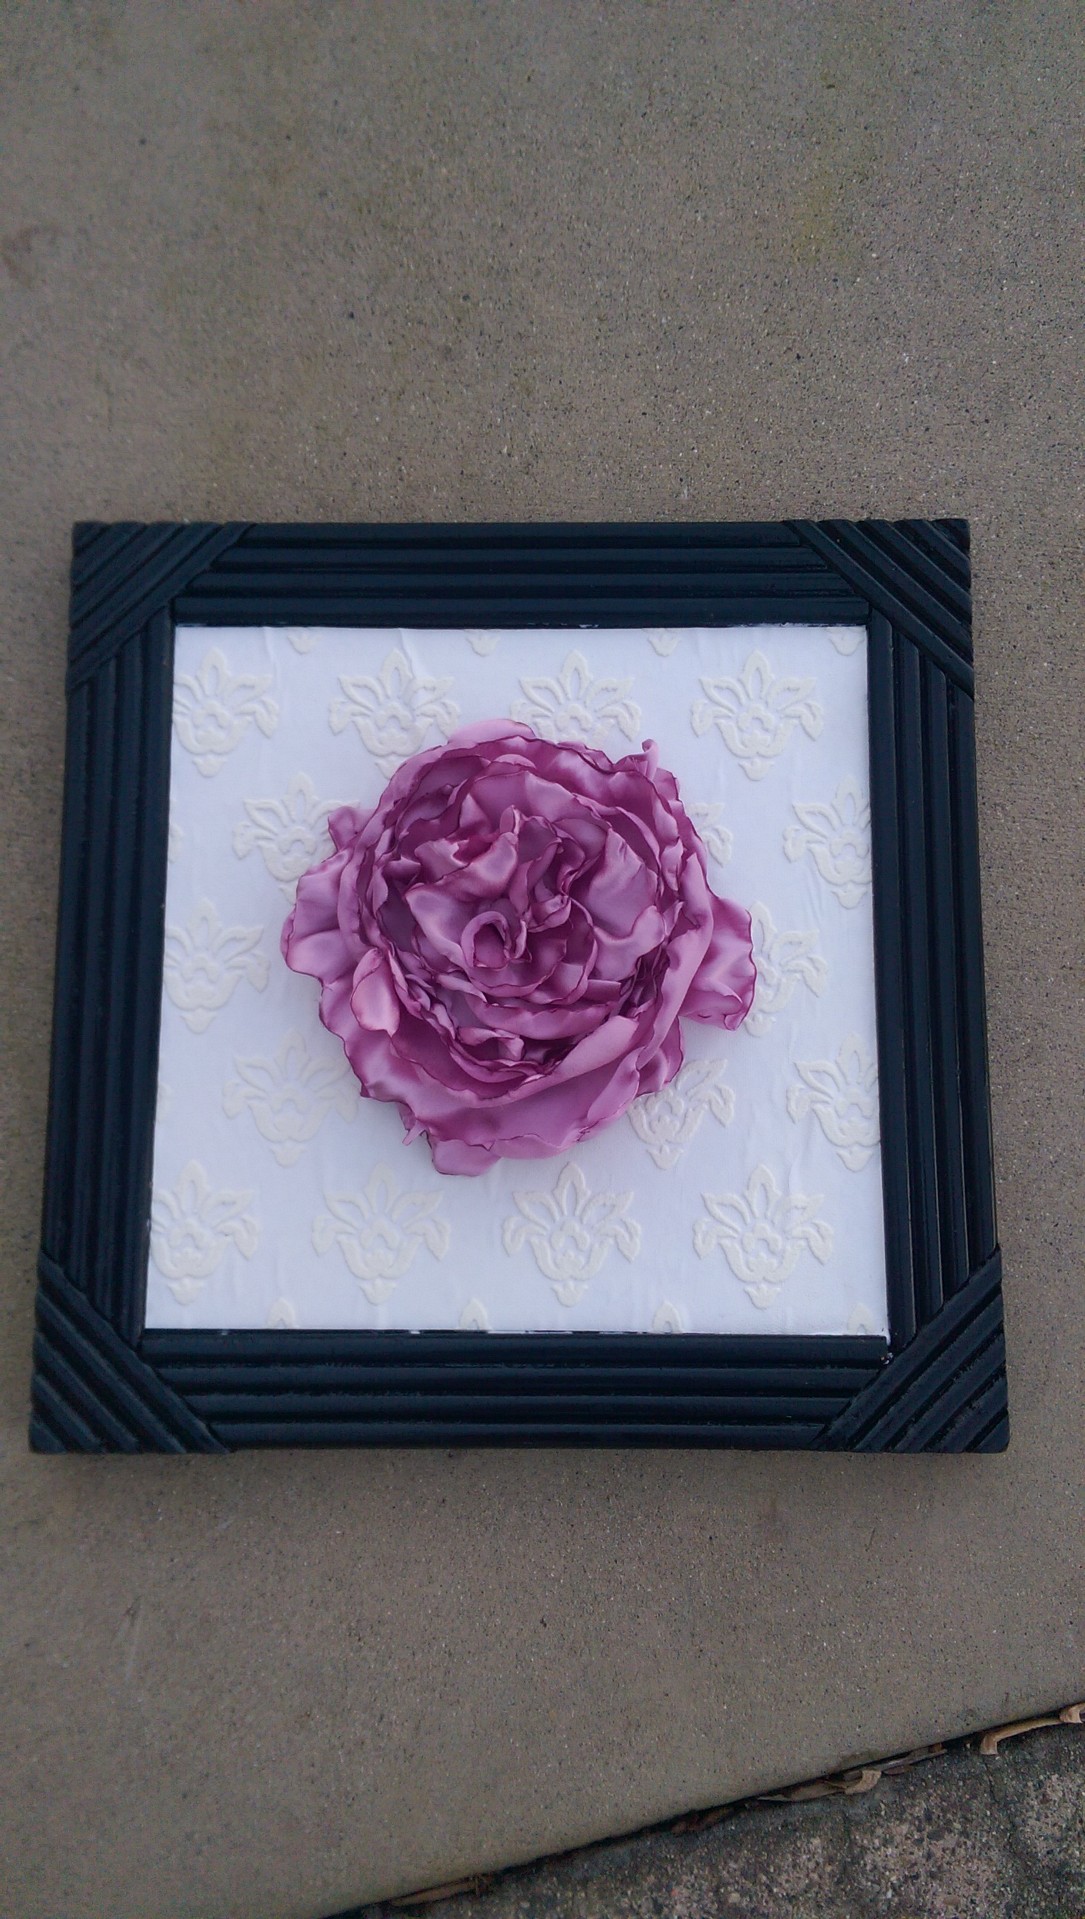
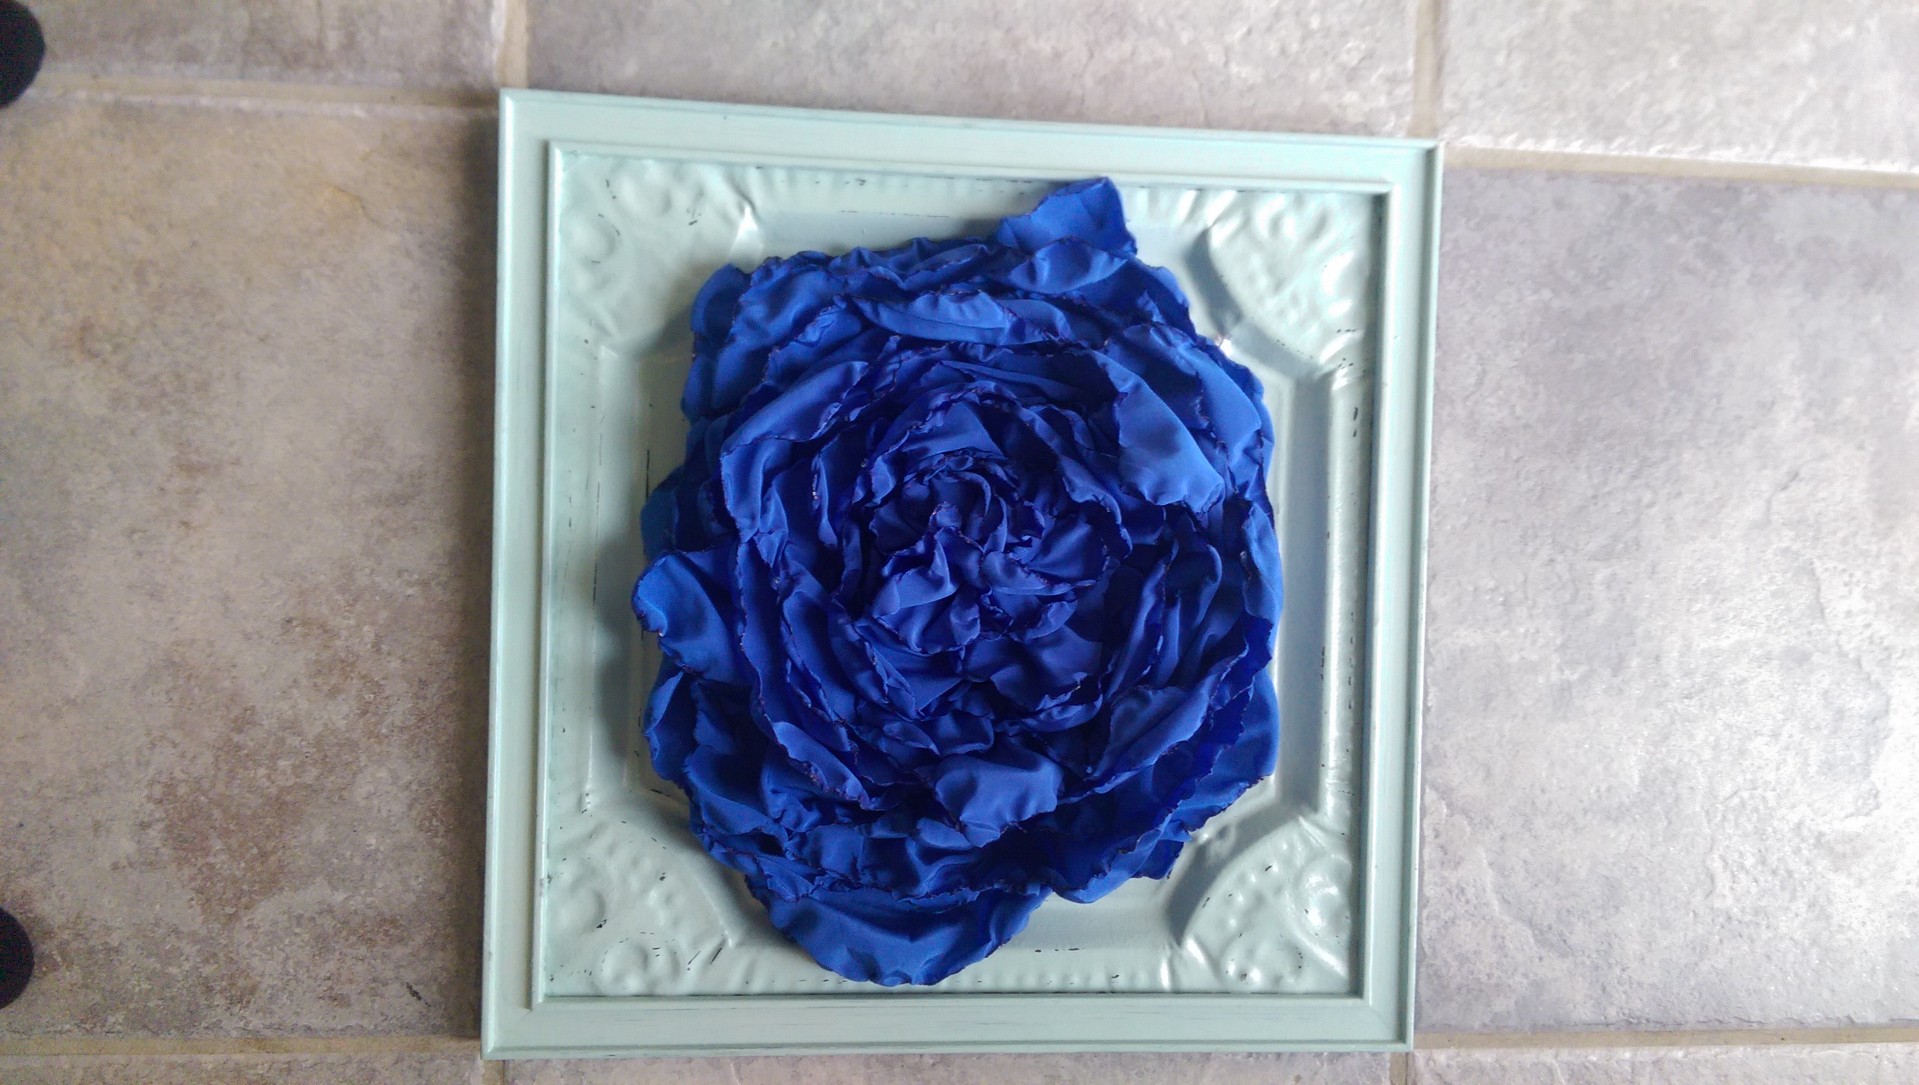
This finished flower turned out to be about 8 1/2 inches wide.  Big enough to make a statement in a frame that I backed with unpainted textured wallpaper:

IMAG00002

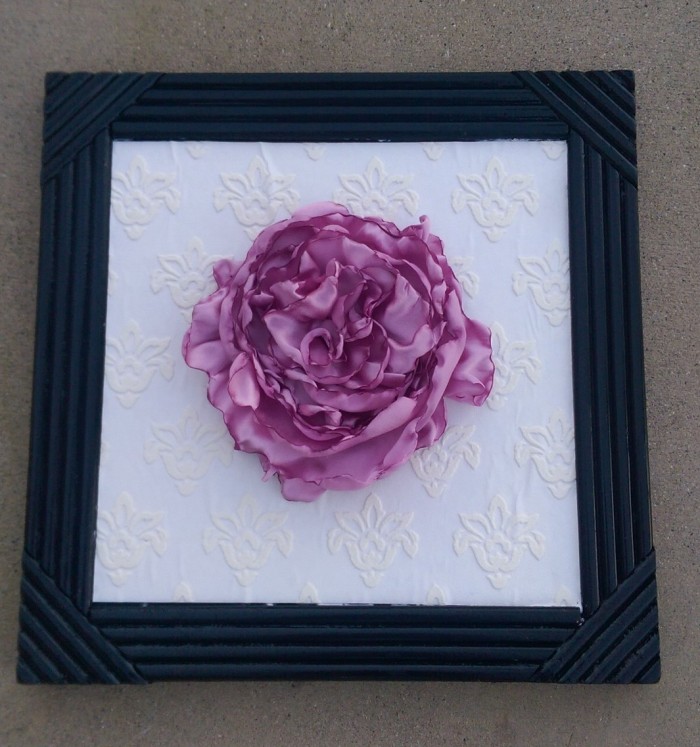
I thought that it turned out pretty good, and I’ll admit that I excitedly thought,  “I MADE that!” every time that I walked past it.    The above picture just doesn’t do it justice.  The satin is so beautiful and I love the color that the fabric turns when the flame melts the edges.   Come to my house sometime and you will see.

After I had walked past it a hundred times or more I got thinking again.  Dangerous!  I adopted a new theory, ” If bigger is better, gigantic is the best!”.  Are you with me?

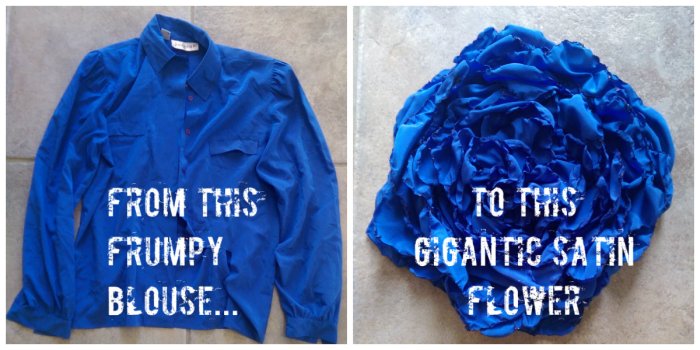
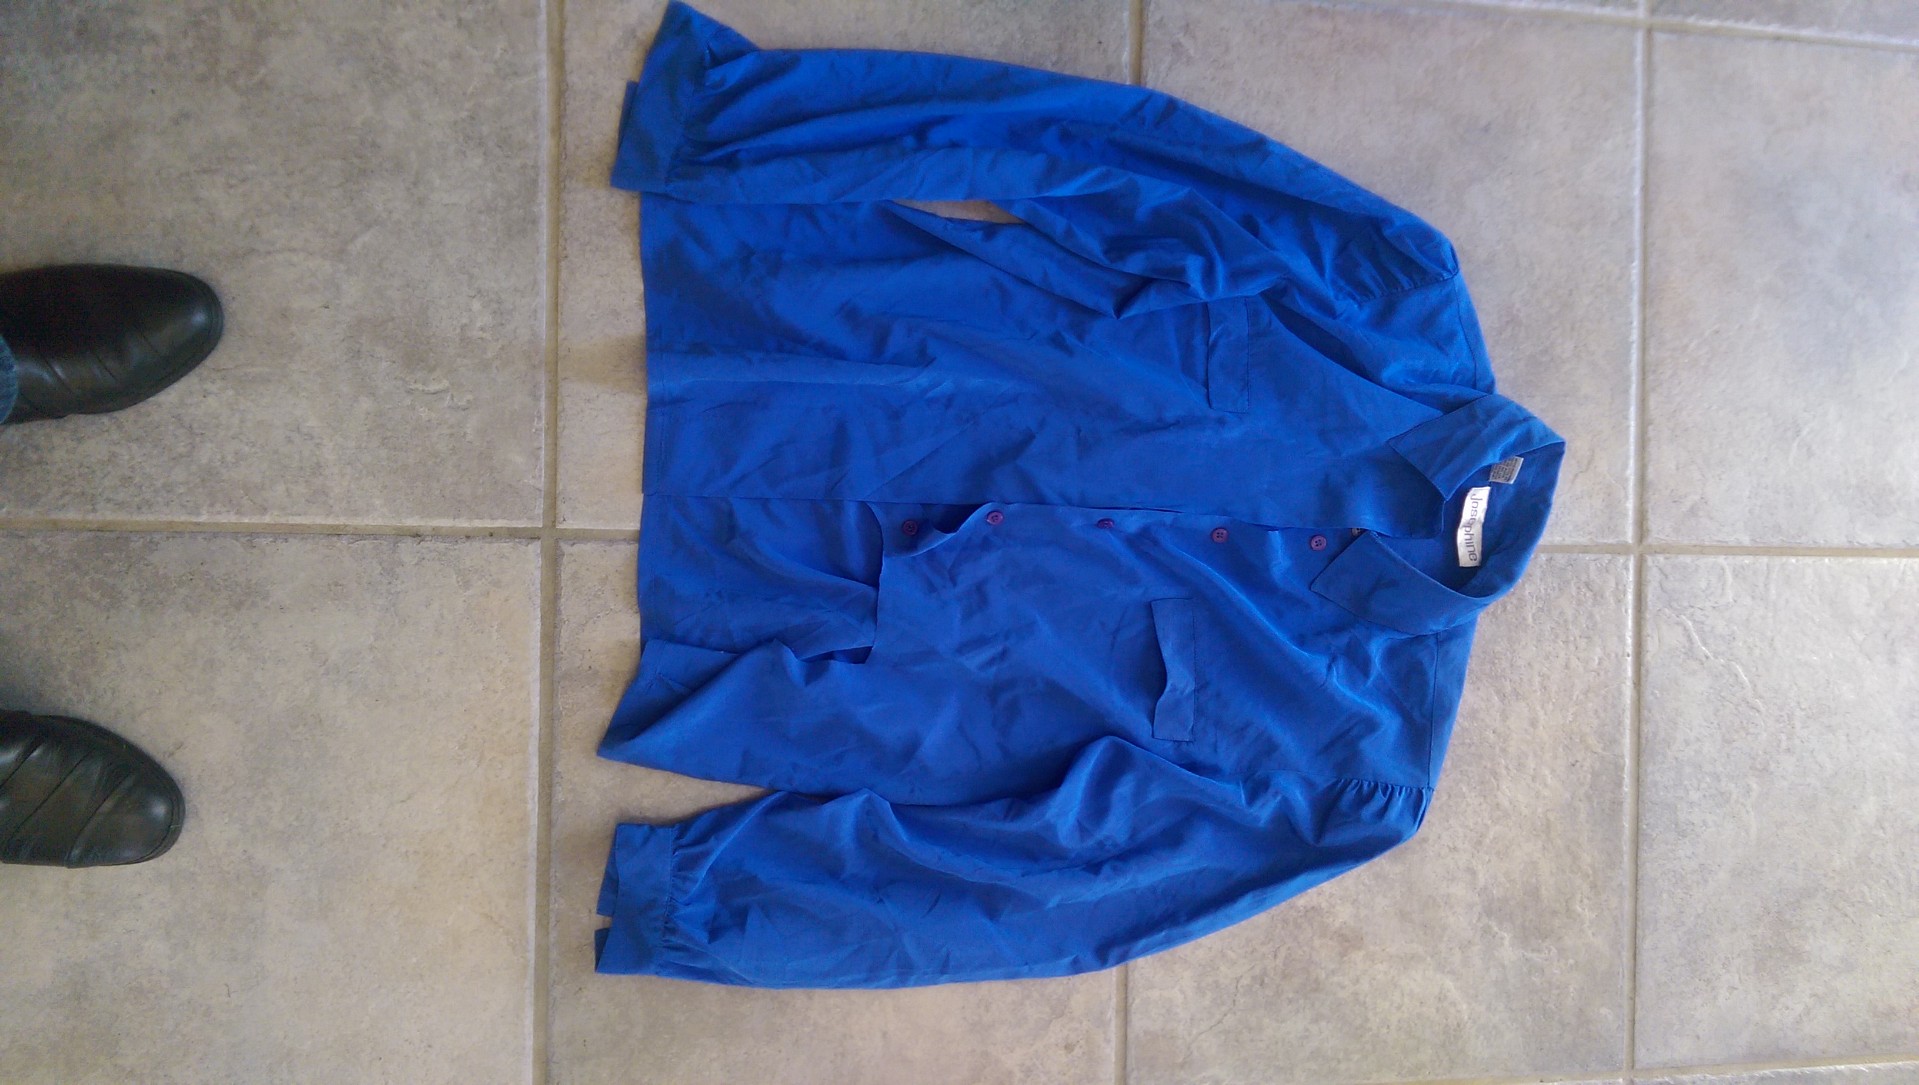
I looked in my fabric stash and found this lovely blouse that had been purchased and cut up for my daughter’s school project last year.  This little number set me back probably $.50.  Way cheaper than fabric store fabric.  I didn’t want to ruin good fabric if my big idea didn’t work.

IMAG00099 (2)

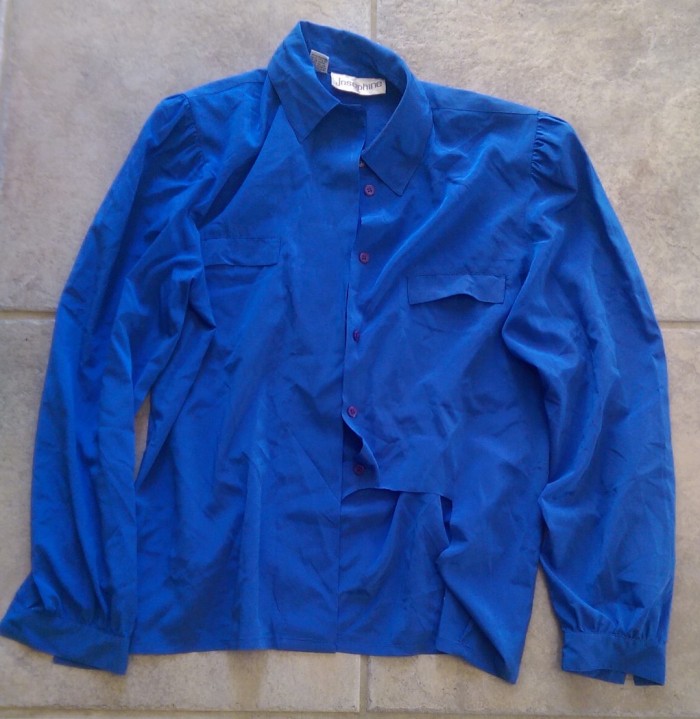
I totally know what you are thinking.  “How could you cut up such an stylish blouse?”  I know, right?

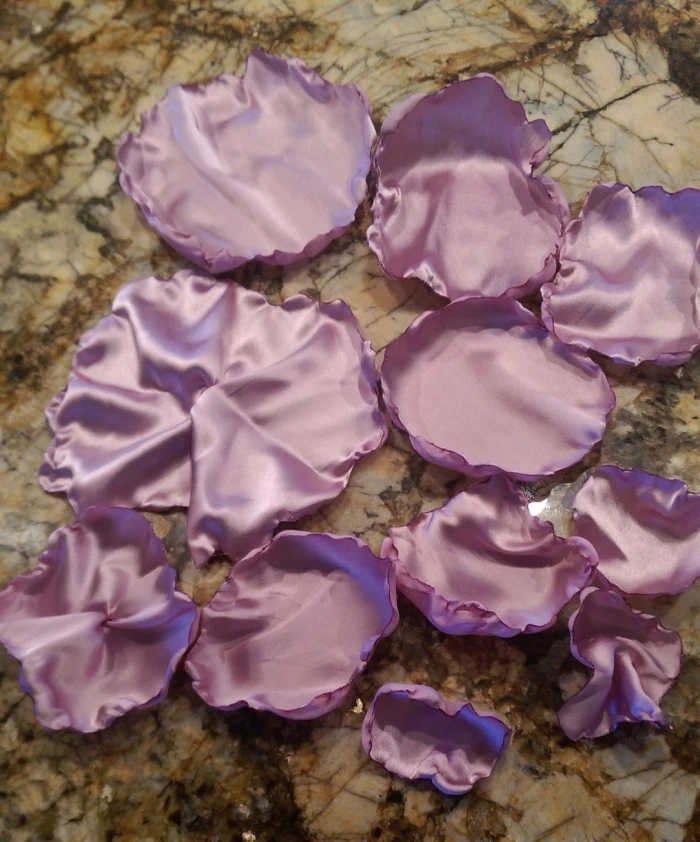
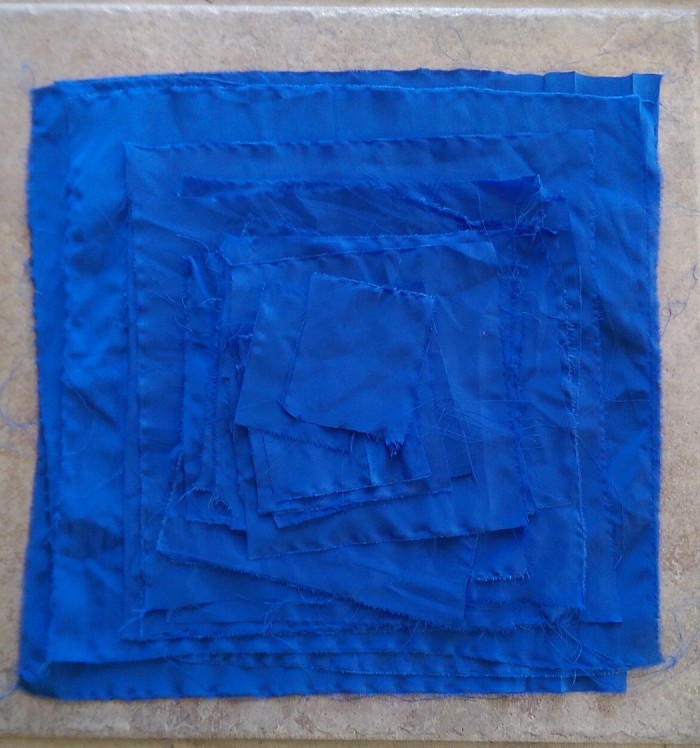
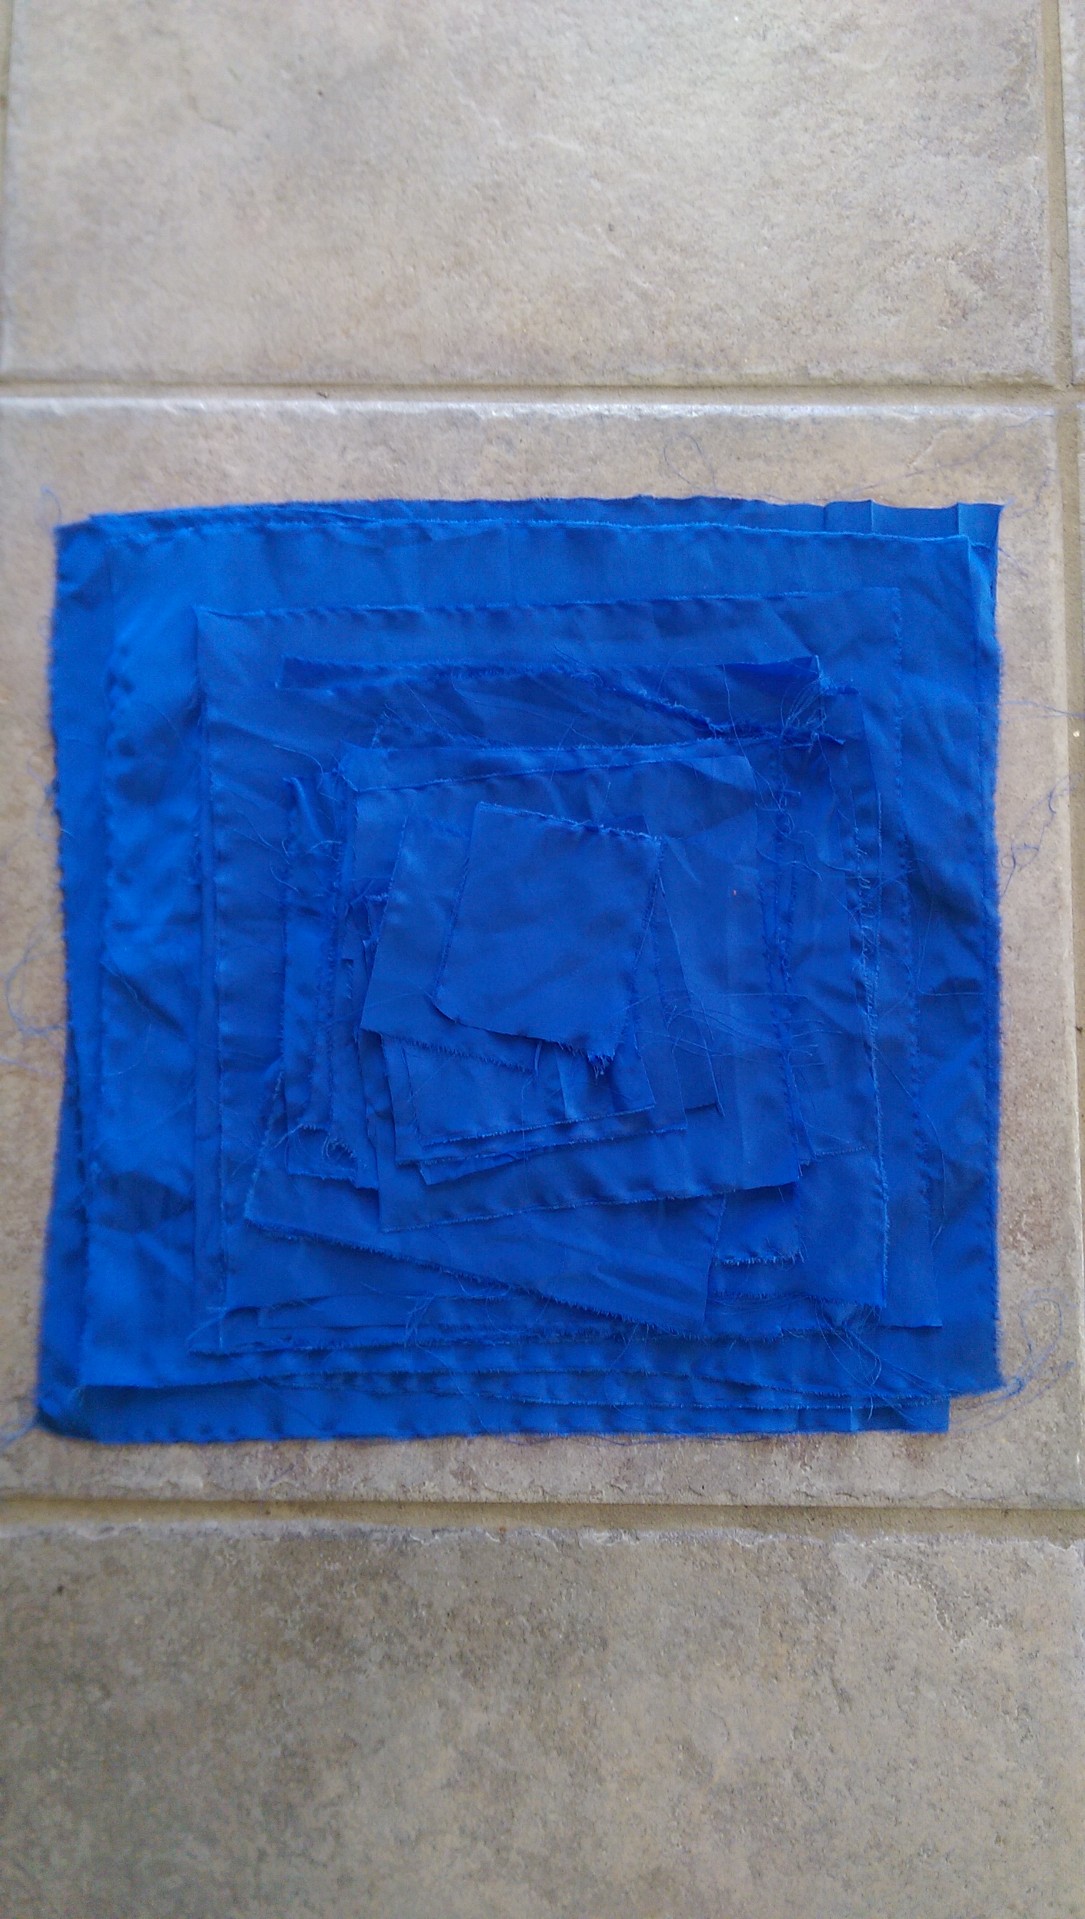
As I started cutting I realized something awesome, this 100% polyester fabric tears really easily.  In no time at all I had a large stack of fabric squares.  The largest squares were cut out of the back of the blouse, but I was amazed at how much fabric was in each sleeve.  I didn’t even try to count how many layers this flower has.   I just know it was a lot because I wanted my gigantic flower to be nice and fluffy.

IMAG00100 (2)

Using the same process that I showed you in my Super Simple Satin Flower tutorial I started melting my edges.  Unfortunately, my hubby was working at home when I made this and I knew that he would not welcome the thought of me putting fabric over a flame in the house so I did it on my front porch.  Trust me, it is much faster to do indoors.  Every little breeze makes the candle flicker.

I made a cool little video to show you a way that I found to speed up the process, but ding-dang-dong, I can’t for the life of me figure out how to add it in WordPress.  I will keep trying to figure out how to add the video, but basically, just take one side and simply fanfold the edges (maybe a 4-6 inch section) and hold the fanned area vertically about the candle’s hot spot to melt a larger section at a time.  Quickly spread out the fanned out area just in case parts fused together and then melt any sections that might have been missed.  Again, don’t put the fabric IN the flame, just OVER the flame.  We are melting, not burning the edges.  It probably took me an hour to melt all of my edges.

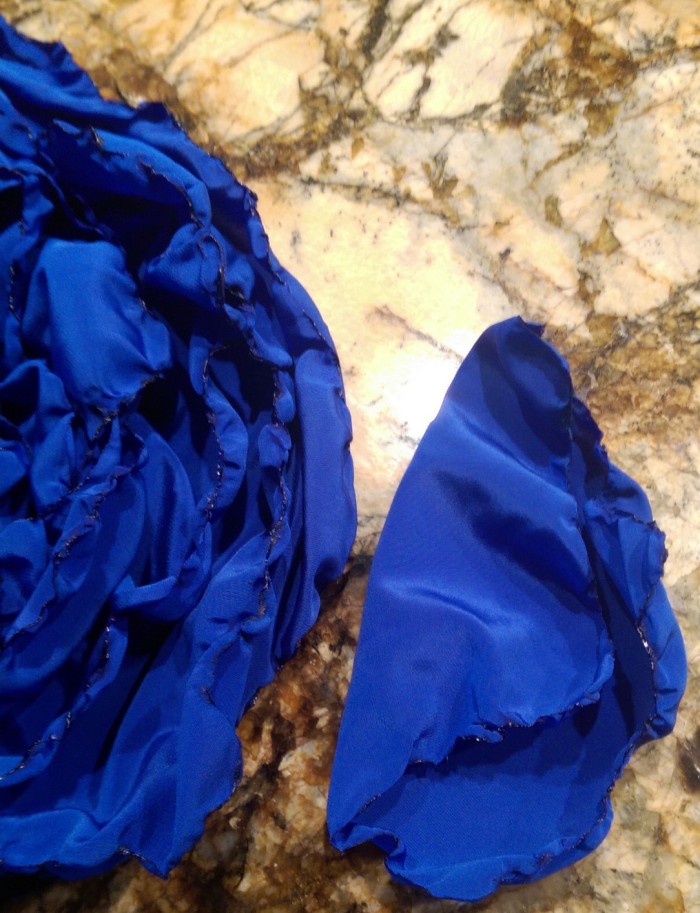
Once all of your pieces are melted, start stacking, largest on the bottom and work your way to the top.  Many of my pieces were similar in size and that is okay.   Just do this:

IMAG00154

See how I put the glue down and scrunched the fabric to make sure the layers beneath can be seen.  This also adds wrinkles which help add volume.

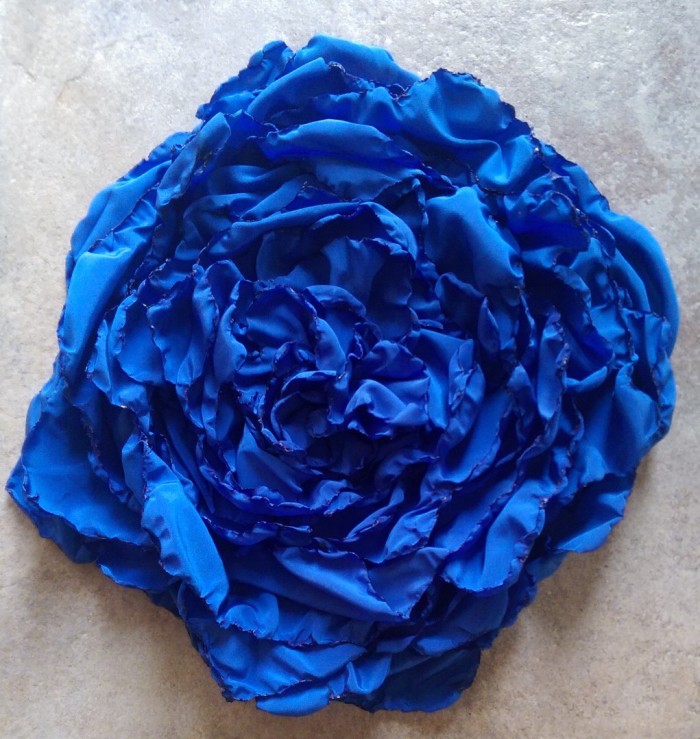
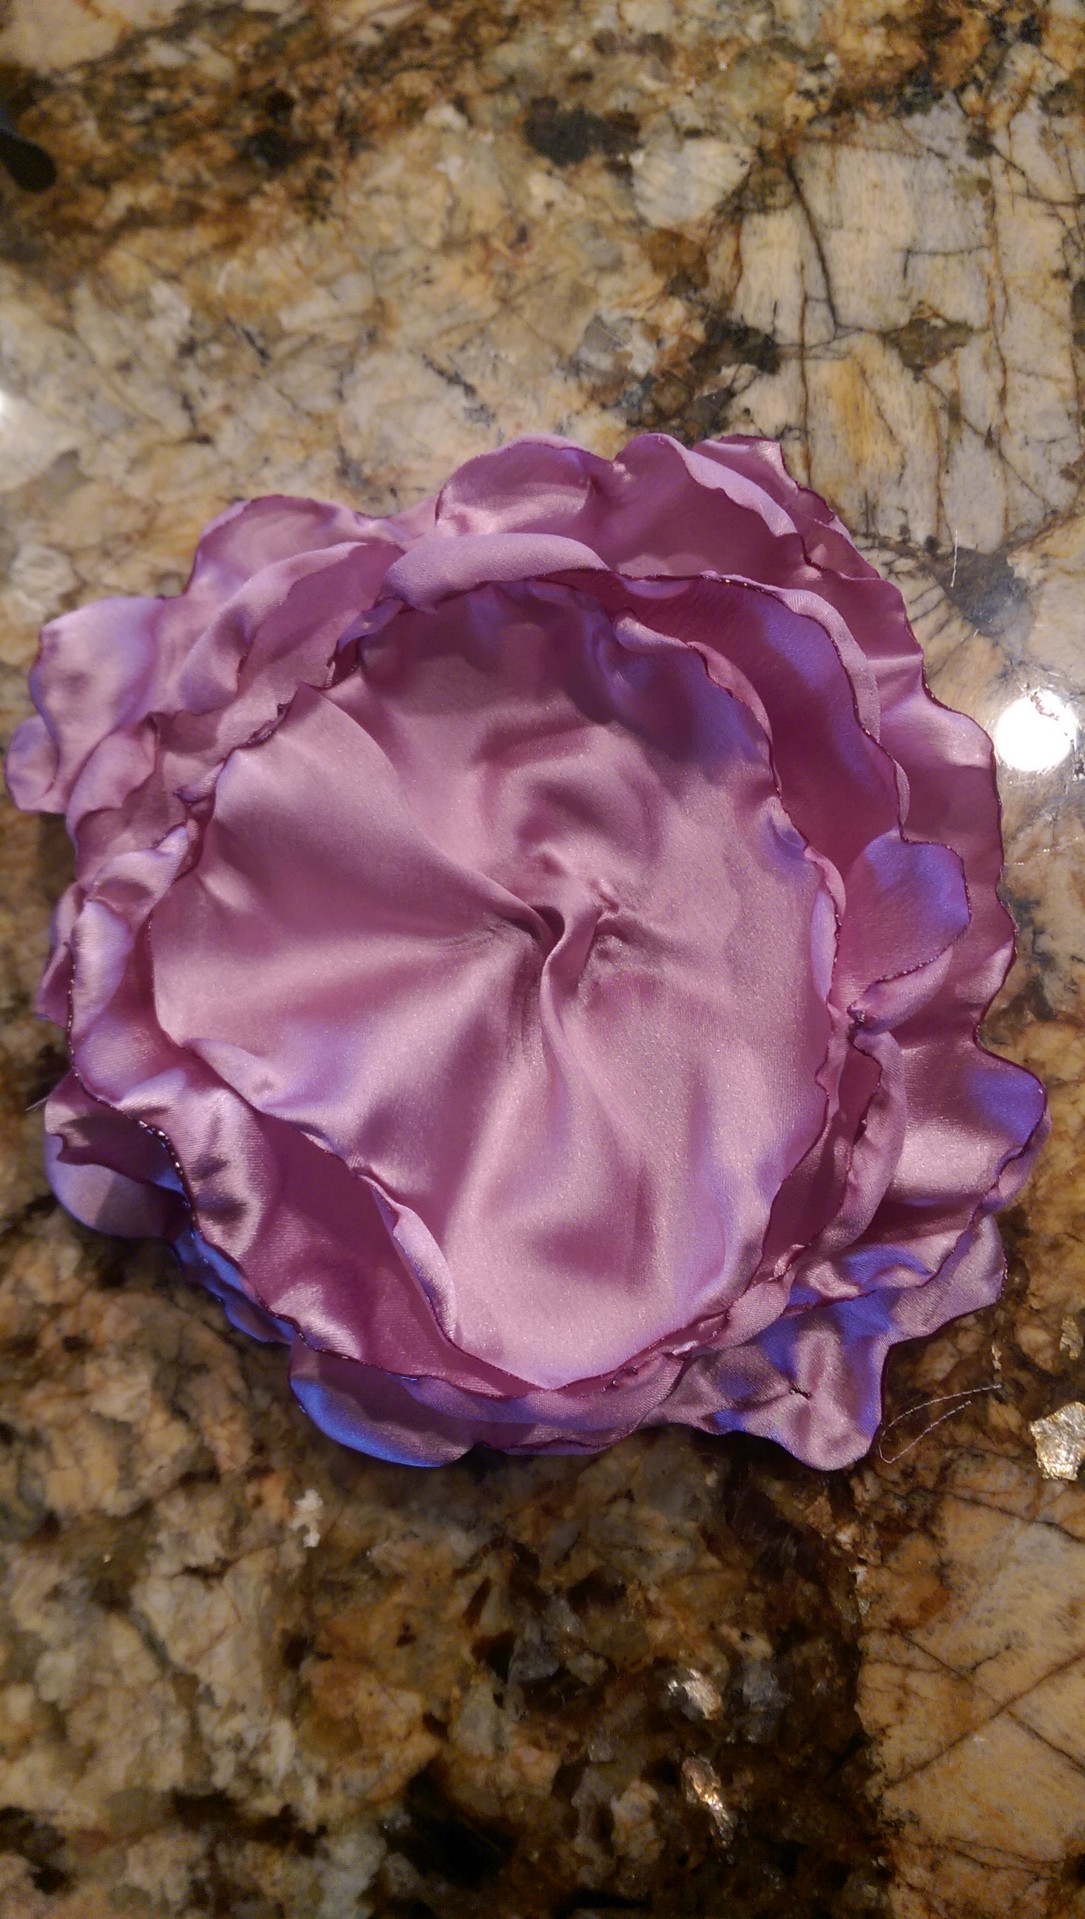
When I got to the center area, I took 4 of my smaller melted shapes, pulled the center down to form a cone shape and glued them down to hide all of the hot glue spots.  At this point, I still had some extra melted fabric sections so I folded them in half and glued in the bare areas.

IMAG00105 (2)

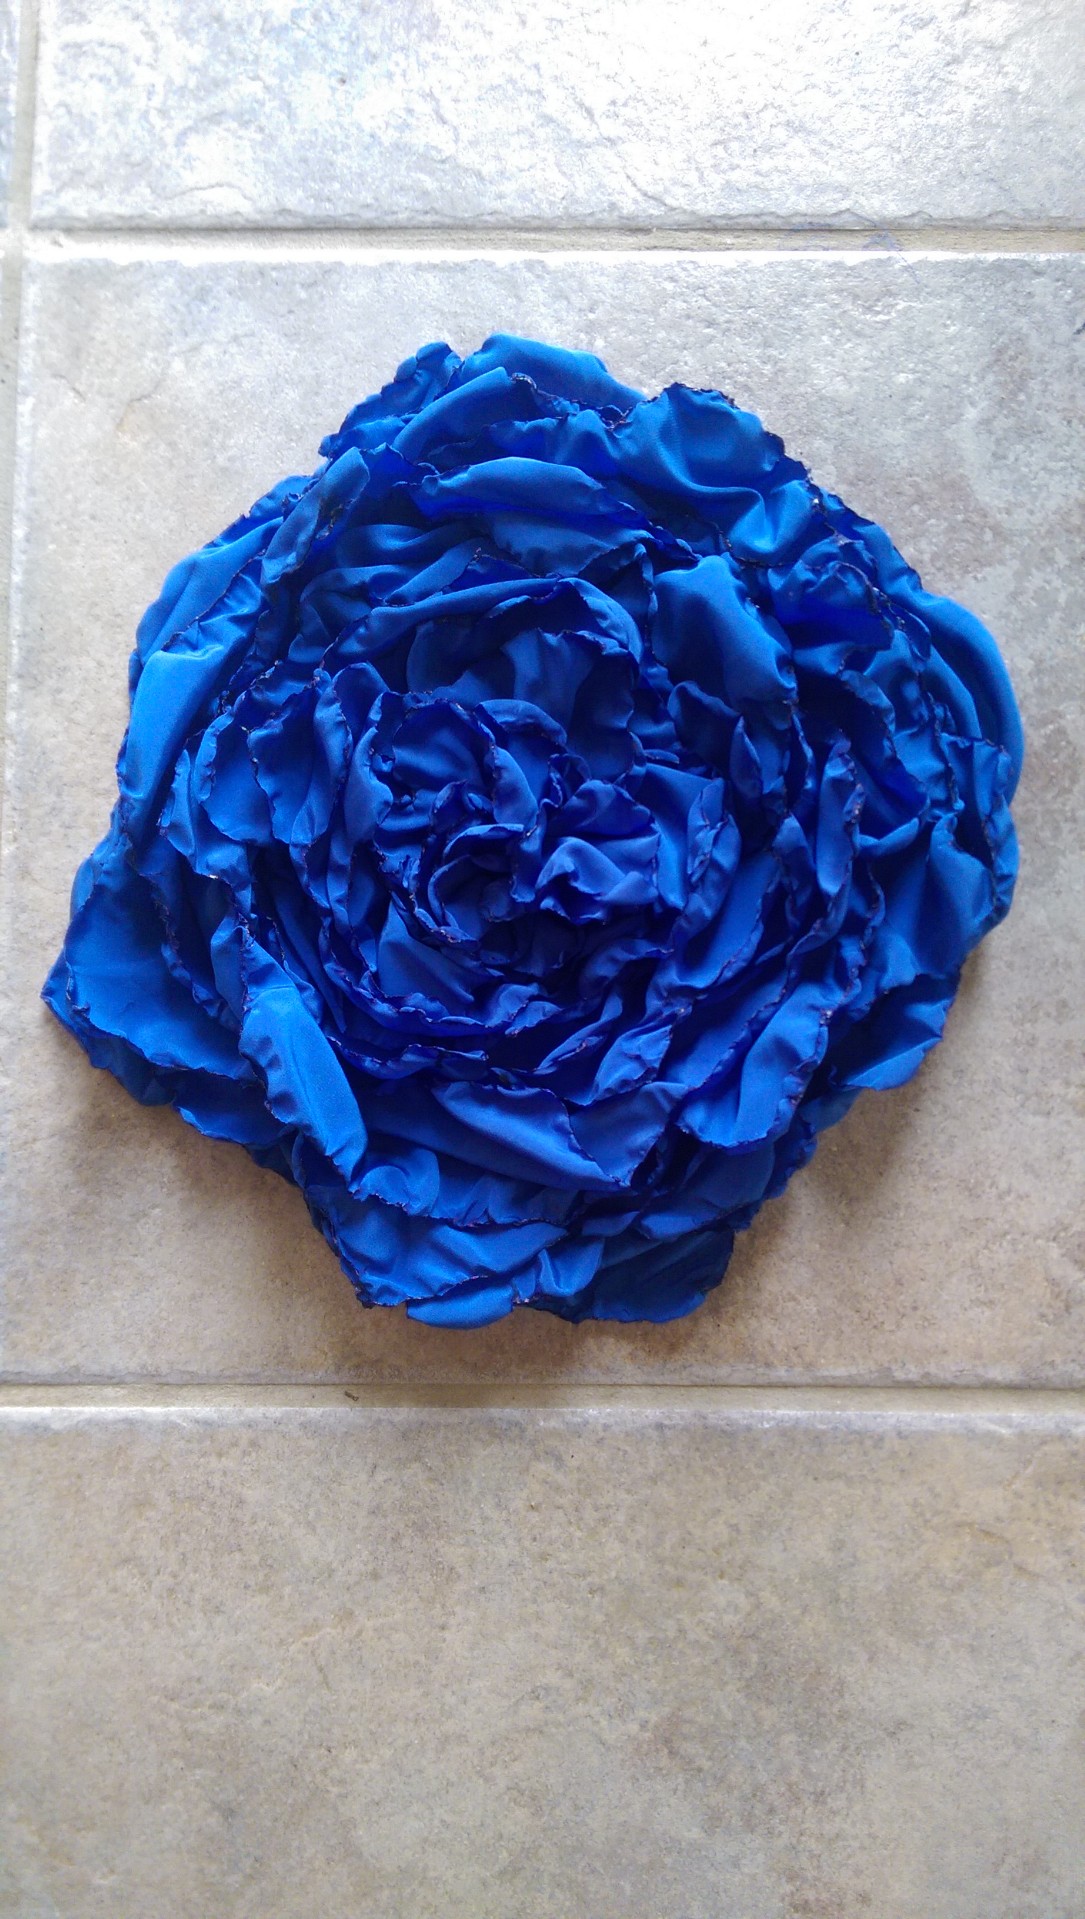
Ta-dah!  This baby is about 14 inches across!  It’s gigantic!

IMAG00106 1

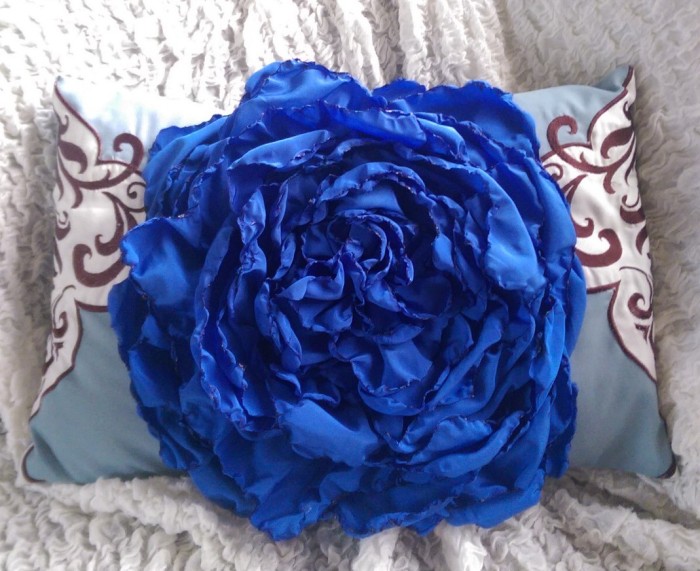
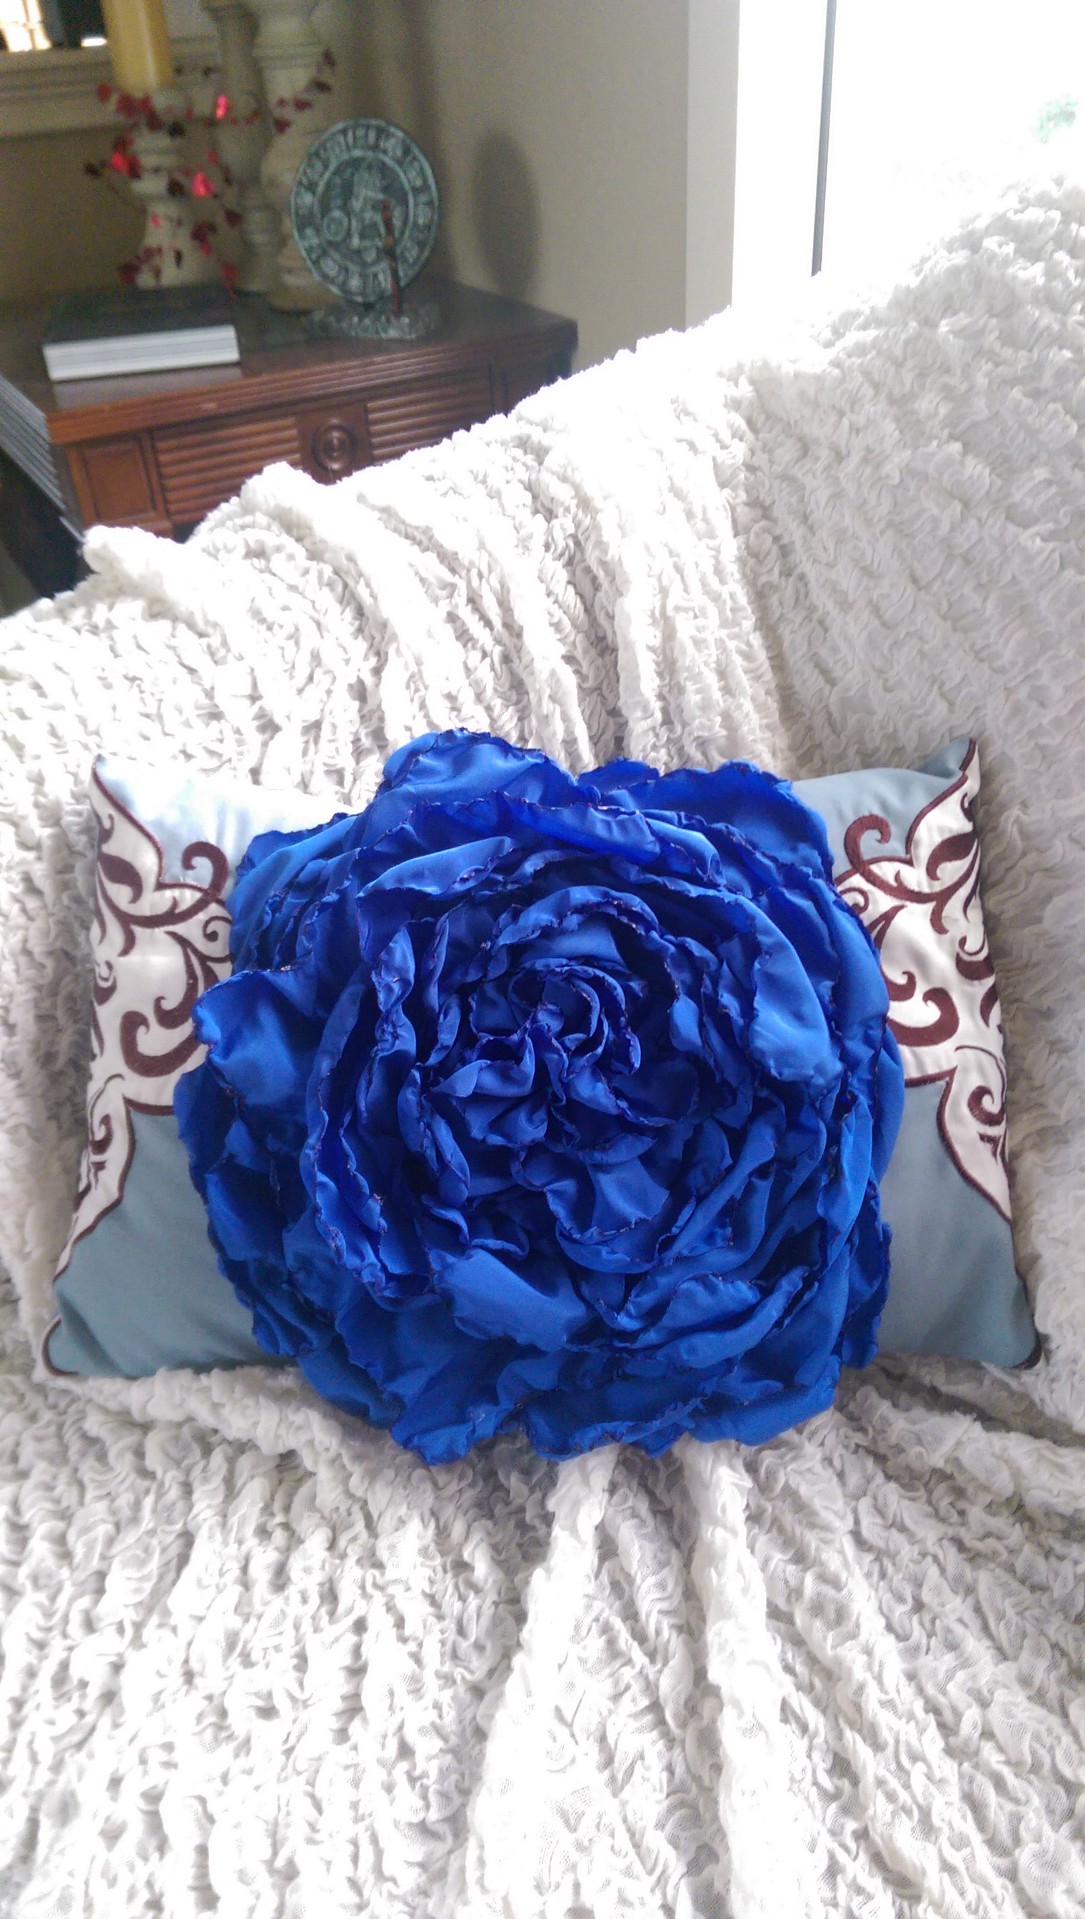
Here, you can see how I added it to a throw pillow:

IMAG00109 (2)

And here I attached it to a framed mirror:

IMAG00111

In all honesty, this bright blue doesn’t go with anything in my house, BUT, my daughter is going away to BYU this fall and this BYU Blue gigantic flower will go with her.  Now that I know that it IS possible to make a Gigantic Satin Flower, I’m making one for me!

So, whadda-ya think?  Was my $.50 investment + 1 1/2 hours of my time worth it?

(Here is a different blouse makeover project that I made)