I’m about to show you something that will blow…your…mind.
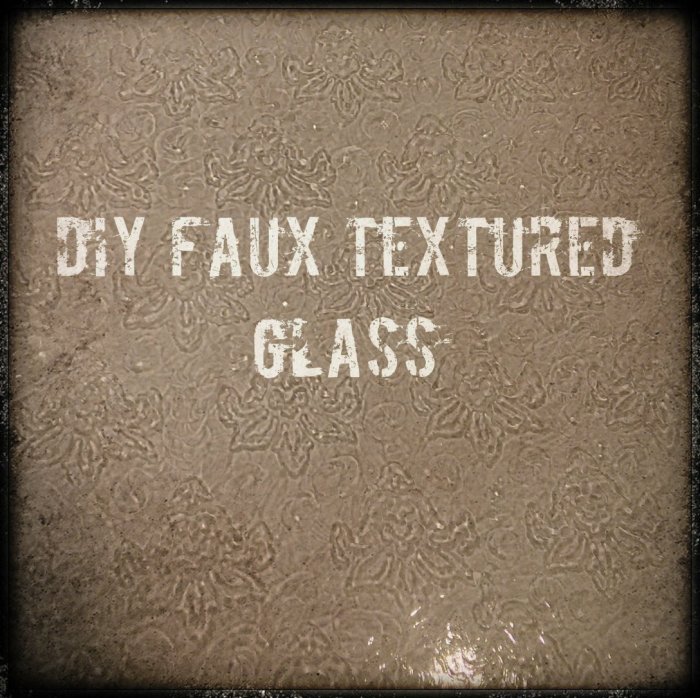
That’s right…I figured out how to make my own faux textured glass and I can’t wait to show you how. Truth be told, I’ve been using this product for several years now:
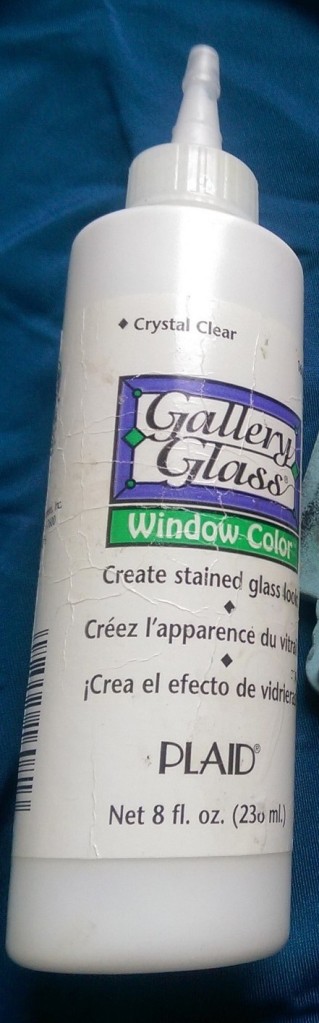
The first time that I used it was purely out of necessity. We had a huge custom triangle-ish shaped window in our old house that had moisture damage and looked horrible. I decided to do a stain glass look using Gallery Glass products. Using their liquid lead striping, I created a Craftsman style border around the whole window using different shades of greens as well as the Crystal Clear. Did I mention that this window was huge? 7 foot at the tallest part, 8 foot at the widest. It seriously took forever just to do the border. When that was done, I still had a huge window that looked moisture damaged. Ignoring the instructions that said NOT to brush the product on, I poured the Crystal Clear in a bowl, grabbed a wide paintbrush and filled in the rest of the window with brushstrokes, making my own textured glass look that hid the moisture damage. That was nearly 15 years ago and, as far as I know, it is still holding up. Cheap and long-lasting fix!
I have a couple of other DIY faux textured glass tricks up my sleeve that I will reveal another time, but I just have to show you the technique that I dreamed up today. The process is really simple. (Place your mouse cursor over each image, or click on it, to see the simple instructions)


Now, for my textured pattern maker: dun, Dun, DUN… textured wallpaper! If you know me, you know that I LOVE textured wallpaper for crafting.


After rolling over the back of the wallpaper, I gently lifted it off. Truth be told, I had a little too much GG and the image was a bit smeary. No problem. I just used a paper towel to remove some of the product, then re-smeared and re-stamped.
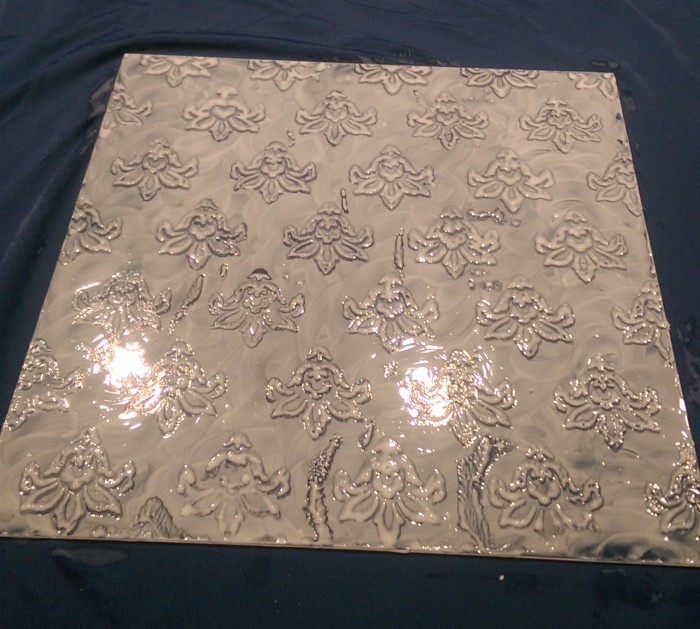
This is what it looked like when I peeled off the textured wallpaper:
You might notice some little wormy looking imprints. Of course I didn’t let them stay. Rather than start over again, I just used my finger to smear those areas out, adding little “polka dots” all throughout the glass. Because of past experience, I knew that those dots would blend in just fine when the product was dry.
This is what it looked like as it was drying:

Notice my little dots? Don’t worry, they will almost disappear.
So……….I found out that it is not easy photographing clear textured glass. I tried about a hundred ways to get some decent pictures for you, I really did! In person, it is a really cool effect. In a photograph, it is much harder to see, but here goes:
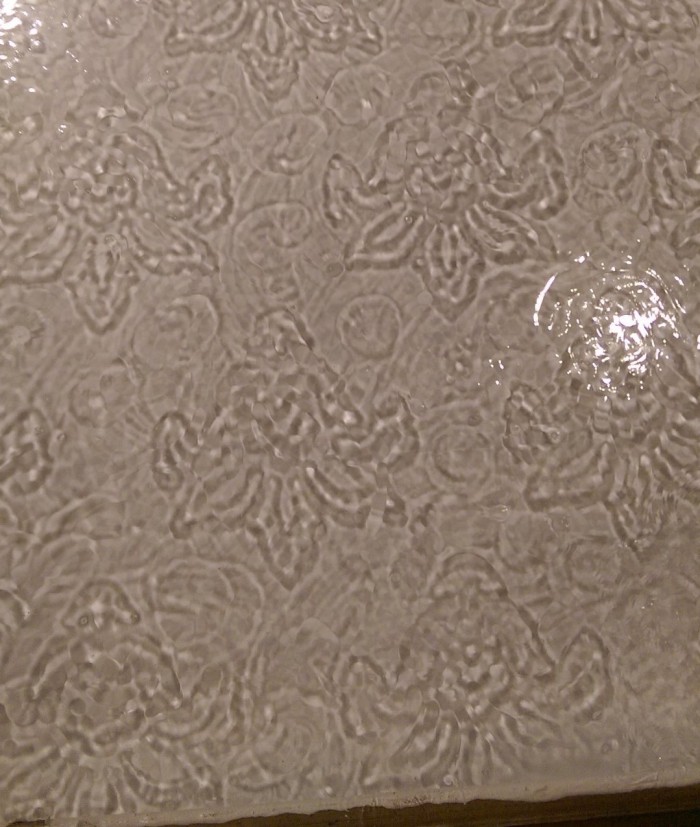
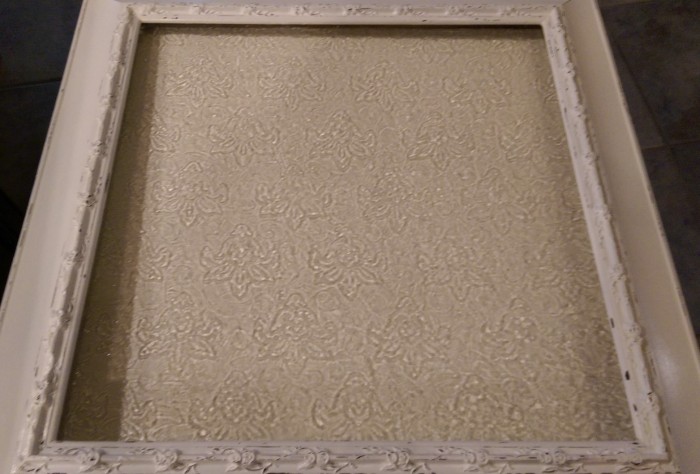
It worked!!! I’m thrilled…giddy…ecstatic! Once I get it in my frame and vinyl lettering added, I will show you the final, final product.
Until then, what do you think of my Faux Textured Glass?
*********Linking up to these awesome parties*********
I was featured!

As a follow-up, I went to and saw the following Q&A regarding Gallery Glass that I found interesting;
Q: Do you need to use a sealer over Gallery Glass® Window Color™ or Liquid Leading™?
A: Gallery Glass Protective Sealer is recommended for all projects, especially window clings and designs in high humidity areas. The sealer will resist dust and fingerprint impressions as well as protect against condensation in moist areas. – See more at: https://www.plaidonline.com/gallery-glass/brand/detail.htm#sthash.7y3GGCHg.dpuf


This is a great idea! Thanks for sharing it with us. I saw your post over at Link Party Palooza.
LikeLike
Why, thank you! I really wish that the pics could do it justice. Thanks for taking the time to stop by!
LikeLike
LOVE that idea!
LikeLike
Thanks Vickie!
LikeLike
I really like this project, and I think I may have to give it a try one day!
LikeLike
You really should…it is a lot of fun to play with.
LikeLike
Wow! I just love this! I think (based on the pictures anyway) that this would be a great thing to do to a window that the view was less than appealing. You’d still get the light in but the view wouldn’t look so horrible!
Tania
LikeLike
Thanks! I think that Crystal Clear Gallery Glass is so much fun to play around with. You can make all kinds of designs and if you don’t like them, you just scrape it off and start again. That said, you wouldn’t want it on the exterior side of windows because it is not water resistant. Thanks for stopping by!
LikeLike
That’s brilliant to use wallpaper to add texture! And it turned out great. I love how it lets all the light and colors in, but distorts it so it’s not see-through. We have some glass on our front door that I’ve been trying to figure out what to do with. This sounds like a great solution.
LikeLike
Why, thank you, Rebecca! I would totally recommend trying out the Crystal Clear Gallery Glass for your front door. Send pics if you do!
LikeLike
Wow! I love seeing interesting techniques and this is really cool. I know what you mean about pictures, but I think they show just how amazing this project will be! Can’t wait to see the finished. Appreciate you sharing with us at Brag About It! Pinned and tweeted to share!
~Laurie
LikeLike
[…] 1.DIY Faux Textured Glass at Arm Chair Decorator Blog […]
LikeLike
[…] 1.DIY Faux Textured Glass at Arm Chair Decorator Blog […]
LikeLike
I wish i was crafty, that wass beautiful
LikeLike
I can’t locate the sealant. Any other options?
LikeLike
Gallery Glass, made by Plaid, seems to be seasonal now days, available when Christmas holiday stuff comes out, so hopefully it will be coming to a craft store near you soon. I have purchased it at both Michaels and Joann’s craft supply stores. After a quick search, I found it on Amazon.com and Joann.com. The Crystal Clear is the one to get for this project. I love this stuff! Good luck, and thanks for stopping by!
LikeLike
Great reaading your blog post
LikeLiked by 1 person