Do you like snowmen? I adore snowmen! I even have a snowman themed tree that I put up in my dining room each year. It rarely snows where I live in N. Cal, but I still give myself permission to keep snowmen decorating my home until February. Over the years I have crafted up all kinds of snowmen: ornaments, wall hangers, large porch sitters, fabric ones, wood ones, etc, etc. I have come to the conclusion that a carrot nose can either make or break a snowman. Is that weird?
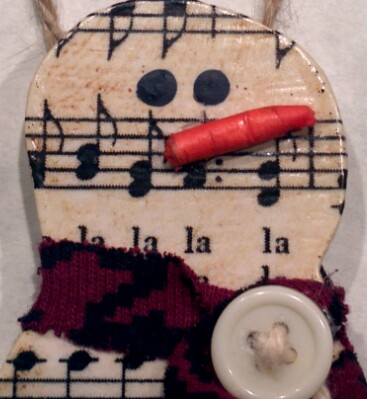
In this post I showed my latest snowman that I crafted for a Super Saturday craft day and promised that I would show how I made the carrot noses. Before I go on, I want to make it clear that I am NOT the originator of this cute sheet music idea… I’ve seen a few different versions of him on Pinterest. Anyway…this is my snowguy:

Notice his cute little carrot nose? Want a closer look?
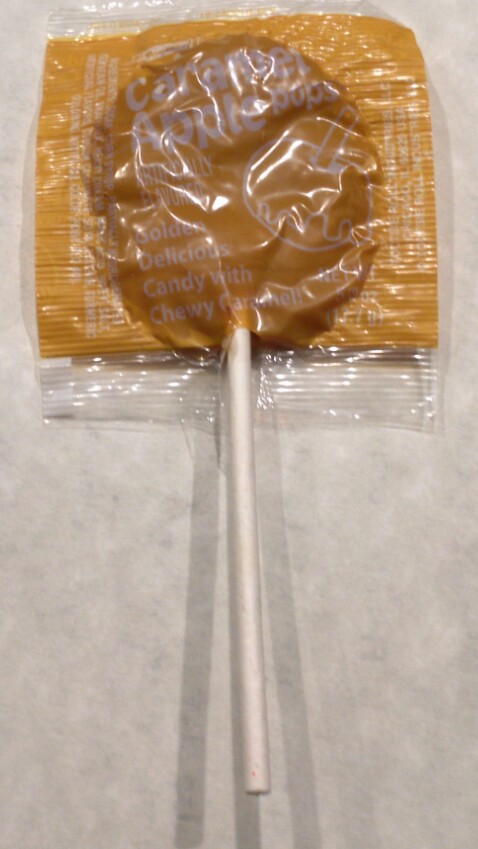
Looks like a carrot, doesn’t it? Do you want to know how I did made it? I will give you a clue:
I was creating my snowman ornament just before Halloween and as I was decoupaging him, I wondered how I was going to make the carrot nose. Just painting it on seems so flat and boring. I happened to look into our Halloween bowl of candy sitting there, ready for trick or treaters and, whammo, I knew what I was going to do. That is what I am going to share with you right now.
Supplies that you will need: sucker sticks, pencil sharpener, orange marker, scissors, a glue stick (optional), and about 20 seconds of time.
First, the sucker sticks. You can use sucker sticks with the suckers still attached or run to the craft store and get yourself some of these:

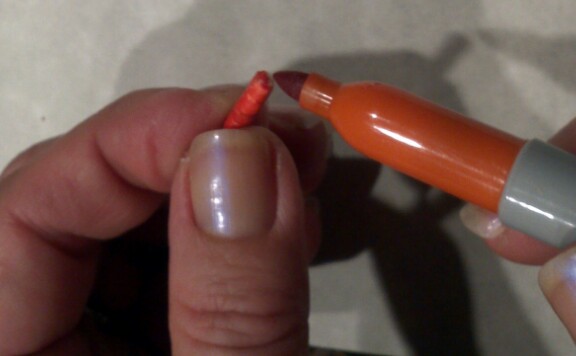
I already had these and personally wouldn’t go buy them just for snowman noses. Suckers still taste the same even with shorter sticks. Next, sharpen your stick with the pencil sharpener.
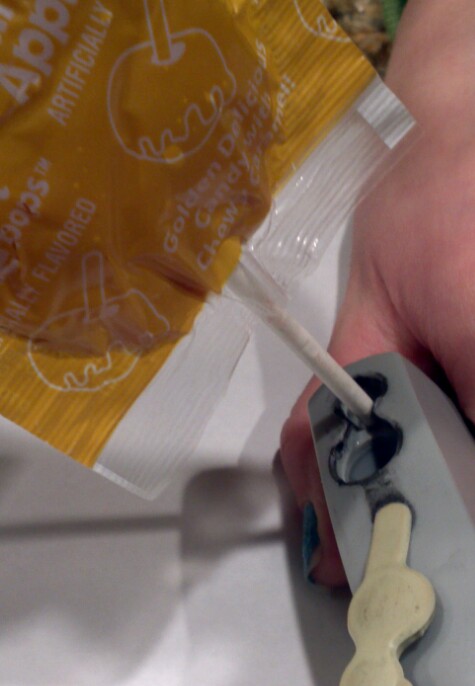
I tried to use my electric pencil sharpener, but it didn’t work as well as this old-fashioned manual one. Make it as sharp or rounded as you want. If the paper seems a bit raggedy, don’t worry. You can fix that later. Before cutting the carrot to your desired size, use your orange marker to color it. I used a Sharpie which is more waterproof than a Crayola, but both will work… the sucker sticks are just paper, after all.
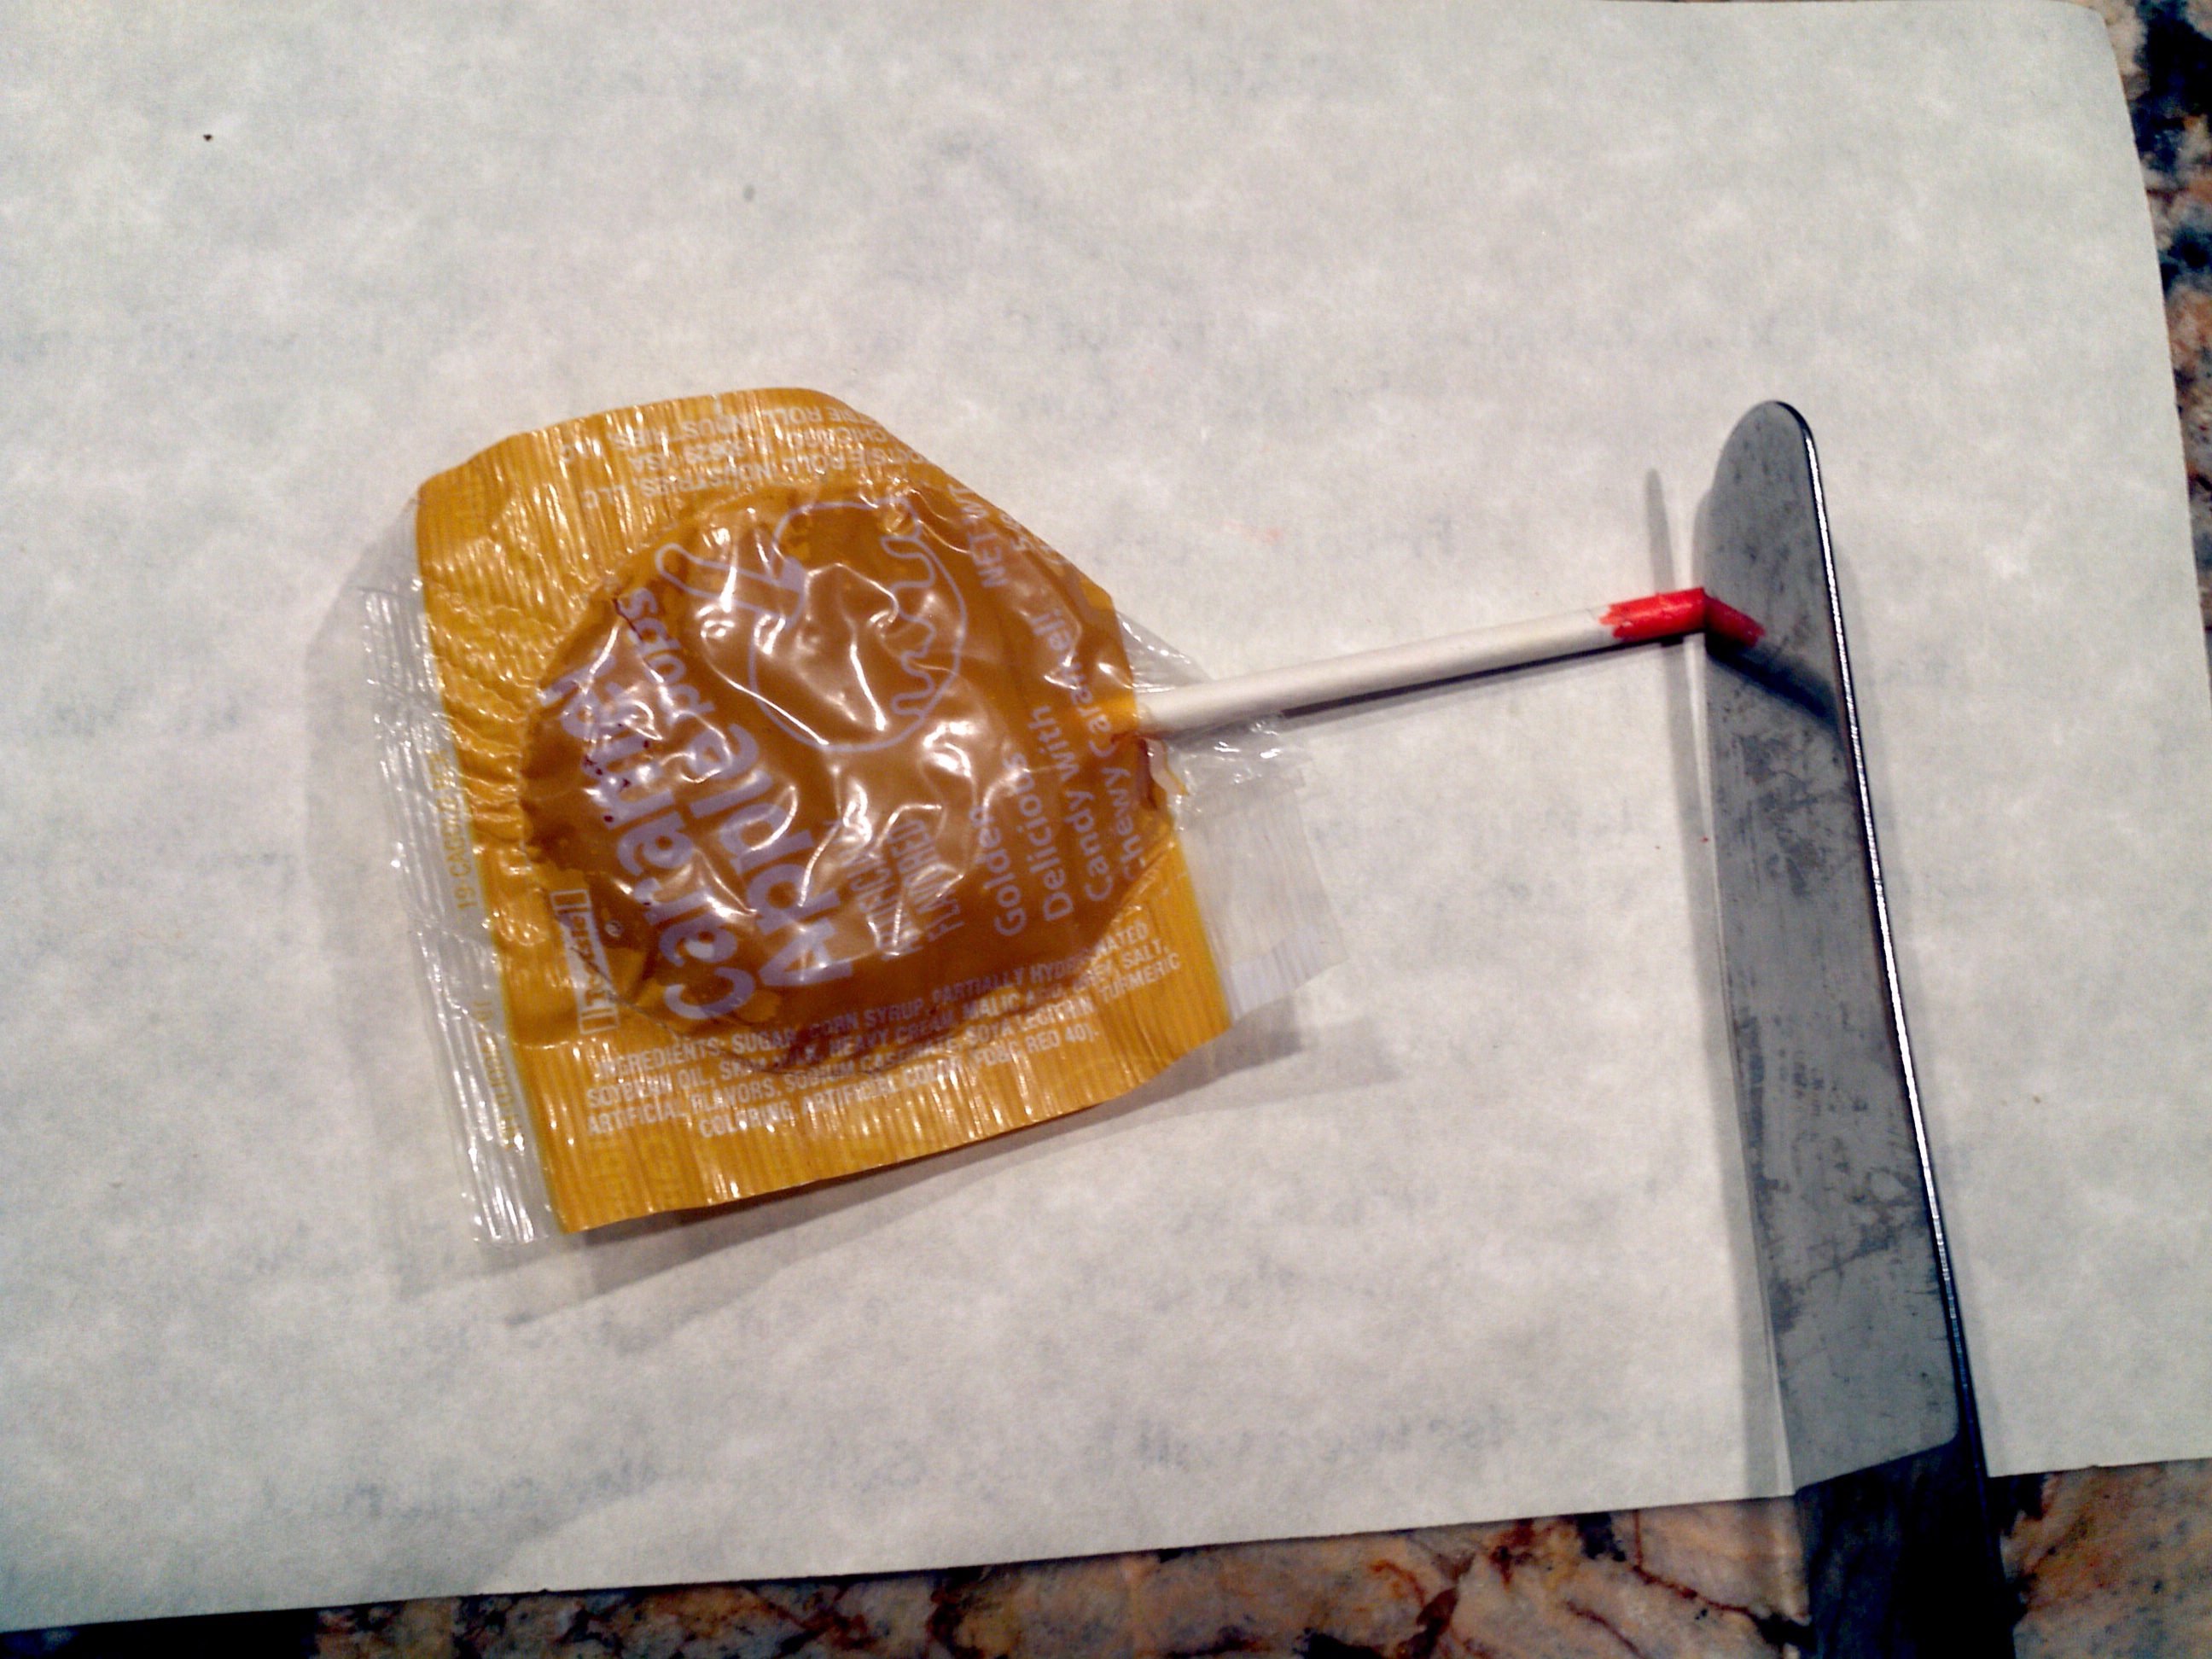
At this point I added little dents with my butter knife (not sure why my knife photographed like that!). You can also use your fingernails or scissors or whatever you want. These dents are what make it look so carrot-y. Now grab your scissors and cut the end off to your desired length. Watch it, though. These little stinkers tend to fly off and get lost. Eyes on the carrot!
Now it is time to paint the white end. At this point, if you have little papery-fibers sticking up, just rub a finger across a glue stick and smooth those babies down. Done!

Don’t you agree that the nose really DOES make the snowman?
*********Linking up to these awesome parties*********


[…] Click here for a tutorial on how we made these ingenious (if I do say so myself) little carrot noses. I’m not going to detail out how to decorate the snowmen. Basically decoupage (think Mod Podge) the sheet music to the snowman cutout, use stain or brown shoe polish to antique the sheet music, add “buttons” and eyes by dotting black paint on (use the end of a skinny paintbrush), then add fabric, buttons and string to dress them up. You can find the sheet music that we used here. […]
LikeLike
What a clever idea. That faux carrot nose looks more like a carrot than a carrot does (if that makes sense:))!
Thanks for linking up to Funtastic Friday.
LikeLike
That cracked me up.. “looks more like a carrot than a carrot does”! Made my day!
LikeLike
[…] | Tea Advent Calendar @ Frau Tschi-Tschi | Countdown to Christmas Box @ Kingsbury Brook Farm | DIY: Snowman Ornament Carrot Nose @ Armchairdecoratorblog […]
LikeLike
[…] | Tea Advent Calendar @ Frau Tschi-Tschi | Countdown to Christmas Box @ Kingsbury Brook Farm | DIY: Snowman Ornament Carrot Nose @ Armchairdecoratorblog […]
LikeLike
[…] Advent Calendar @ Frau Tschi-Tschi | Countdown to Christmas Box @ Kingsbury Brook Farm | DIY: Snowman Ornament Carrot Nose @ Armchairdecoratorblog […]
LikeLike